Using Device Groups
Overview
Groups are a convenient way to view related devices at a glance. For example, you can create a group to view the devices in your Family Room or to quickly see the status of all sensors associated with exterior doors and windows. Groups are especially convenient when used with the Trane® Home mobile app to keep the most frequently used items grouped at the top of the device list.
NOTE: At this time, groups are for viewing device status. It is not yet possible to control a group or to add a group to an Automation trigger or action.
Adding Groups
Adding a Group From the Web Portal
-
Log into the Trane Home web portal.
-
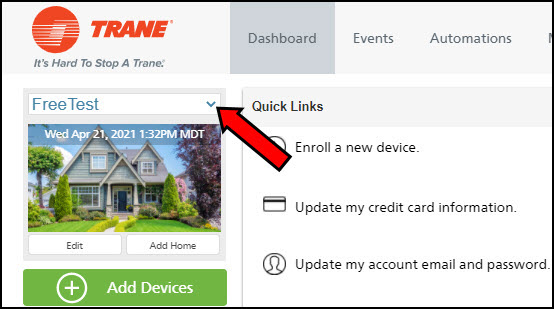
If you have multiple homes, select the home you wish to configure.
-
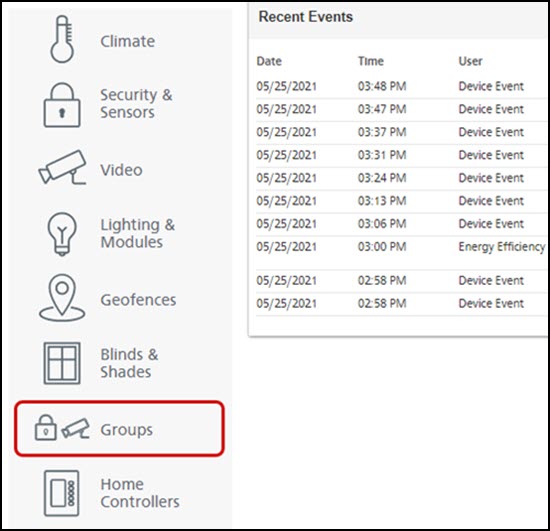
Select Groups from the grey menu on the left side of the page.
-
Click Add Group.

-
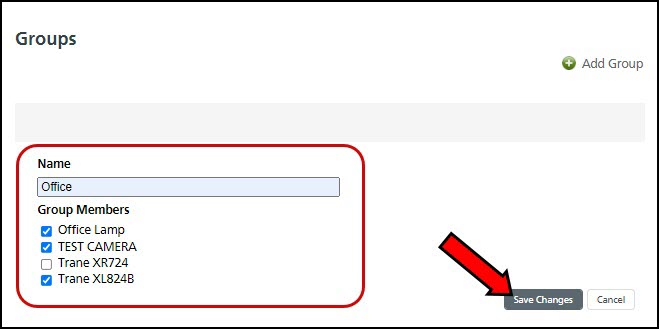
Name the group as desired, select the devices you would like to include in the group, and click Save Changes.
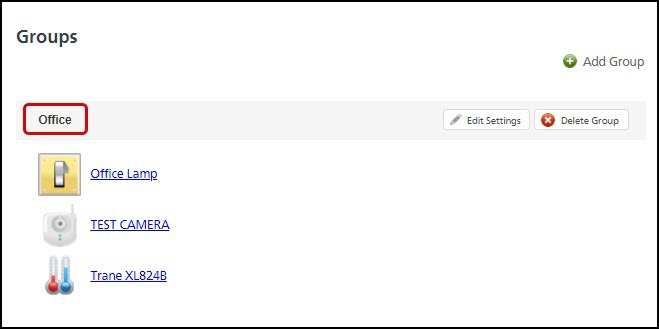
- The new group will be visible in the Groups tab.
Adding a Group From the Mobile App
-
Log into the Trane Home mobile app.
-
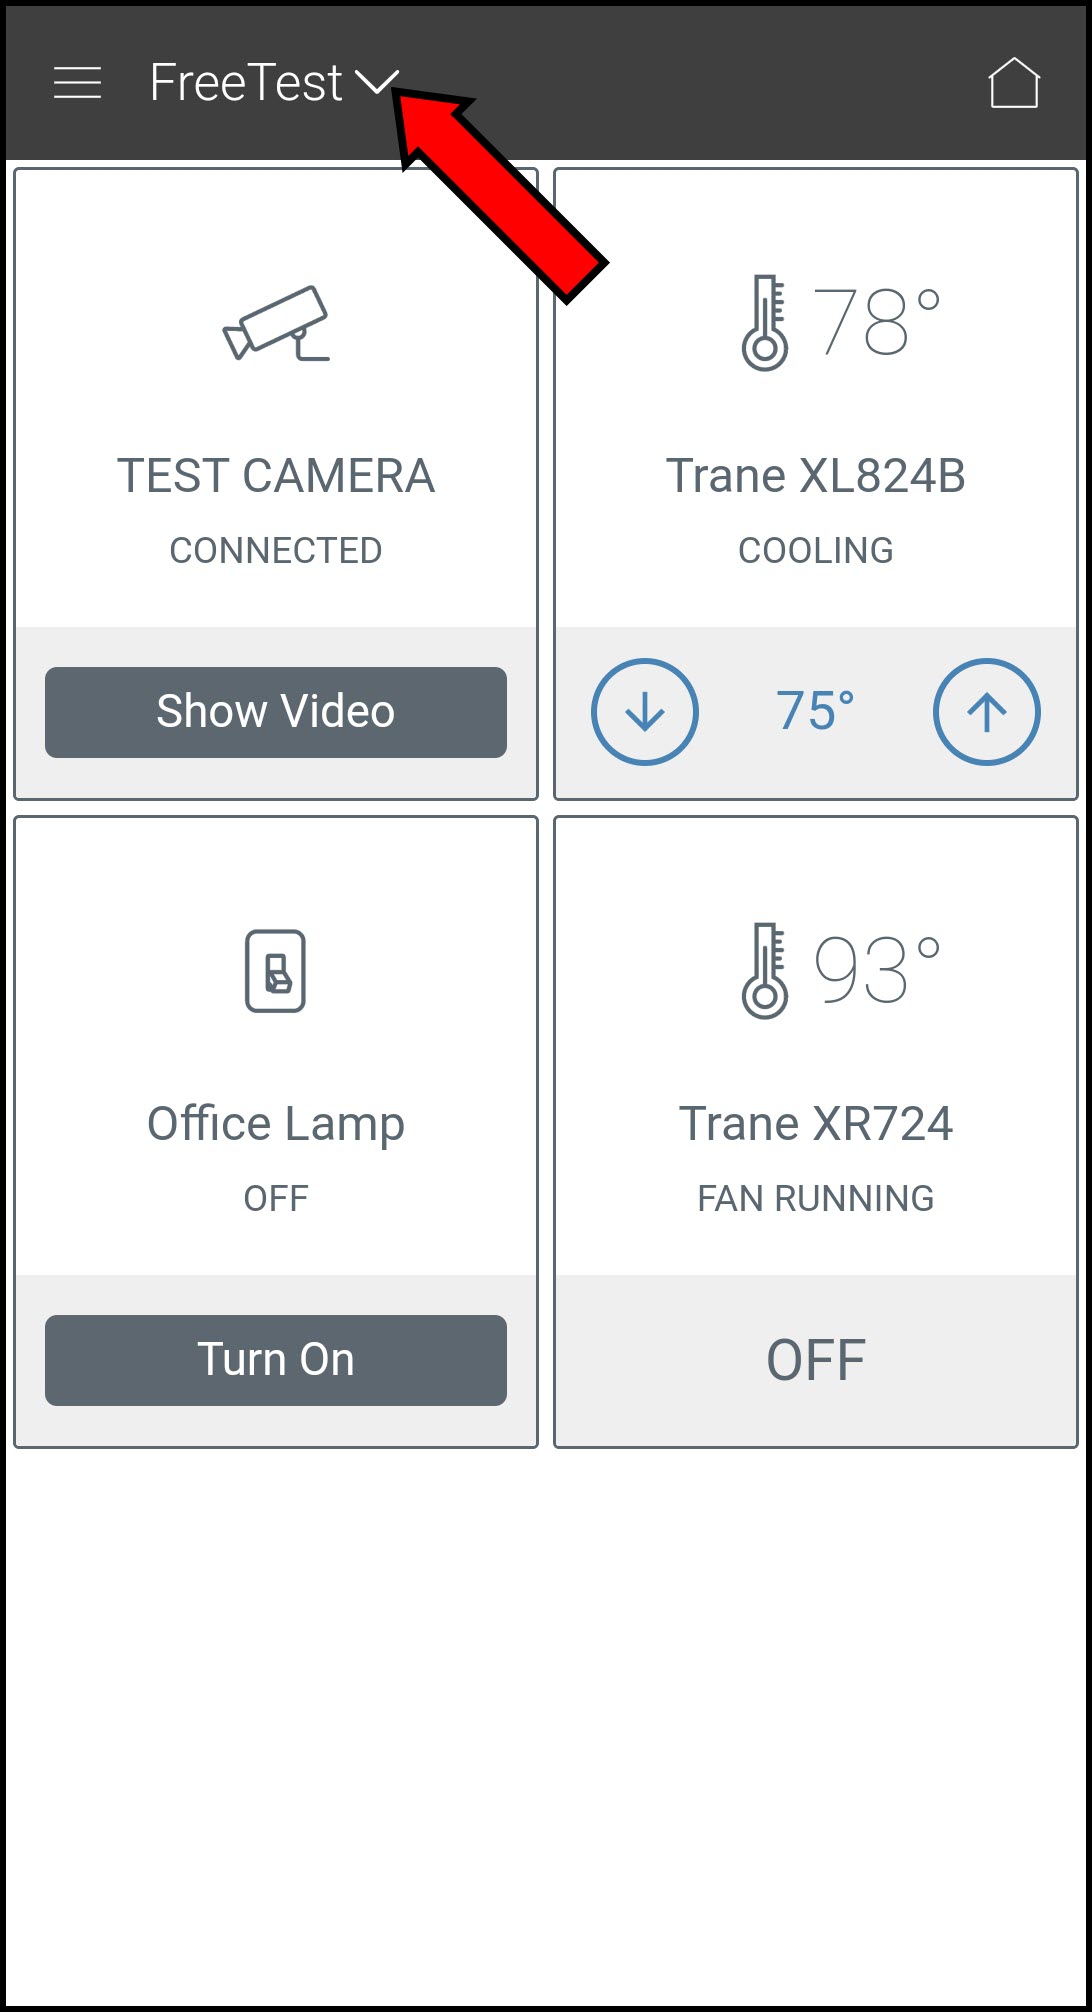
If you have multiple homes, select the home you want to configure.
-
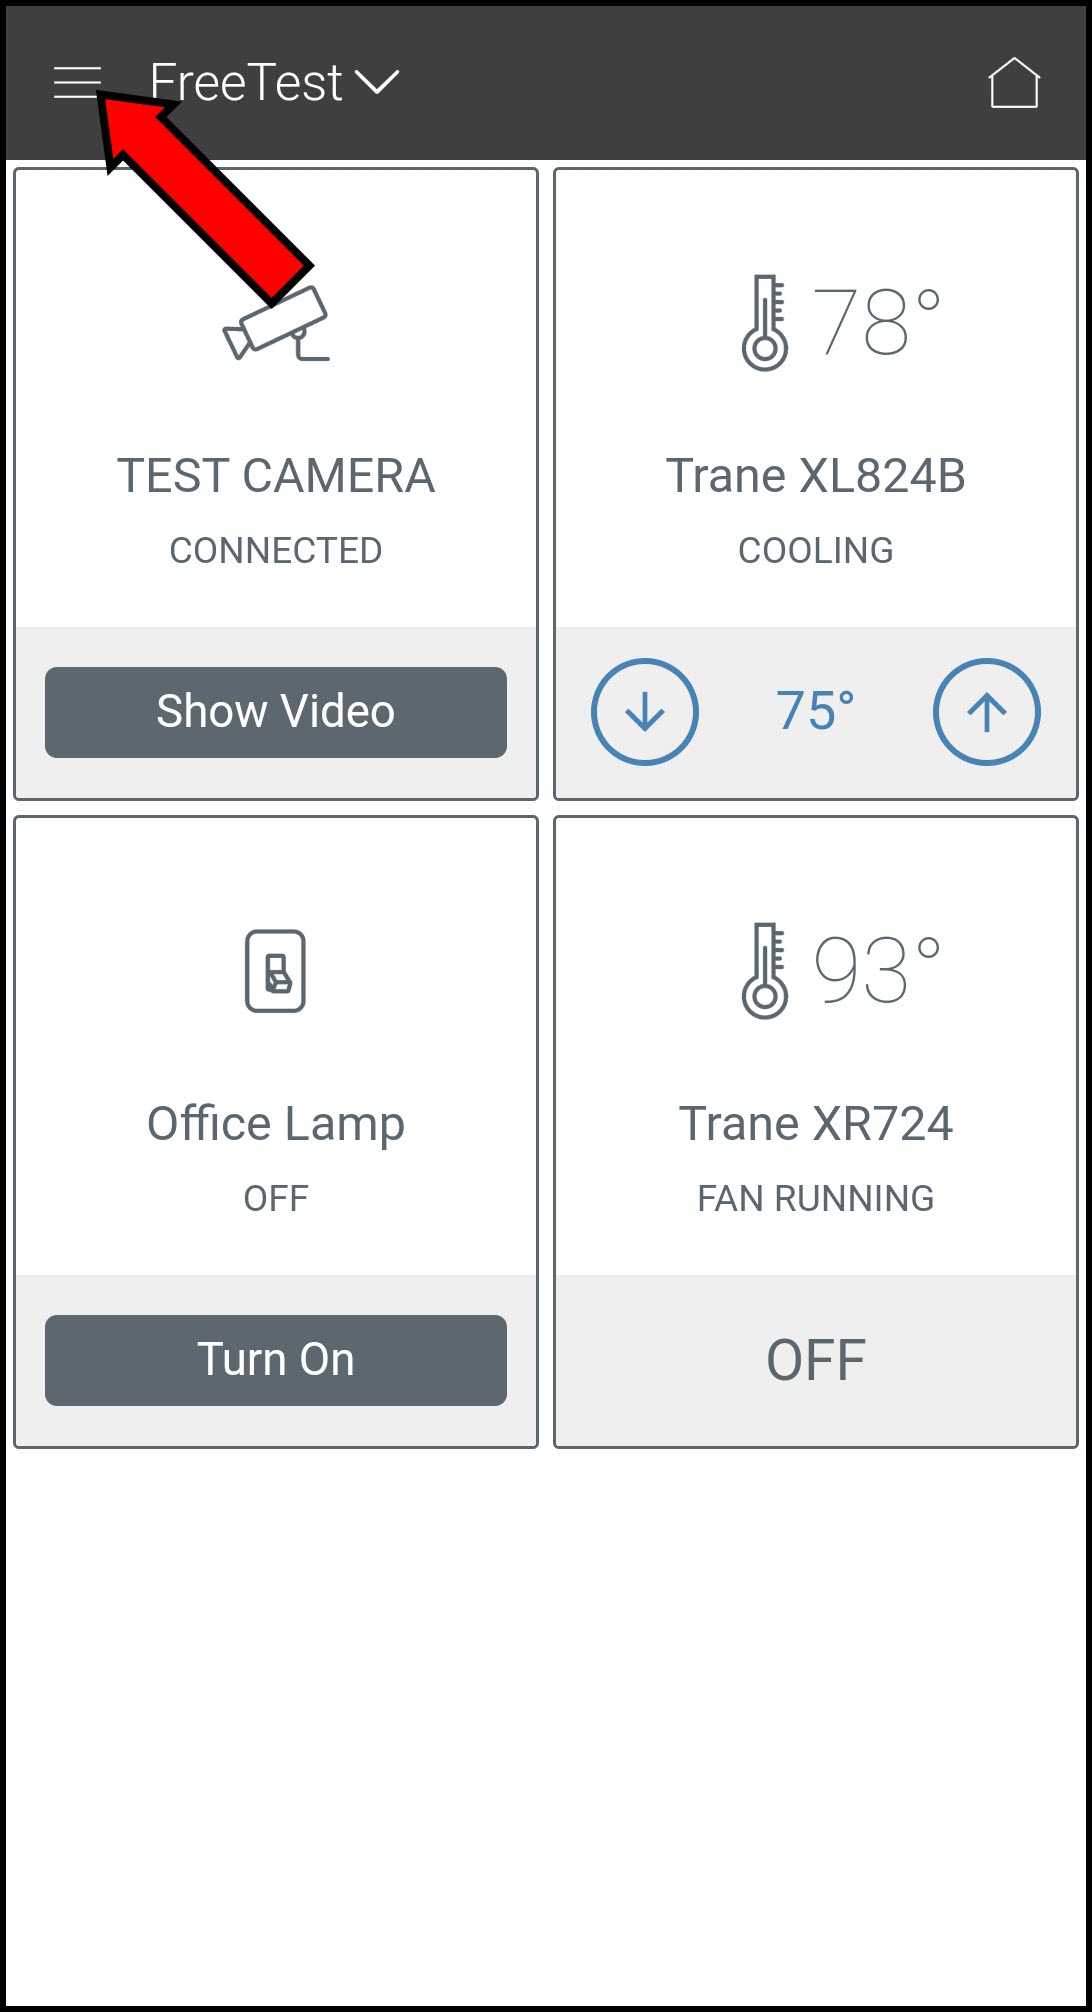
Tap the menu icon in the upper left corner.
-
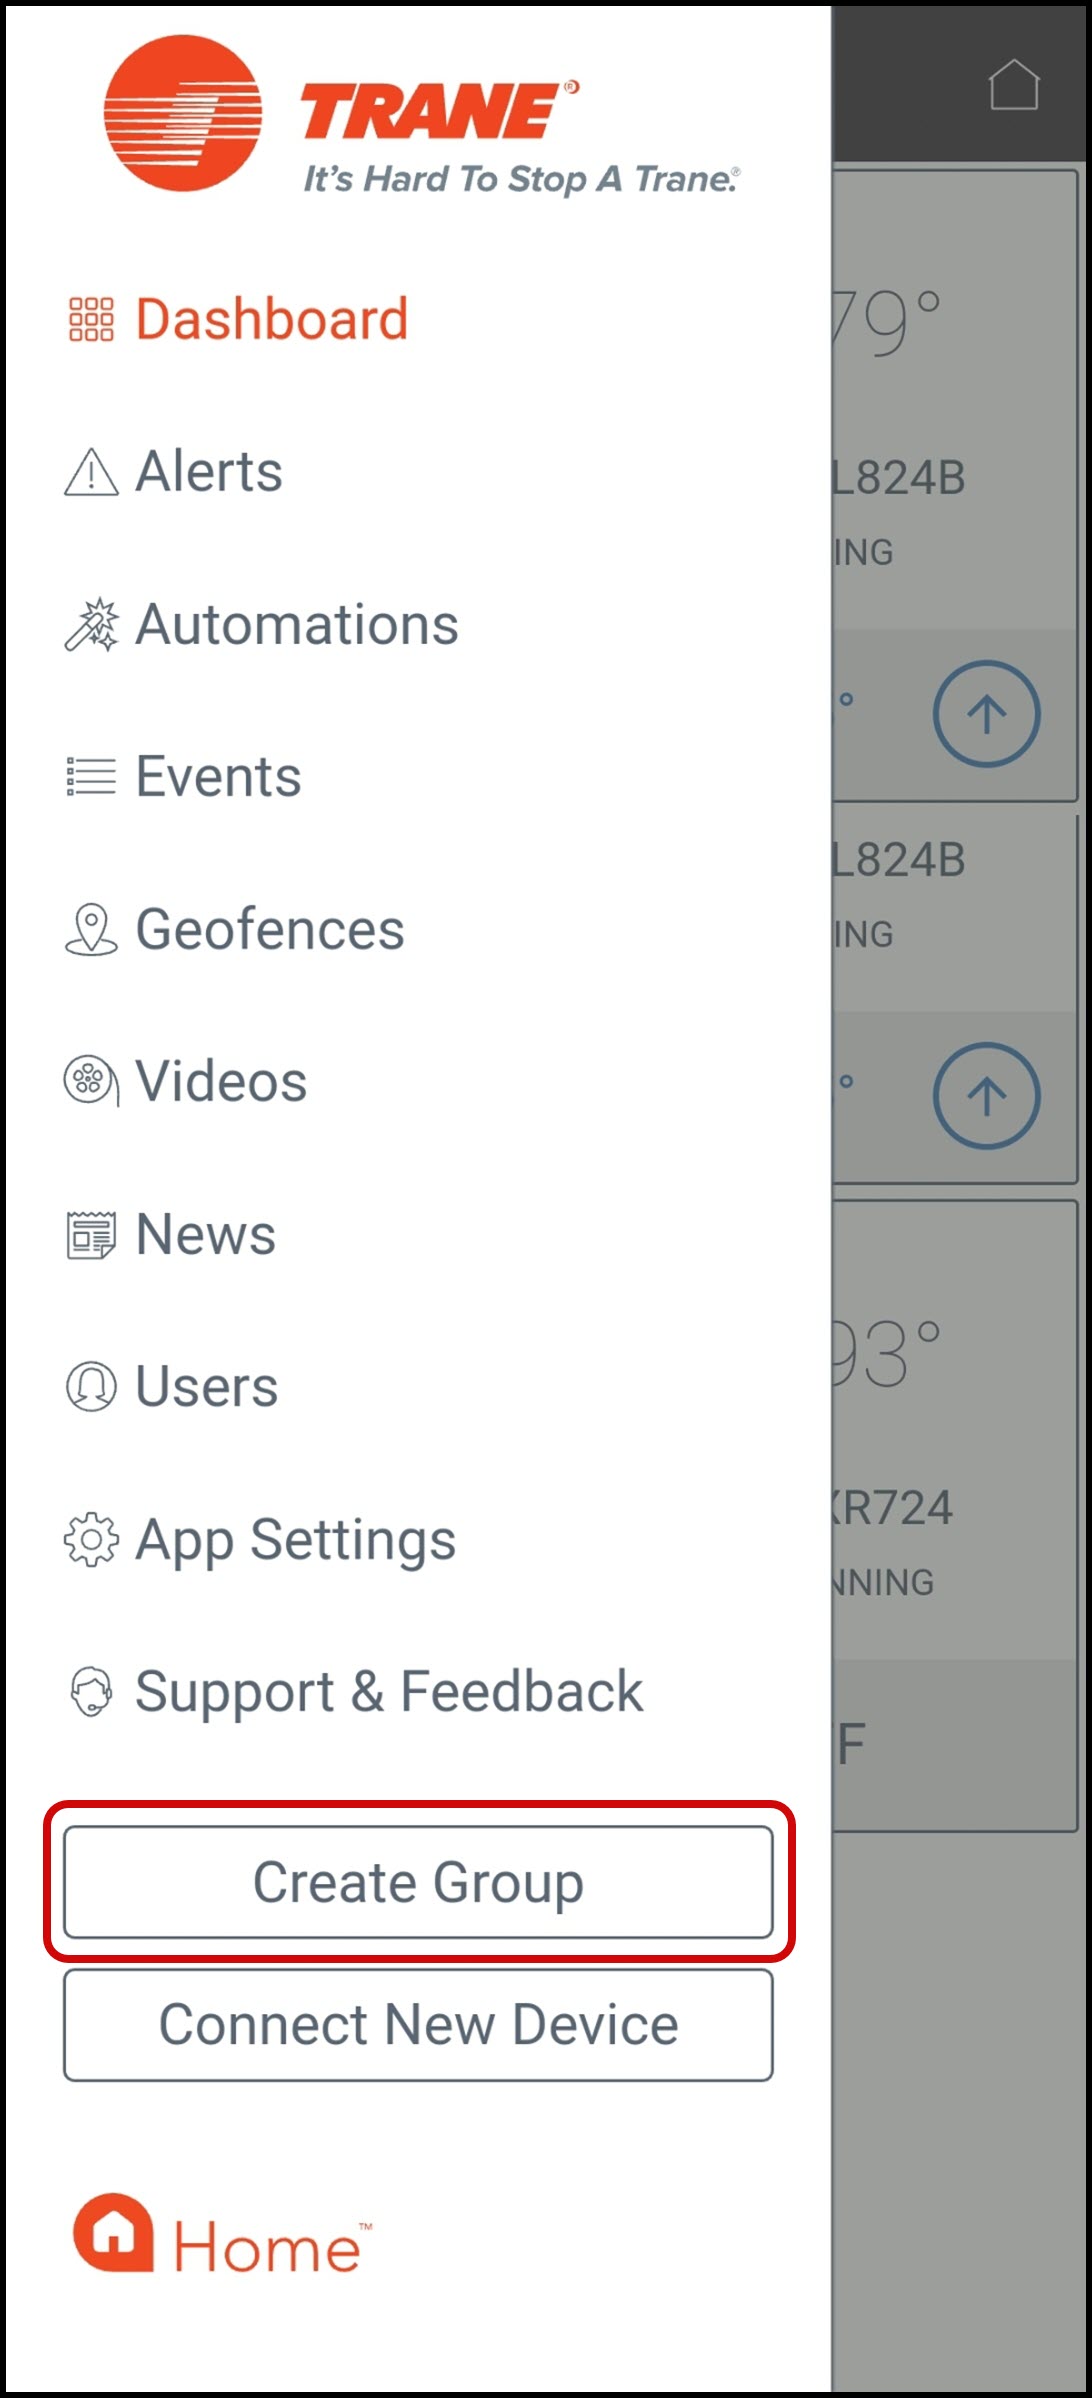
Select Create Group.
-
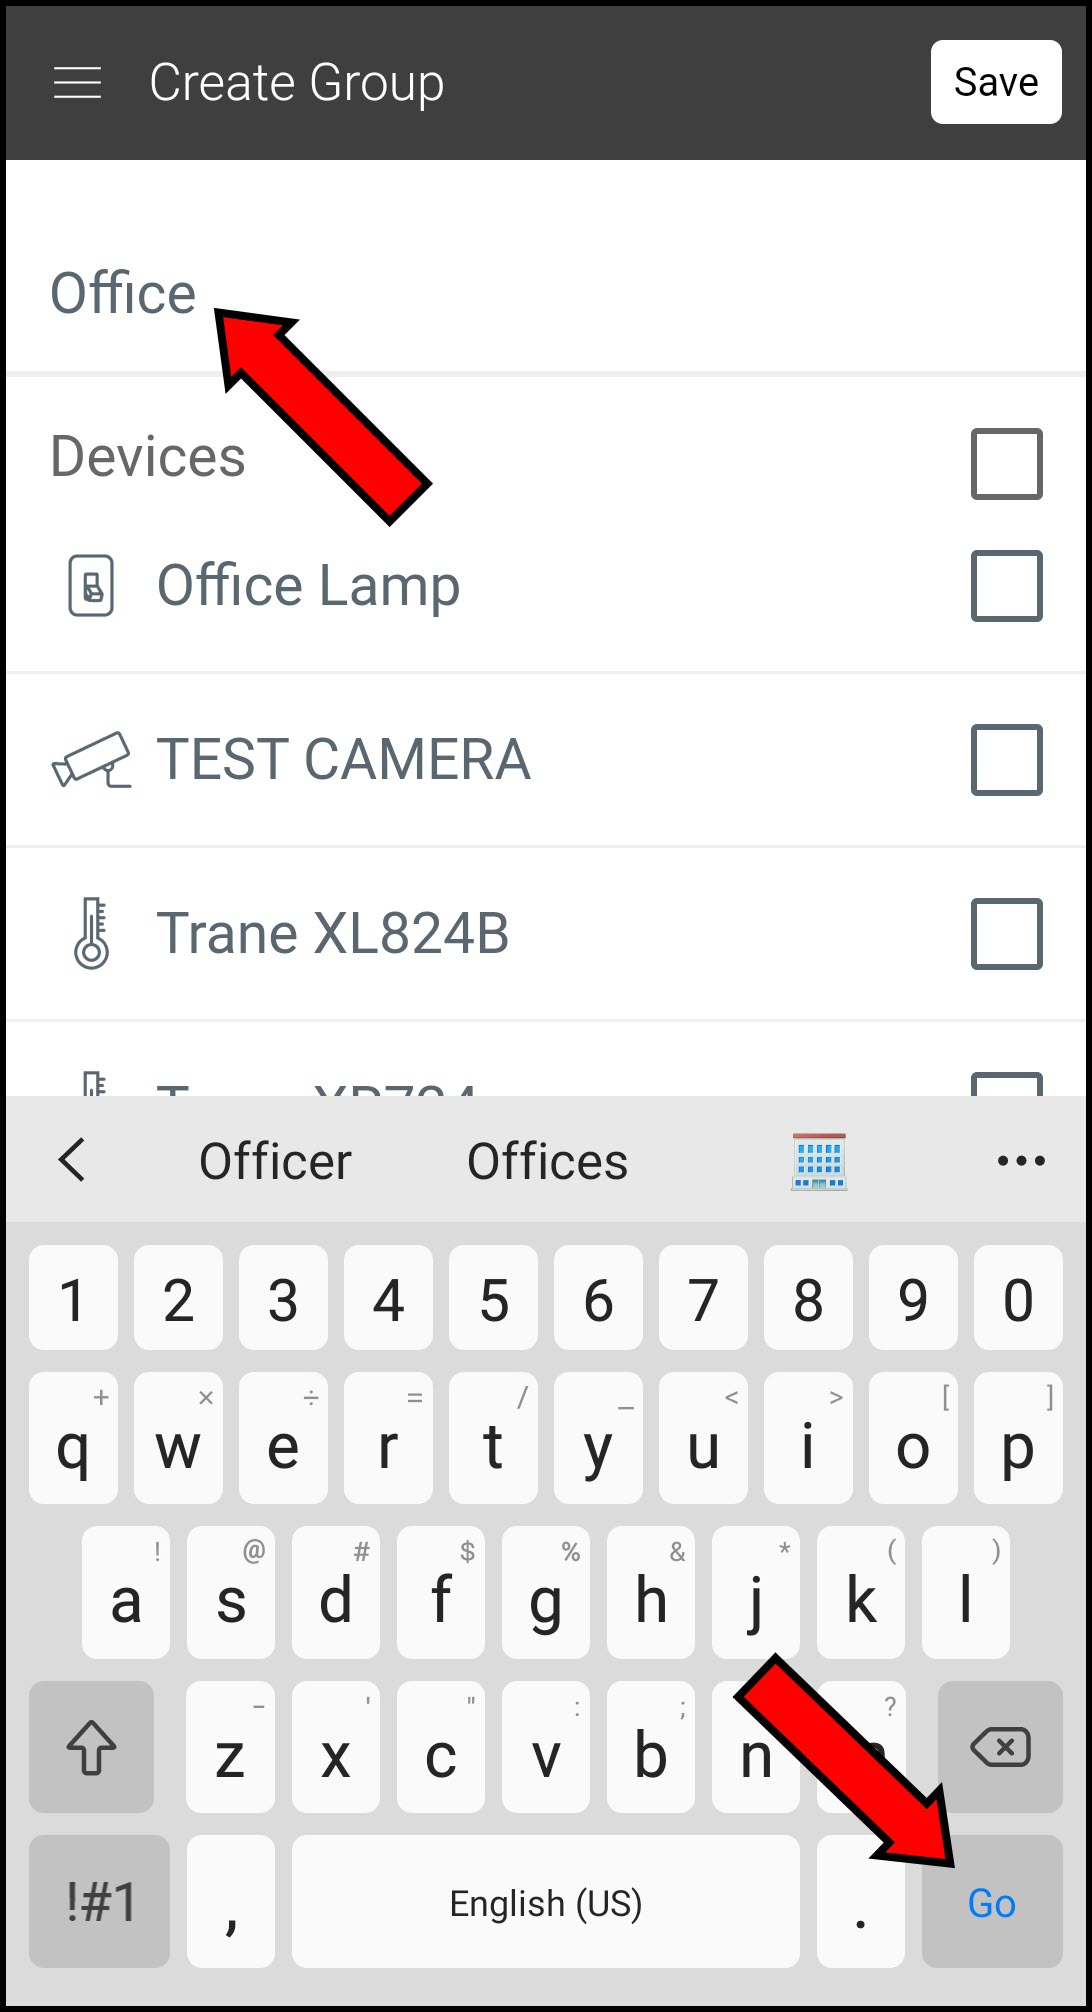
Name your group and press Go/Done/Return (depending on your device) to apply the name.
-
Select the devices you want to include, and tap Save.
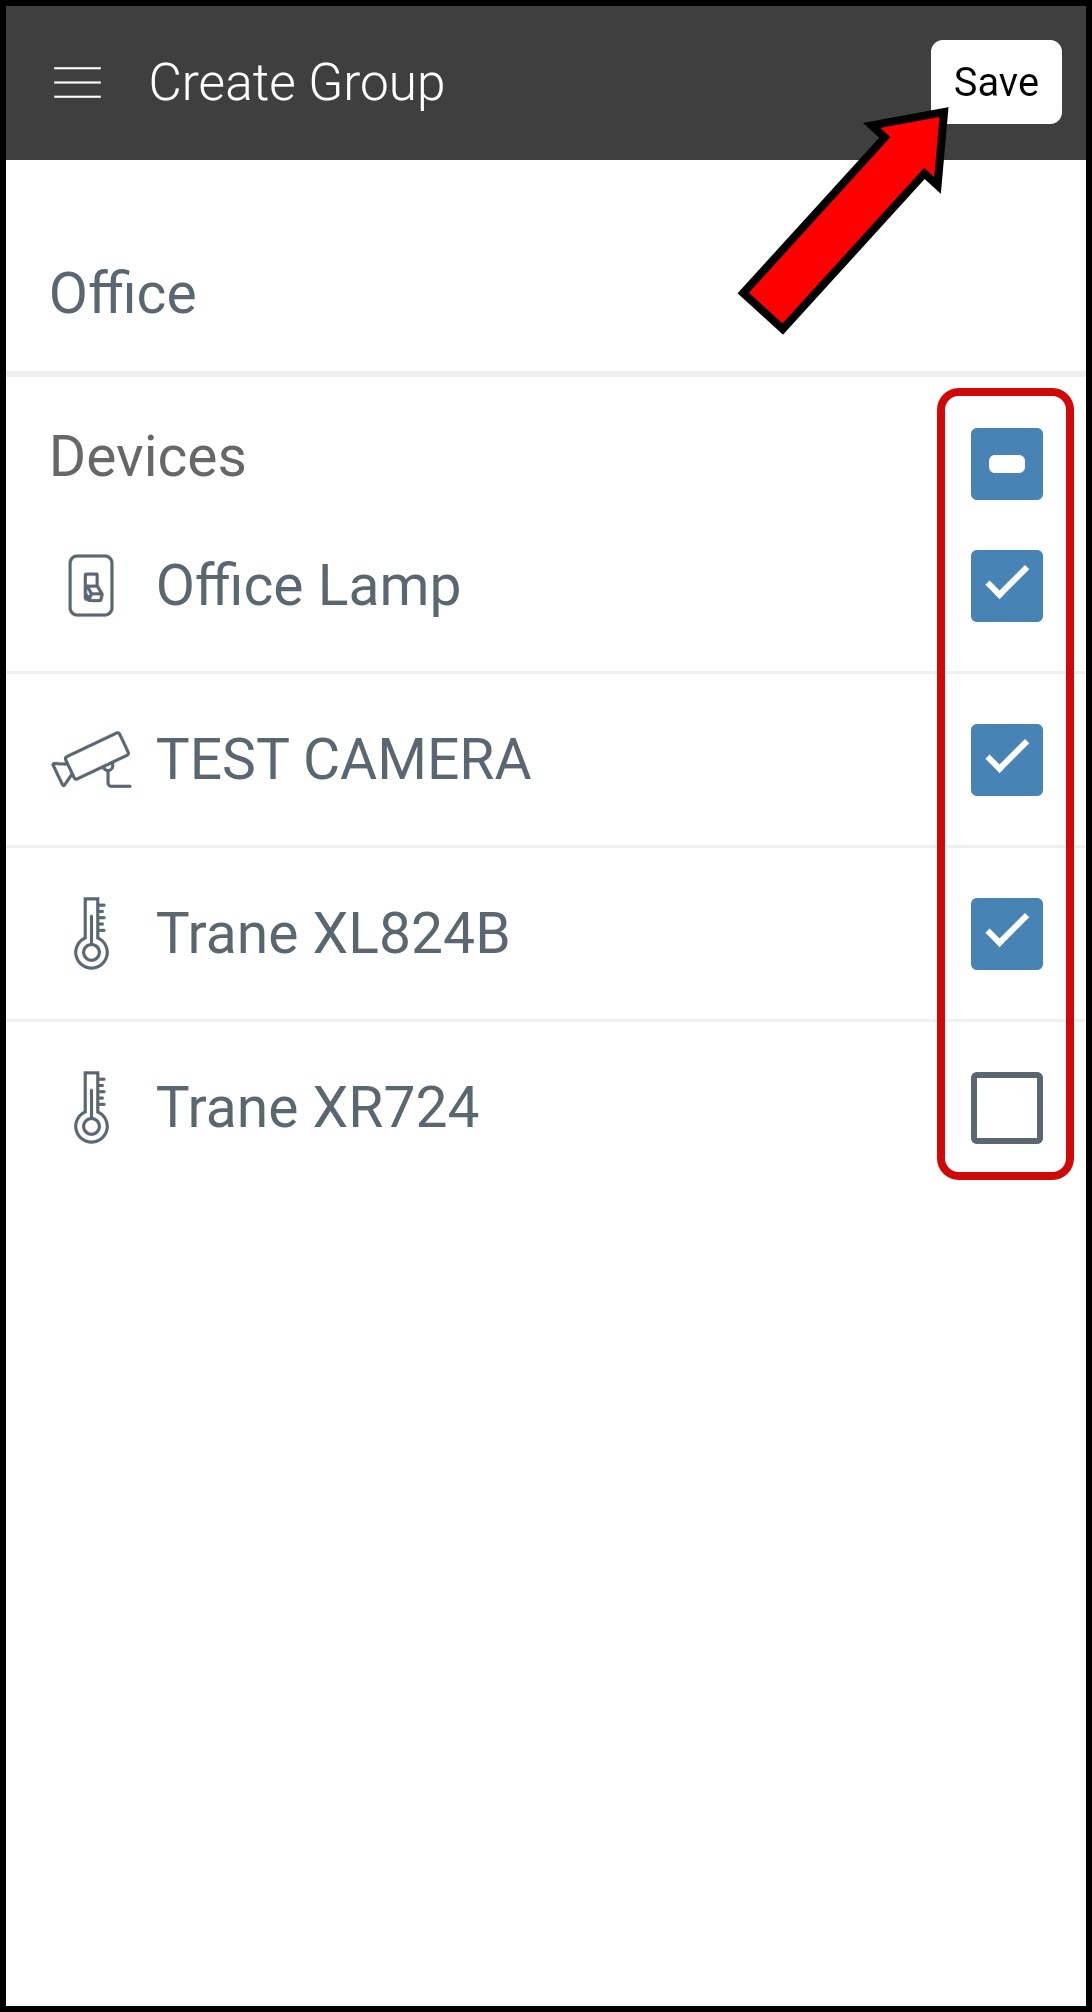
-
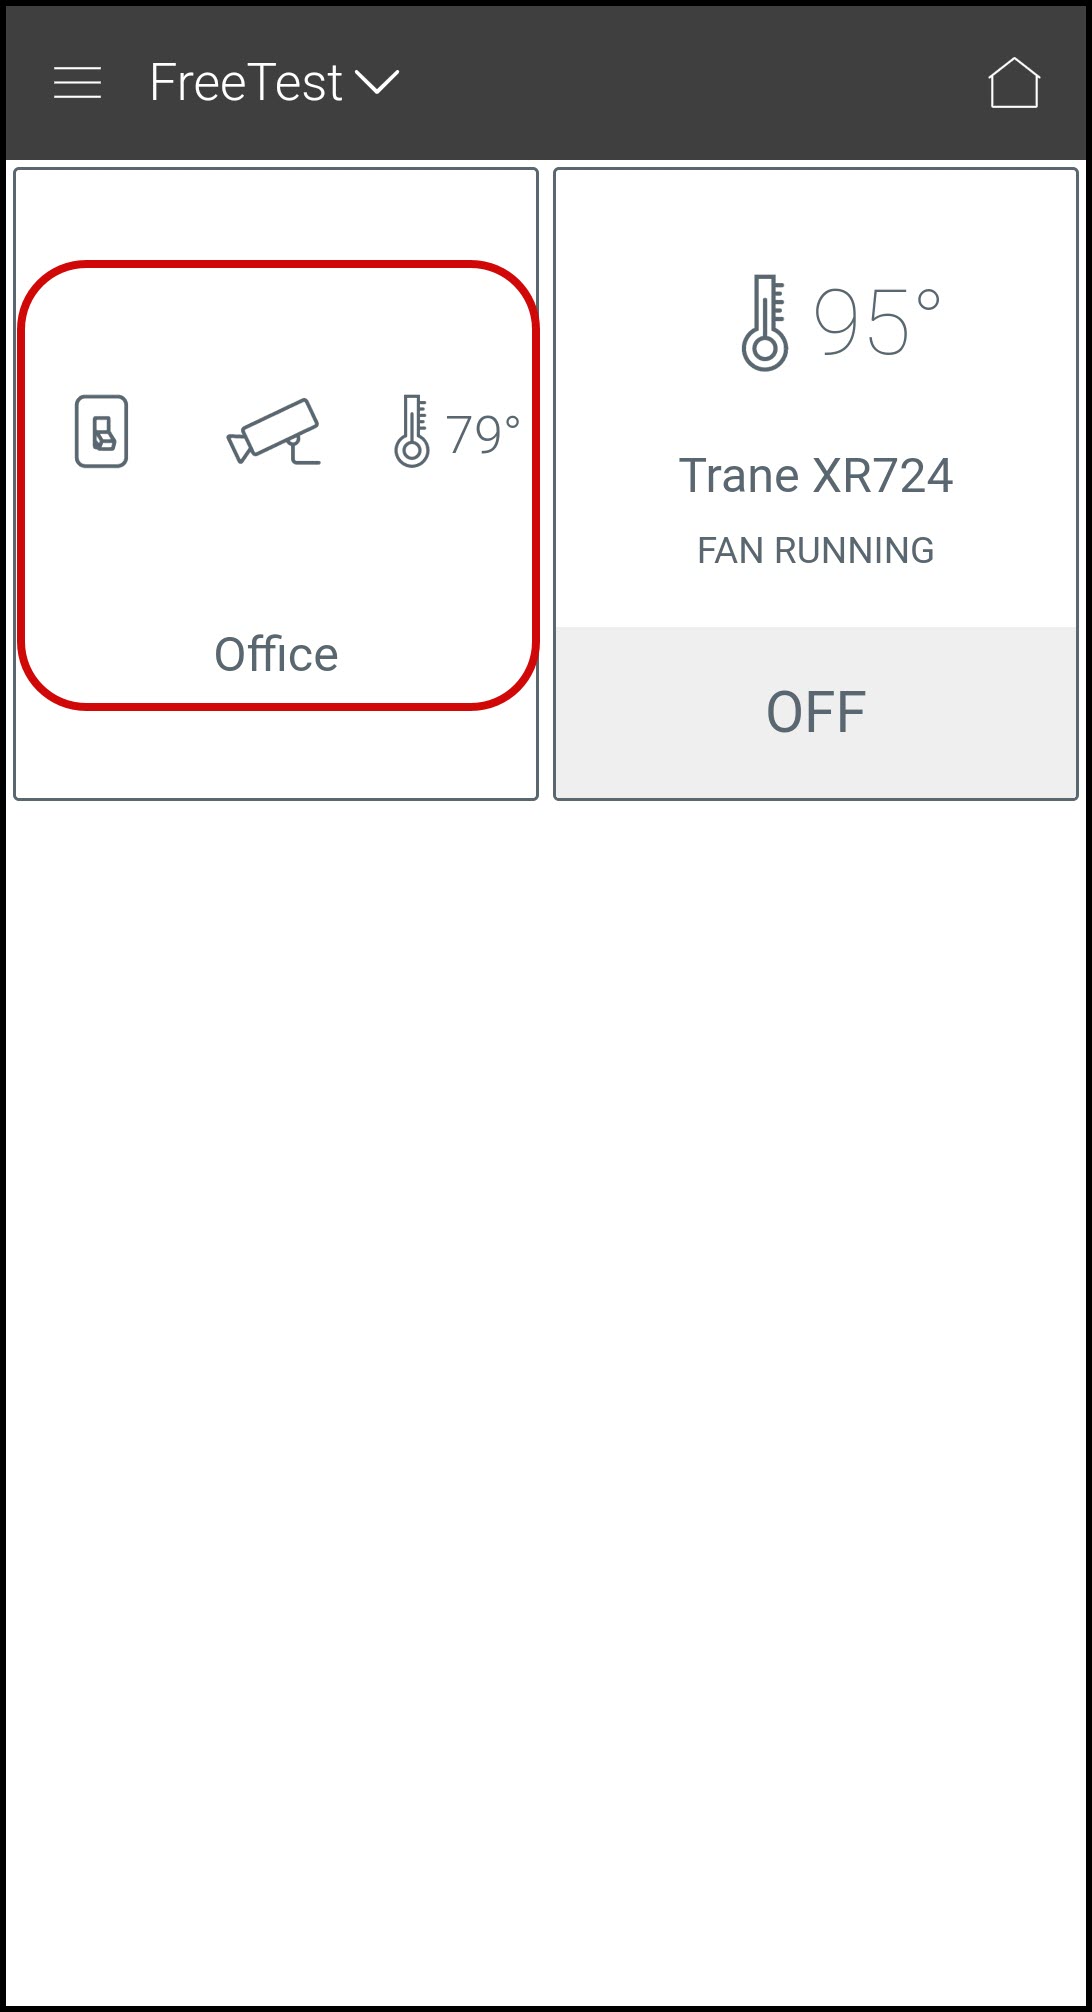
Your new group will now be visible on the dashboard.
Viewing Groups
Once you have created a group, you can view it in the mobile app or on the portal.
Viewing Groups in the Portal
-
Log into the Trane Home web portal.
-
If you have multiple homes, select the home you wish to view.

-
Select Groups from the grey menu on the left side of the page.

-
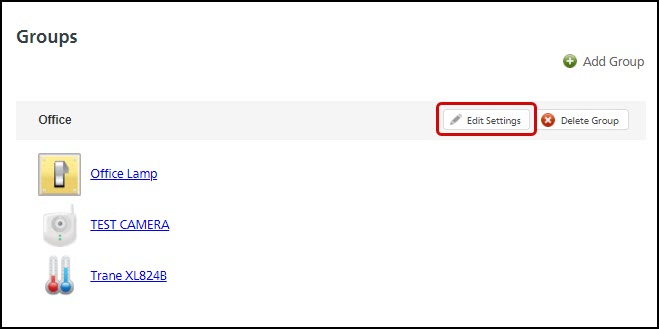
Here you will see each group and the devices they contain. Clicking on any device name will open the detailed control window for that device.
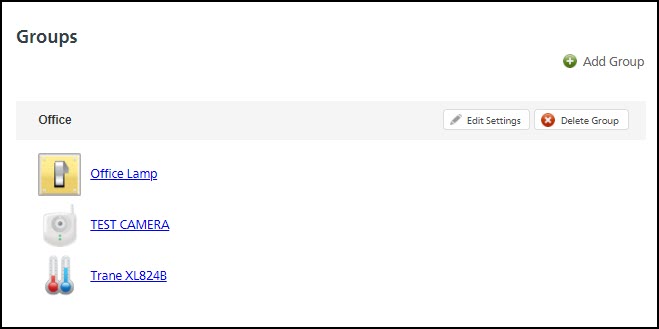
NOTE: You can change the group name or add/remove devices by clicking Edit Settings, making the desired changes, and pressing Save Changes.
Viewing Groups in the Mobile App
-
Log into the Trane Home mobile app.
-
If you have multiple homes, select the home you want to configure.

-
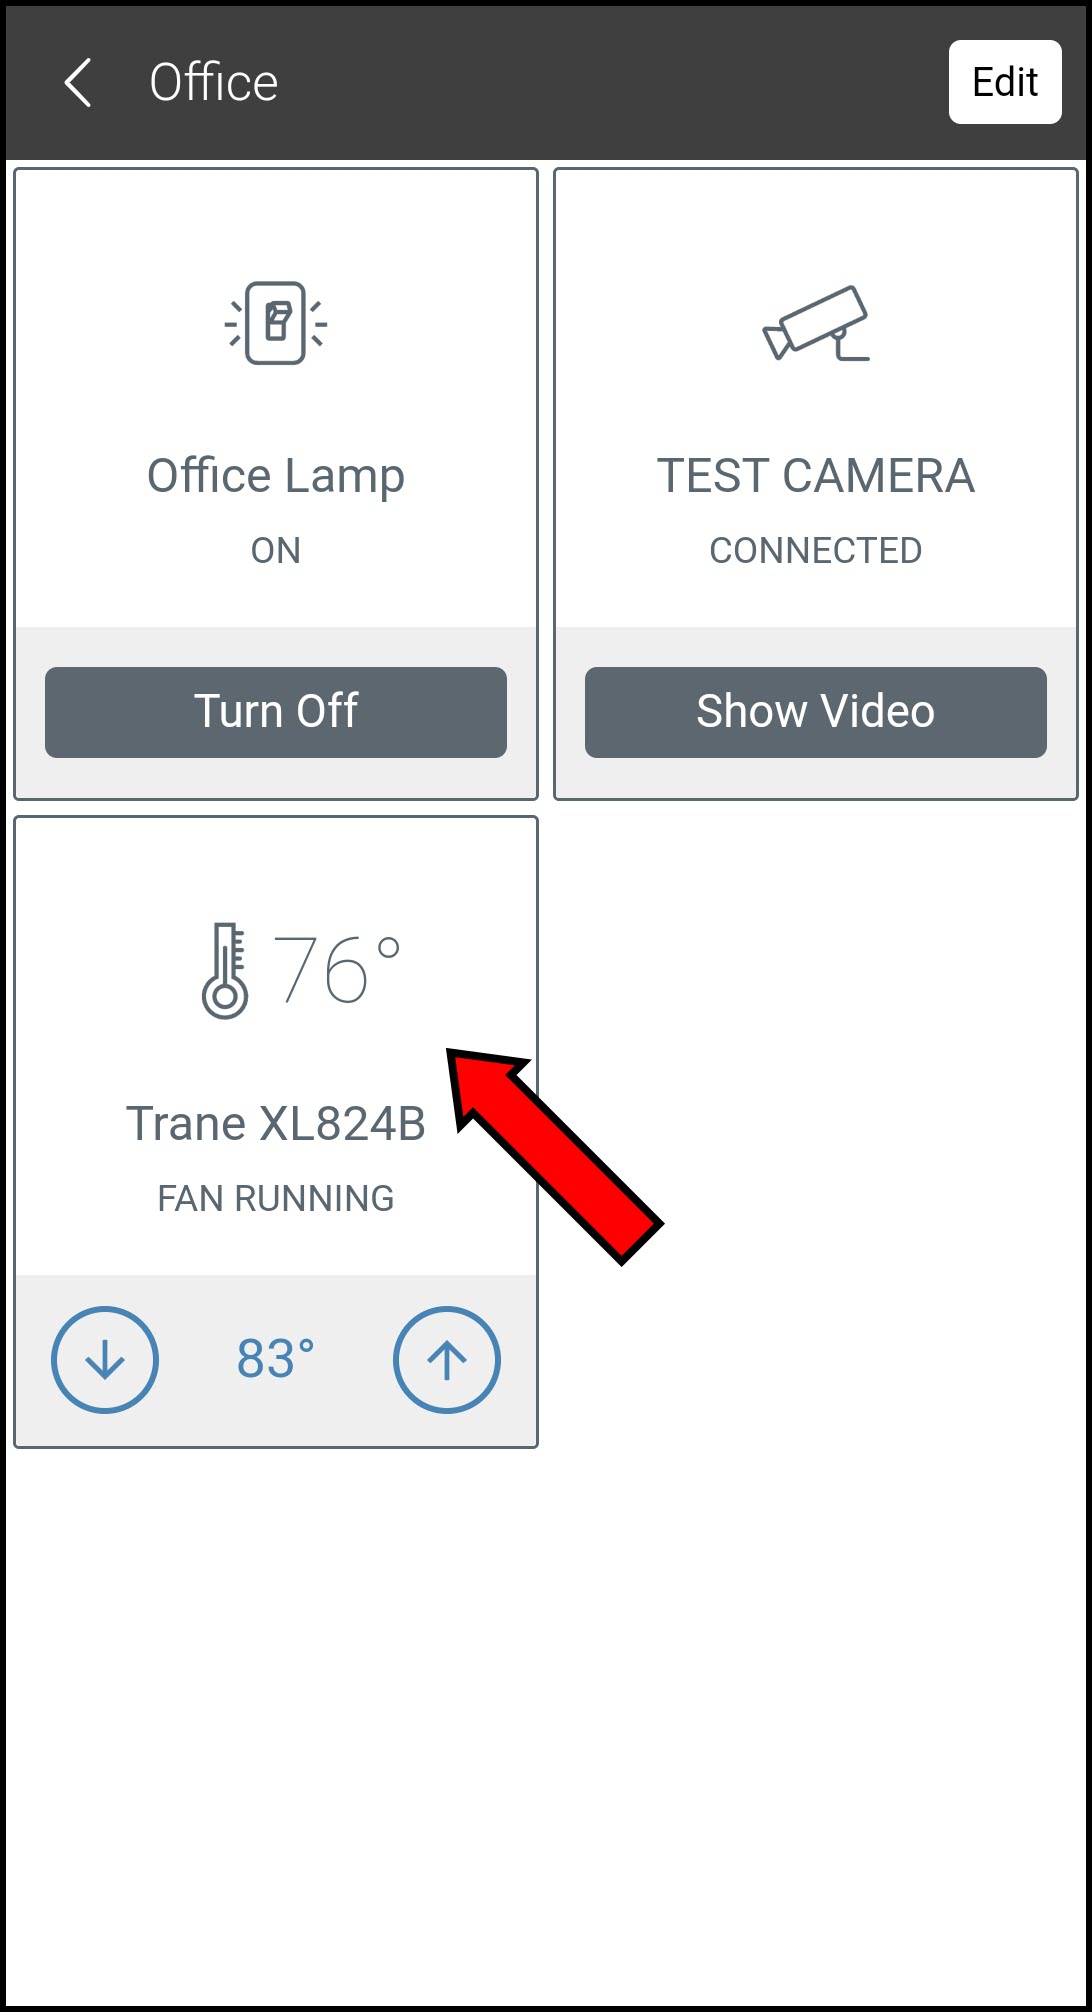
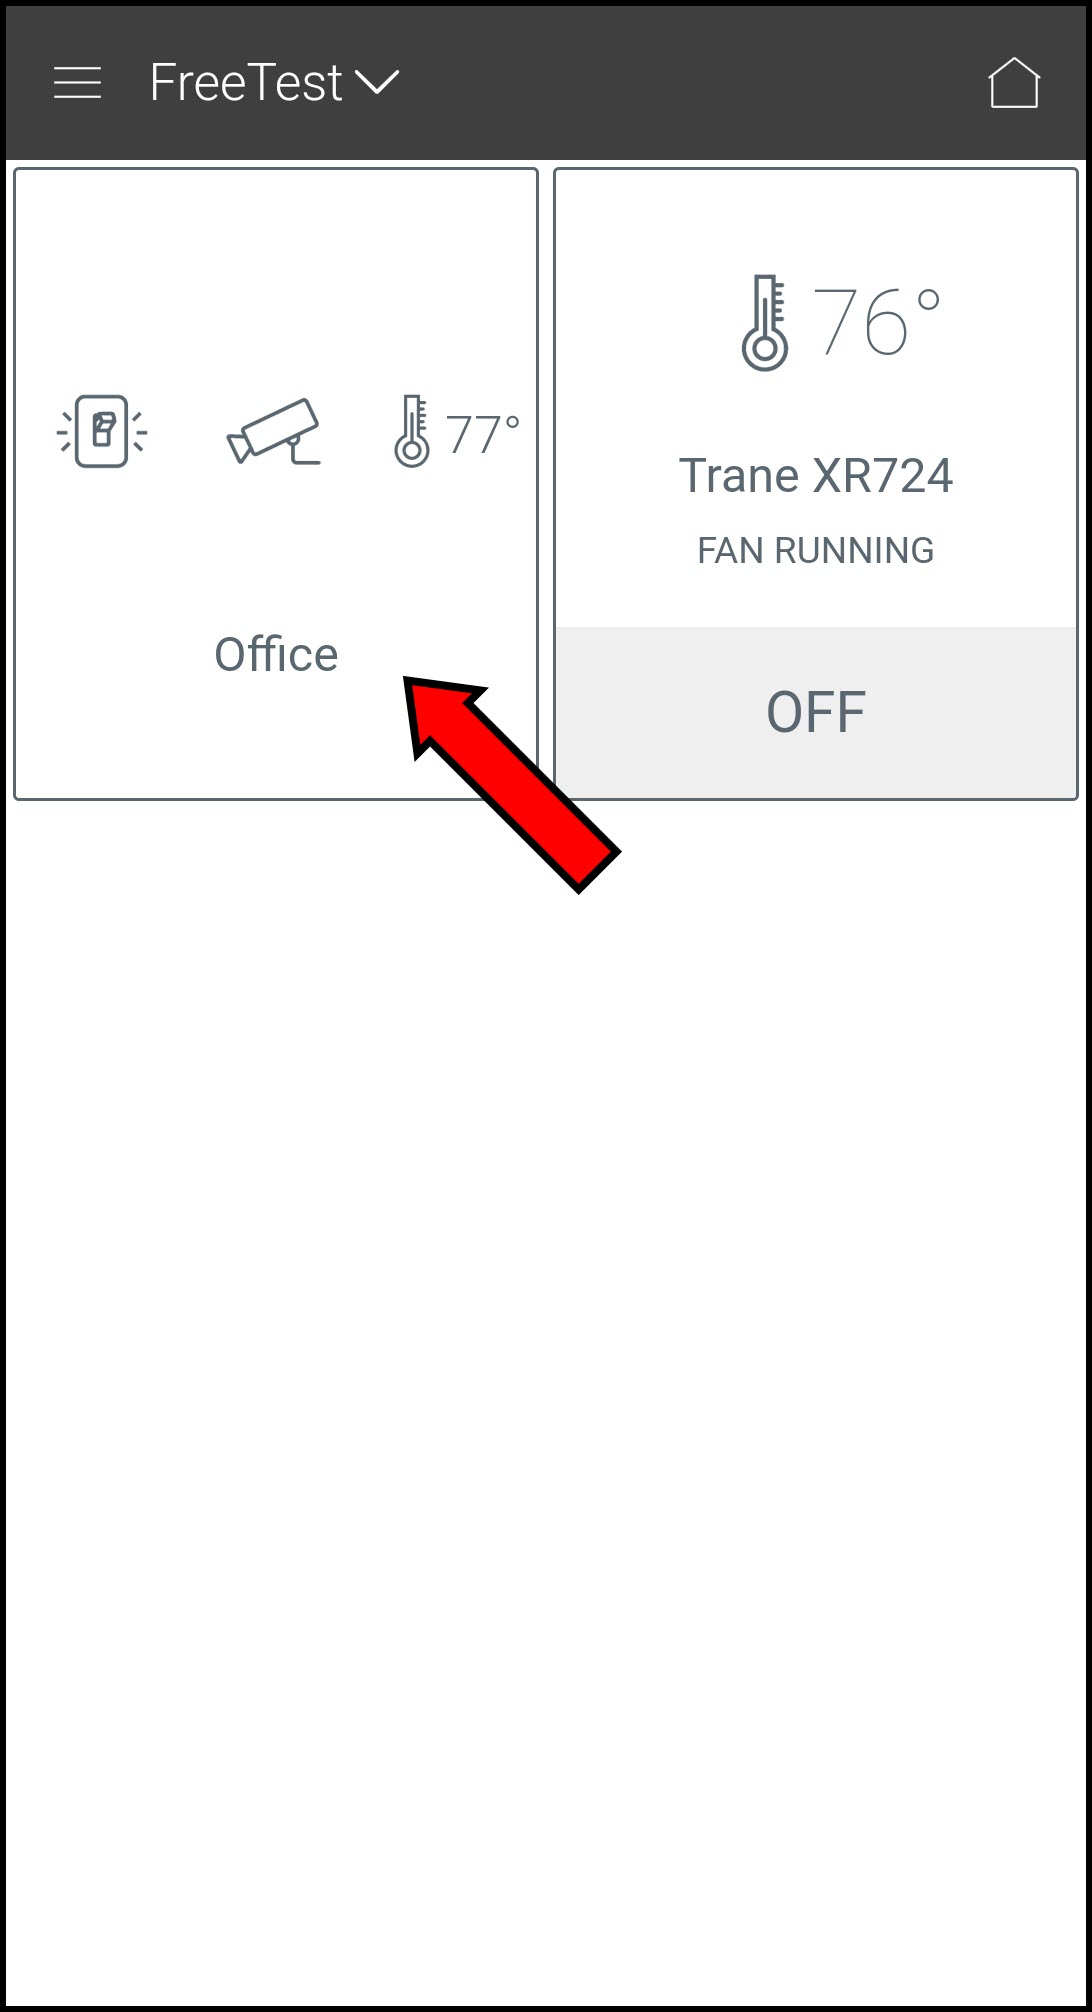
Your groups will appear on the home/dashboard screen with icons to represent each device. You will also see the current temperature for any thermostats in your group(s).

-
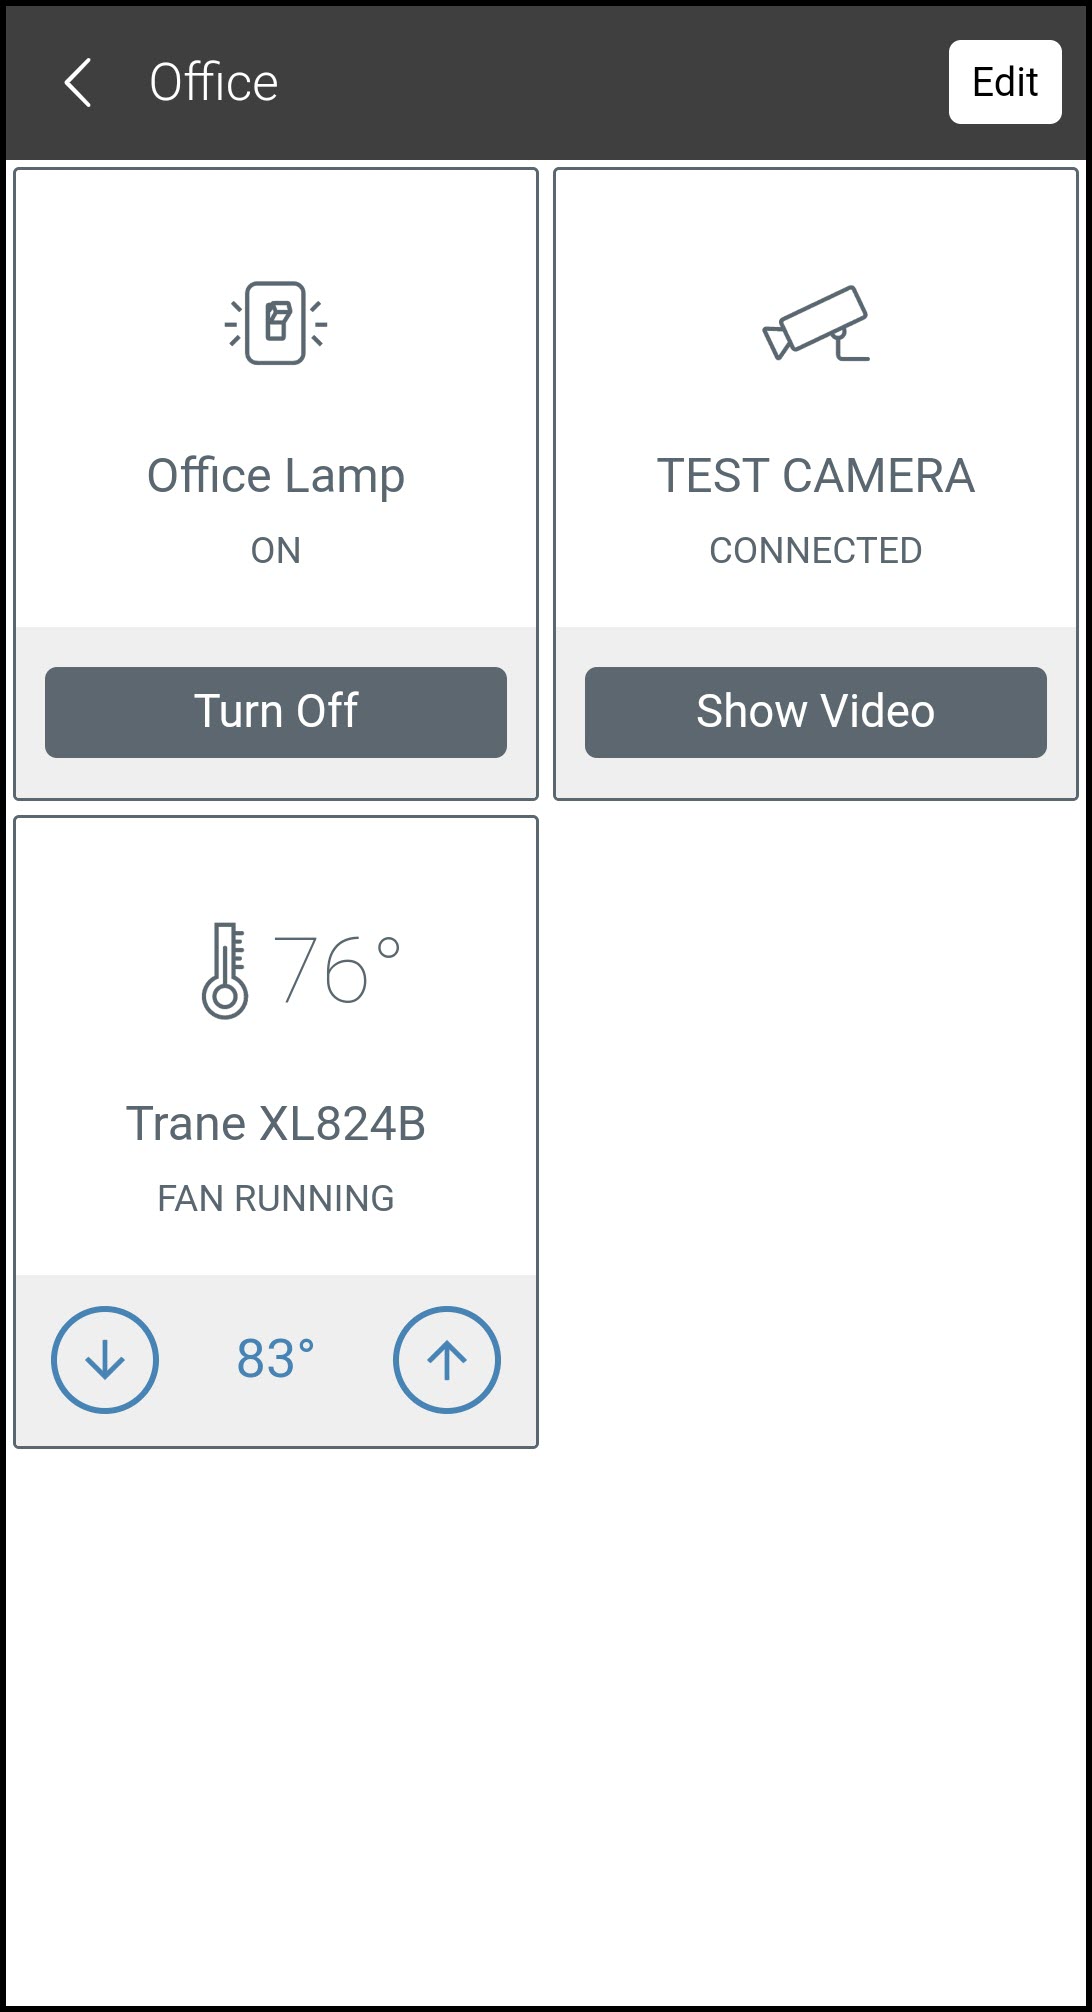
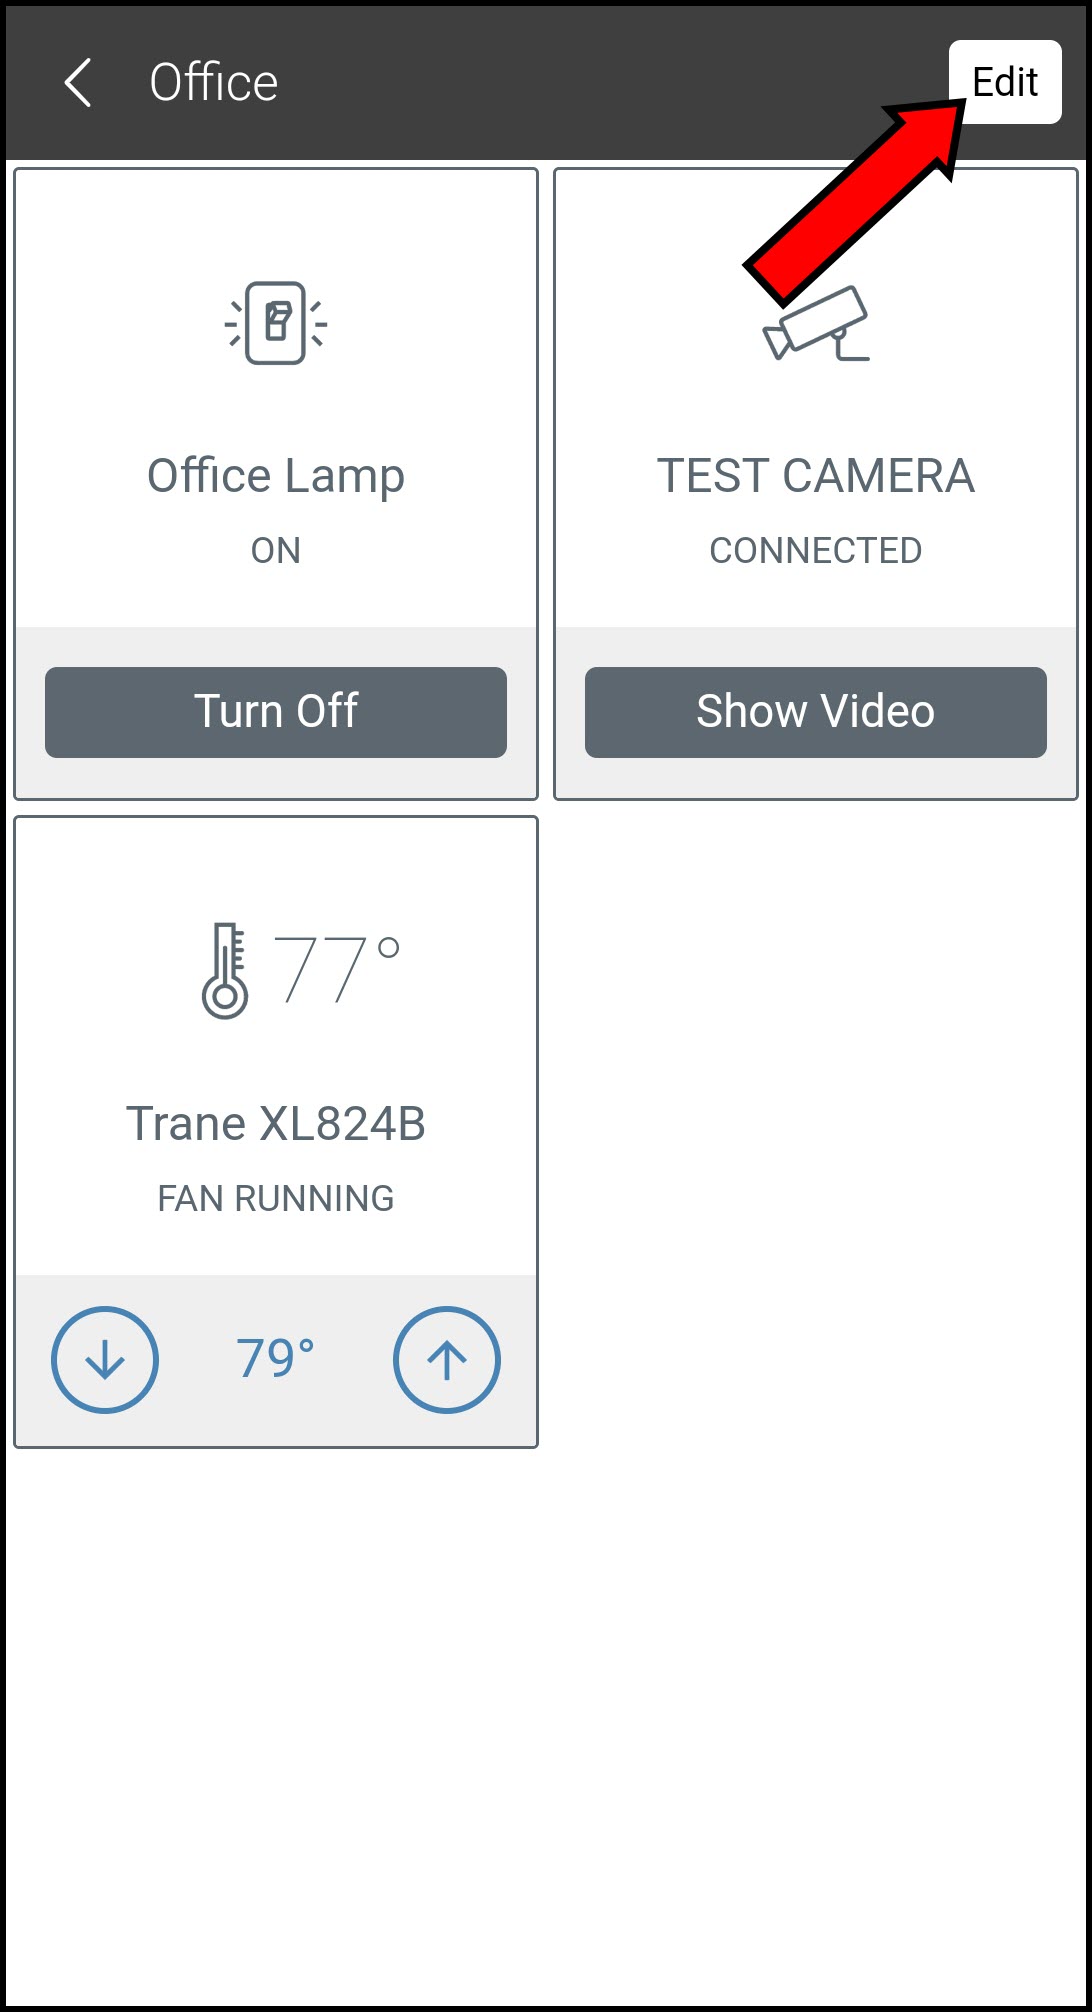
To see more information about individual devices, tap the group.
-
Tap the device you would like to view or control.
Editing a Group
Groups can be edited from the portal or the mobile app.
Editing a Group in the Portal
-
Log into the Trane Home web portal.
-
If you have multiple homes, select the home you wish to configure.

-
Select Groups from the grey menu on the left side of the page.

-
Press Edit Settings.
-
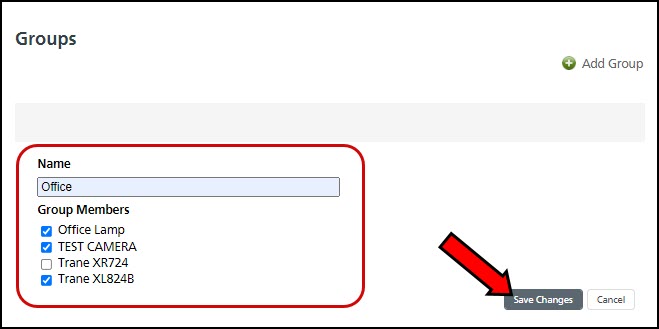
Rename the group, if desired, and include or exclude devices from the group using the checkboxes. Press Save Changes when finished.
Editing a Group in the Mobile App
-
Log into the Trane Home mobile app.
-
If you have multiple homes, select the home you want to configure.
-
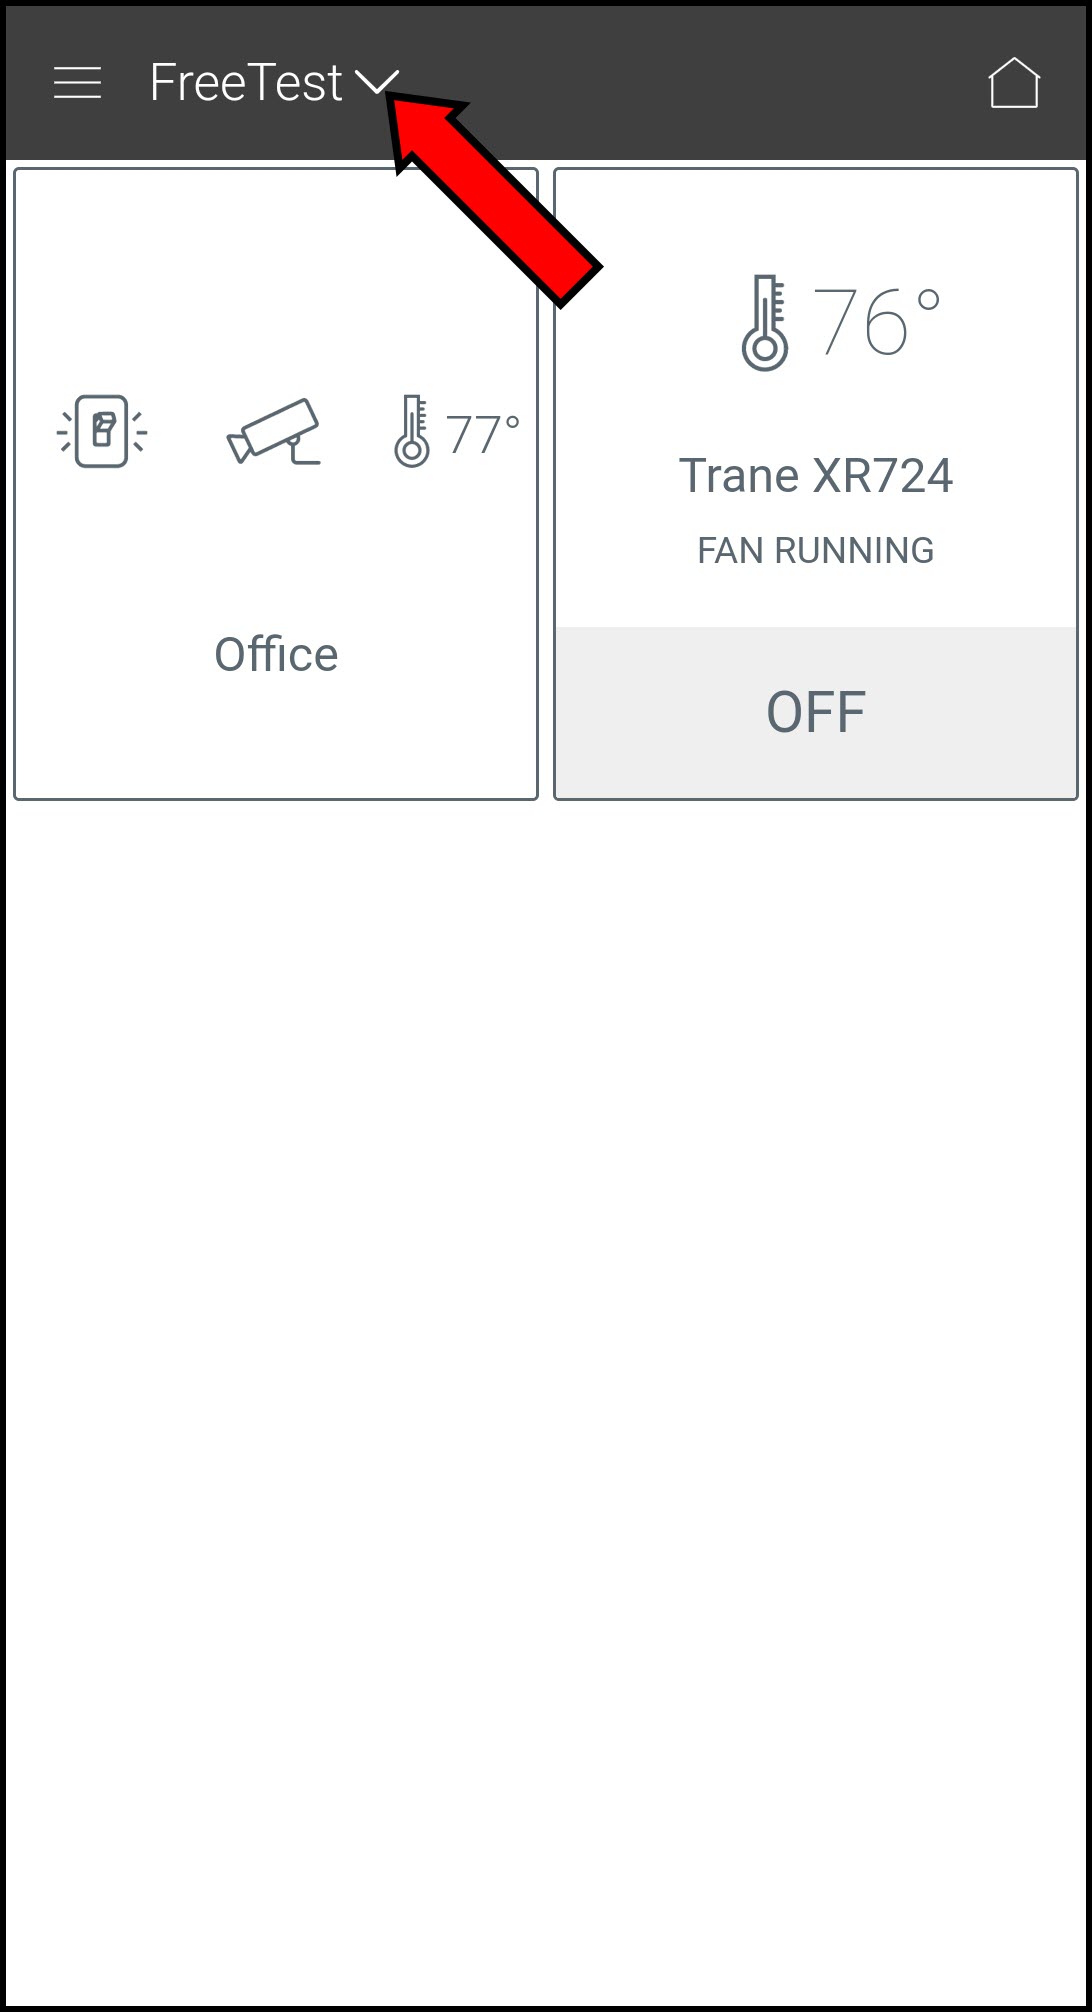
Select the group from the dashboard for that home.
-
Tap Edit.
-
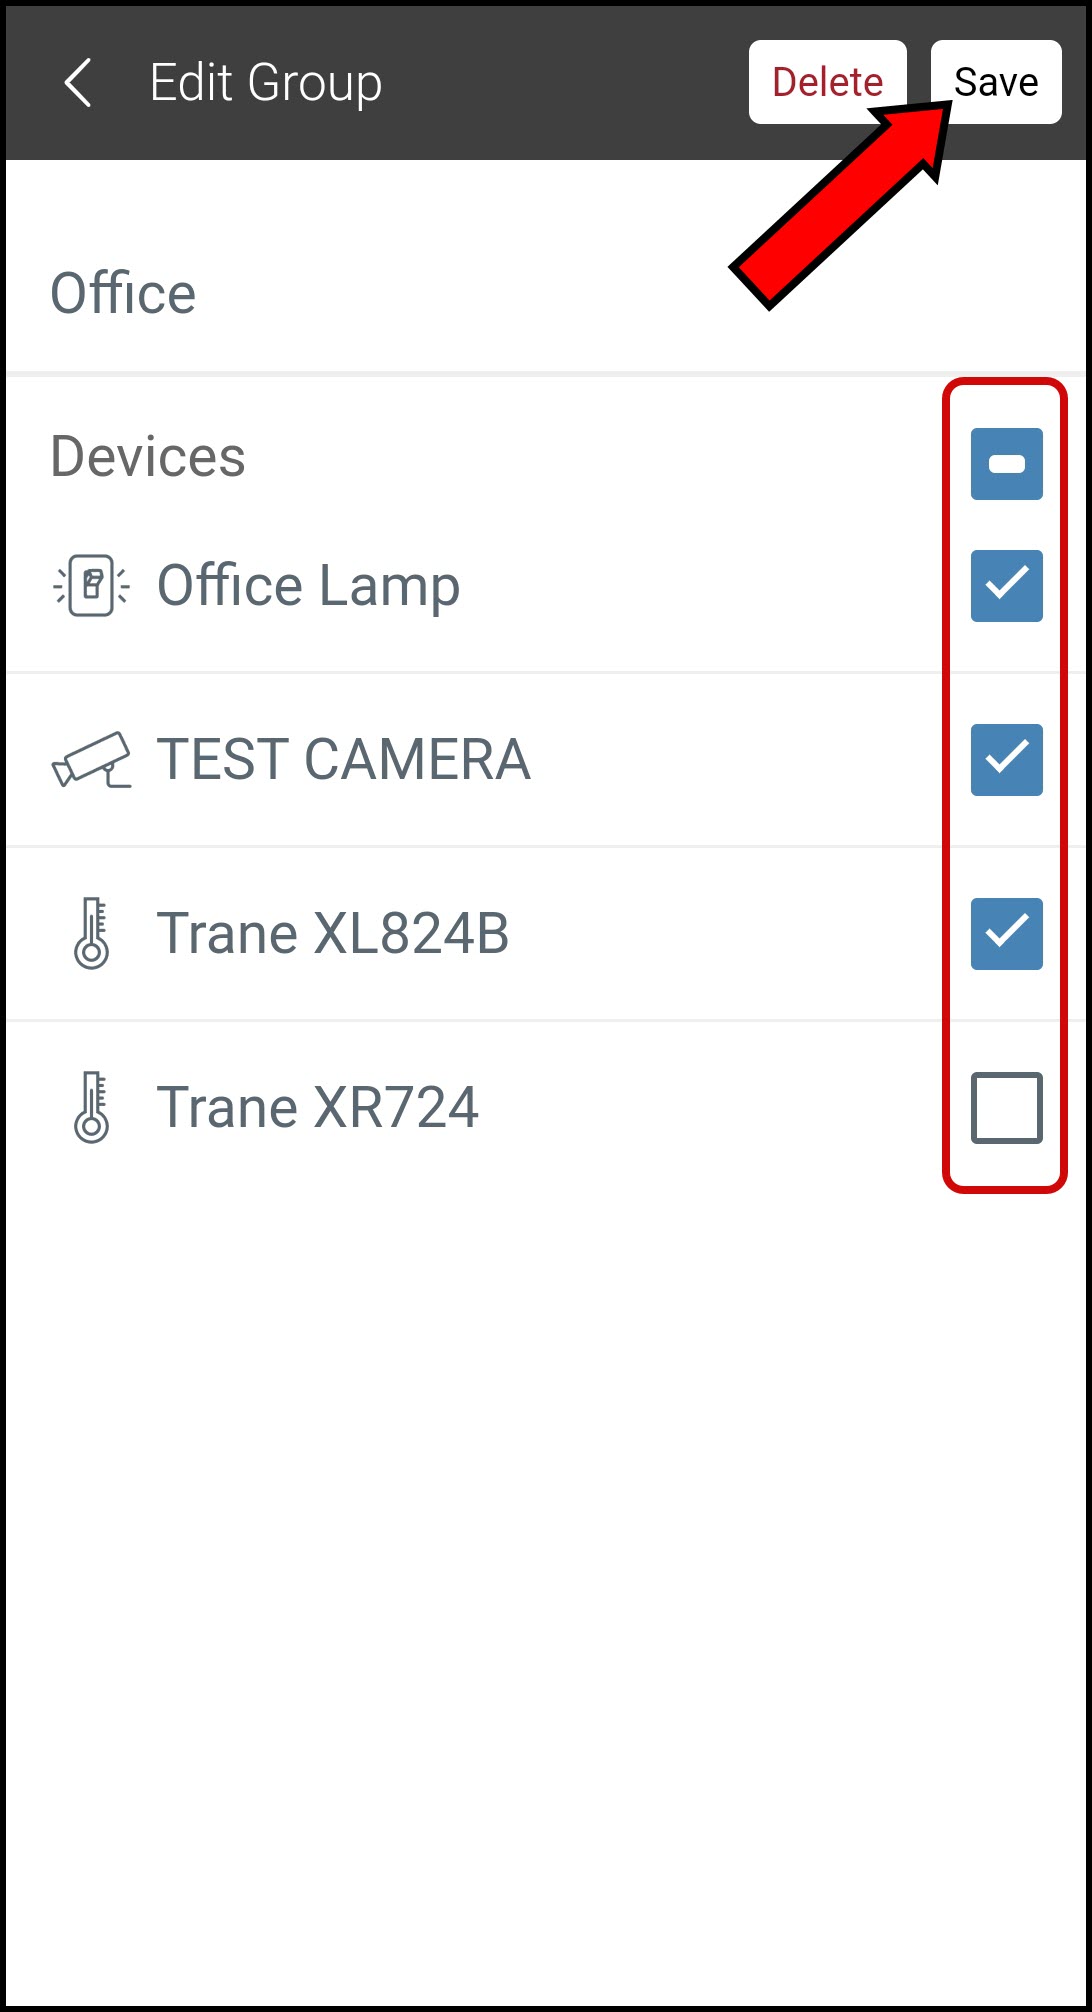
Rename the group, if desired, and include or exclude devices from the group using the checkboxes. Press Save when finished.
Deleting a Group
You can also delete a group from either the portal or the mobile app.
NOTE: Deleting a group ungroups the devices, but it does not remove the devices from your system or affect their functionality.
Deleting a Group in the Portal
-
Log into the Trane Home web portal.
-
If you have multiple homes, select the home you wish to configure.

-
Select Groups from the grey menu on the left side of the page.

-
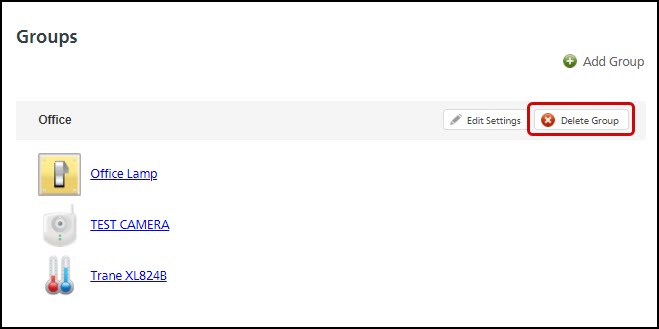
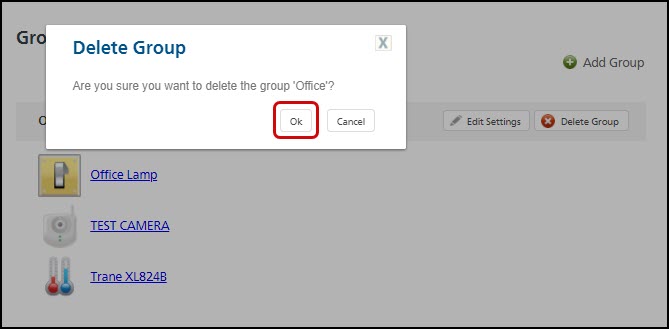
Press Delete Group for the group you wish to delete.
-
Press Ok to confirm that you want to delete the group.
Deleting a Group in the Mobile App
-
Log into the Trane Home mobile app.
-
If you have multiple homes, select the home you want to configure.

-
Select the group you wish to delete.

-
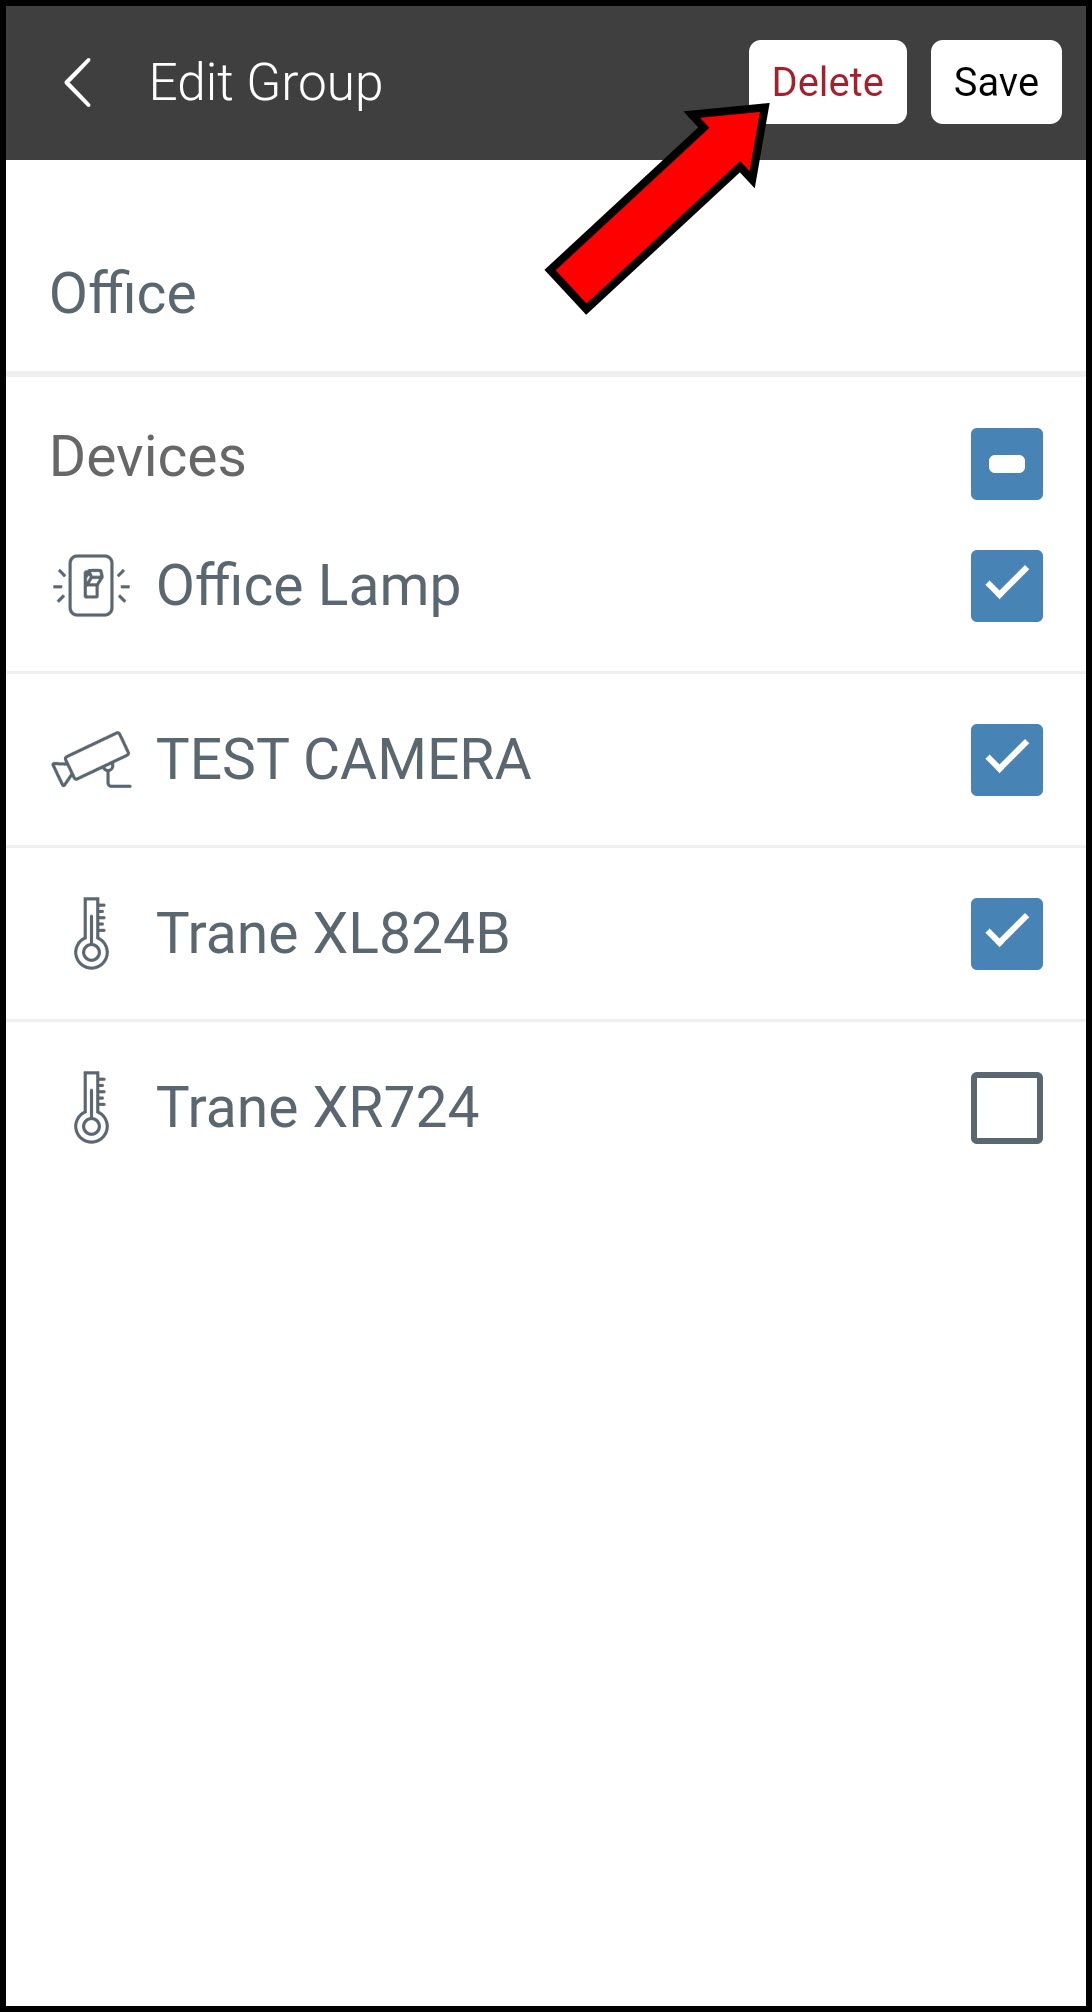
Tap Edit.

-
Press Delete.
-
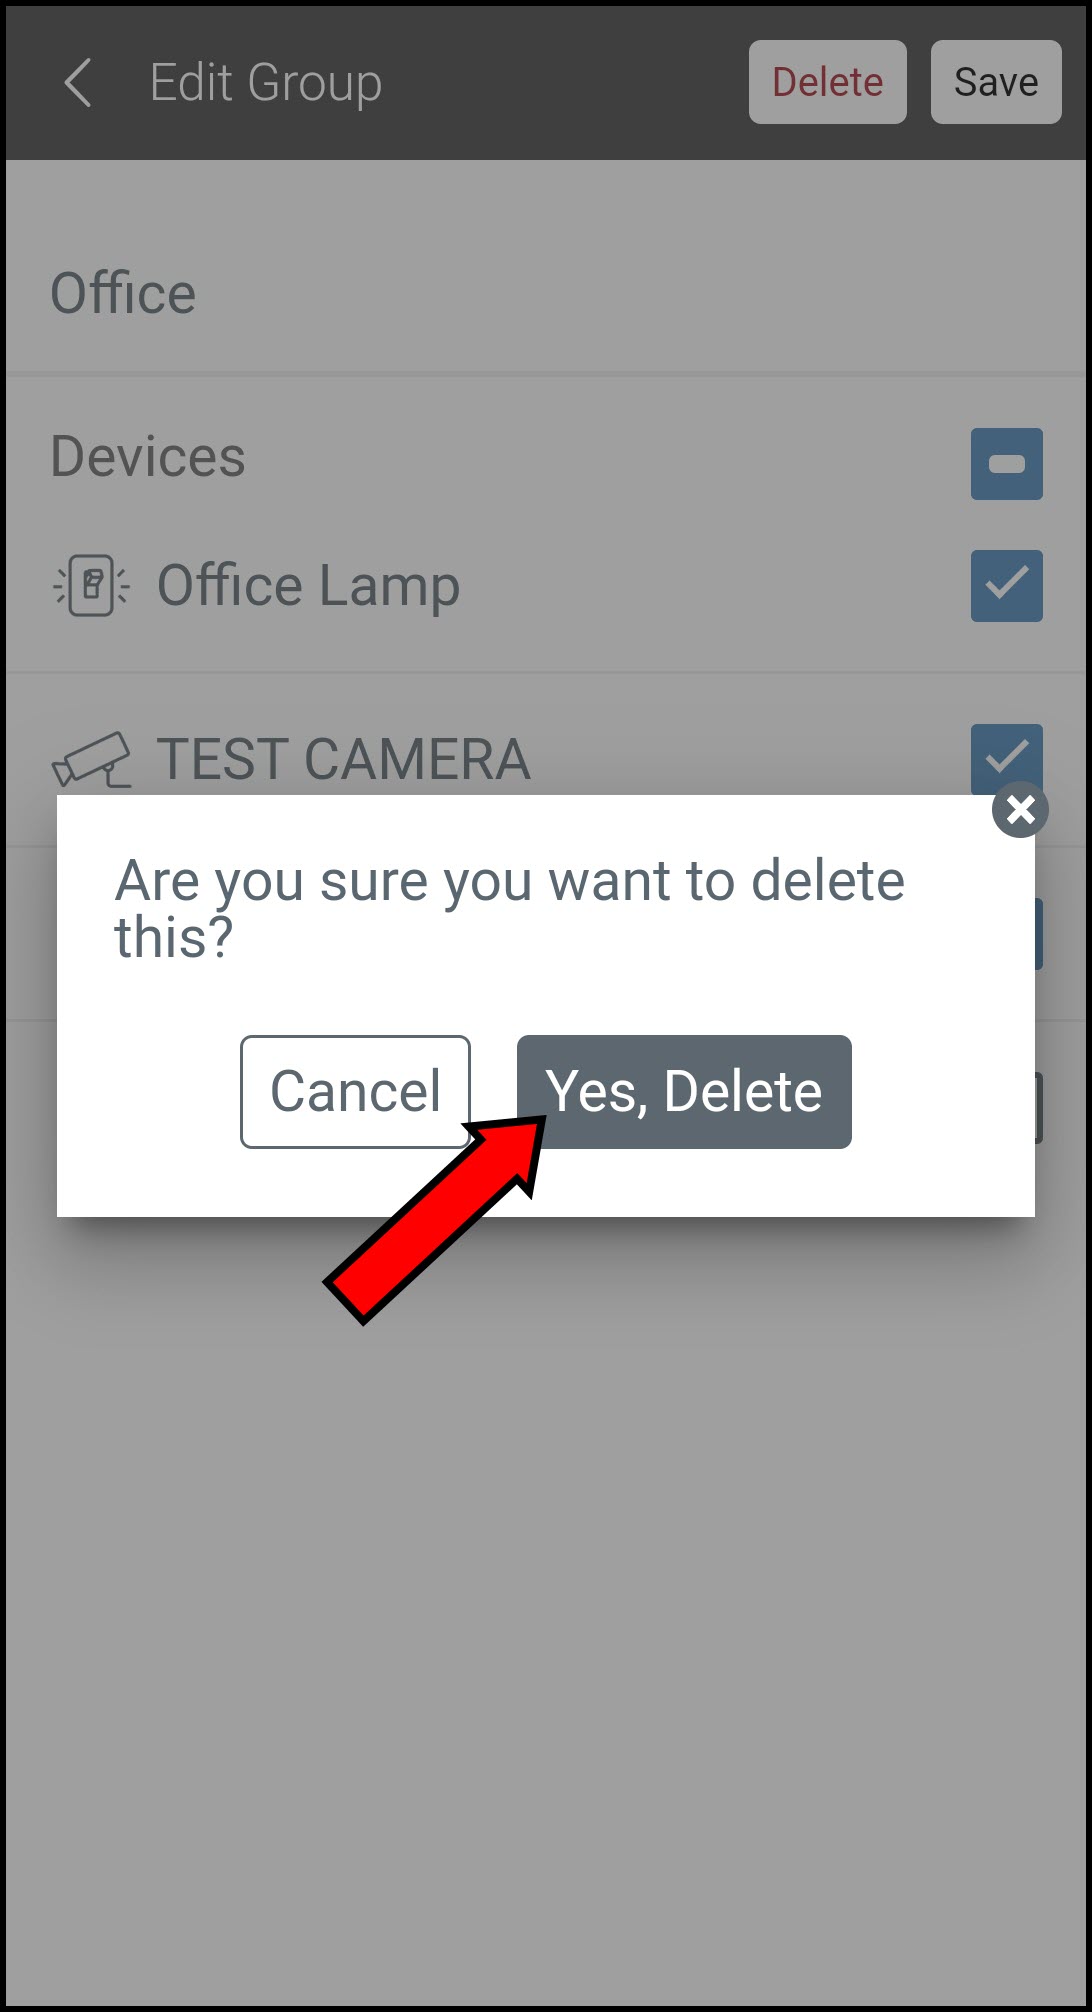
Confirm that you want to delete the group.
If you have any questions or need assistance, please contact Trane Home Customer Support via email at help@tranehome.com or call 1-877-288-7707, Monday-Friday 9 AM – 8 PM ET, and Saturday 10 AM – 5 PM ET.
Comments
0 comments
Article is closed for comments.