Temporarily Override Schedules Using Automations
NOTE: Automations are available through the mobile application and the web portal only. For other methods of overriding schedules, please see Override Schedules - Overview.
This process will create a "run-on-demand" Automation that is not triggered automatically. For more information about Automations, please visit Automations Overview.
From the Mobile Application
-
Log into the Trane® Home mobile application.
-
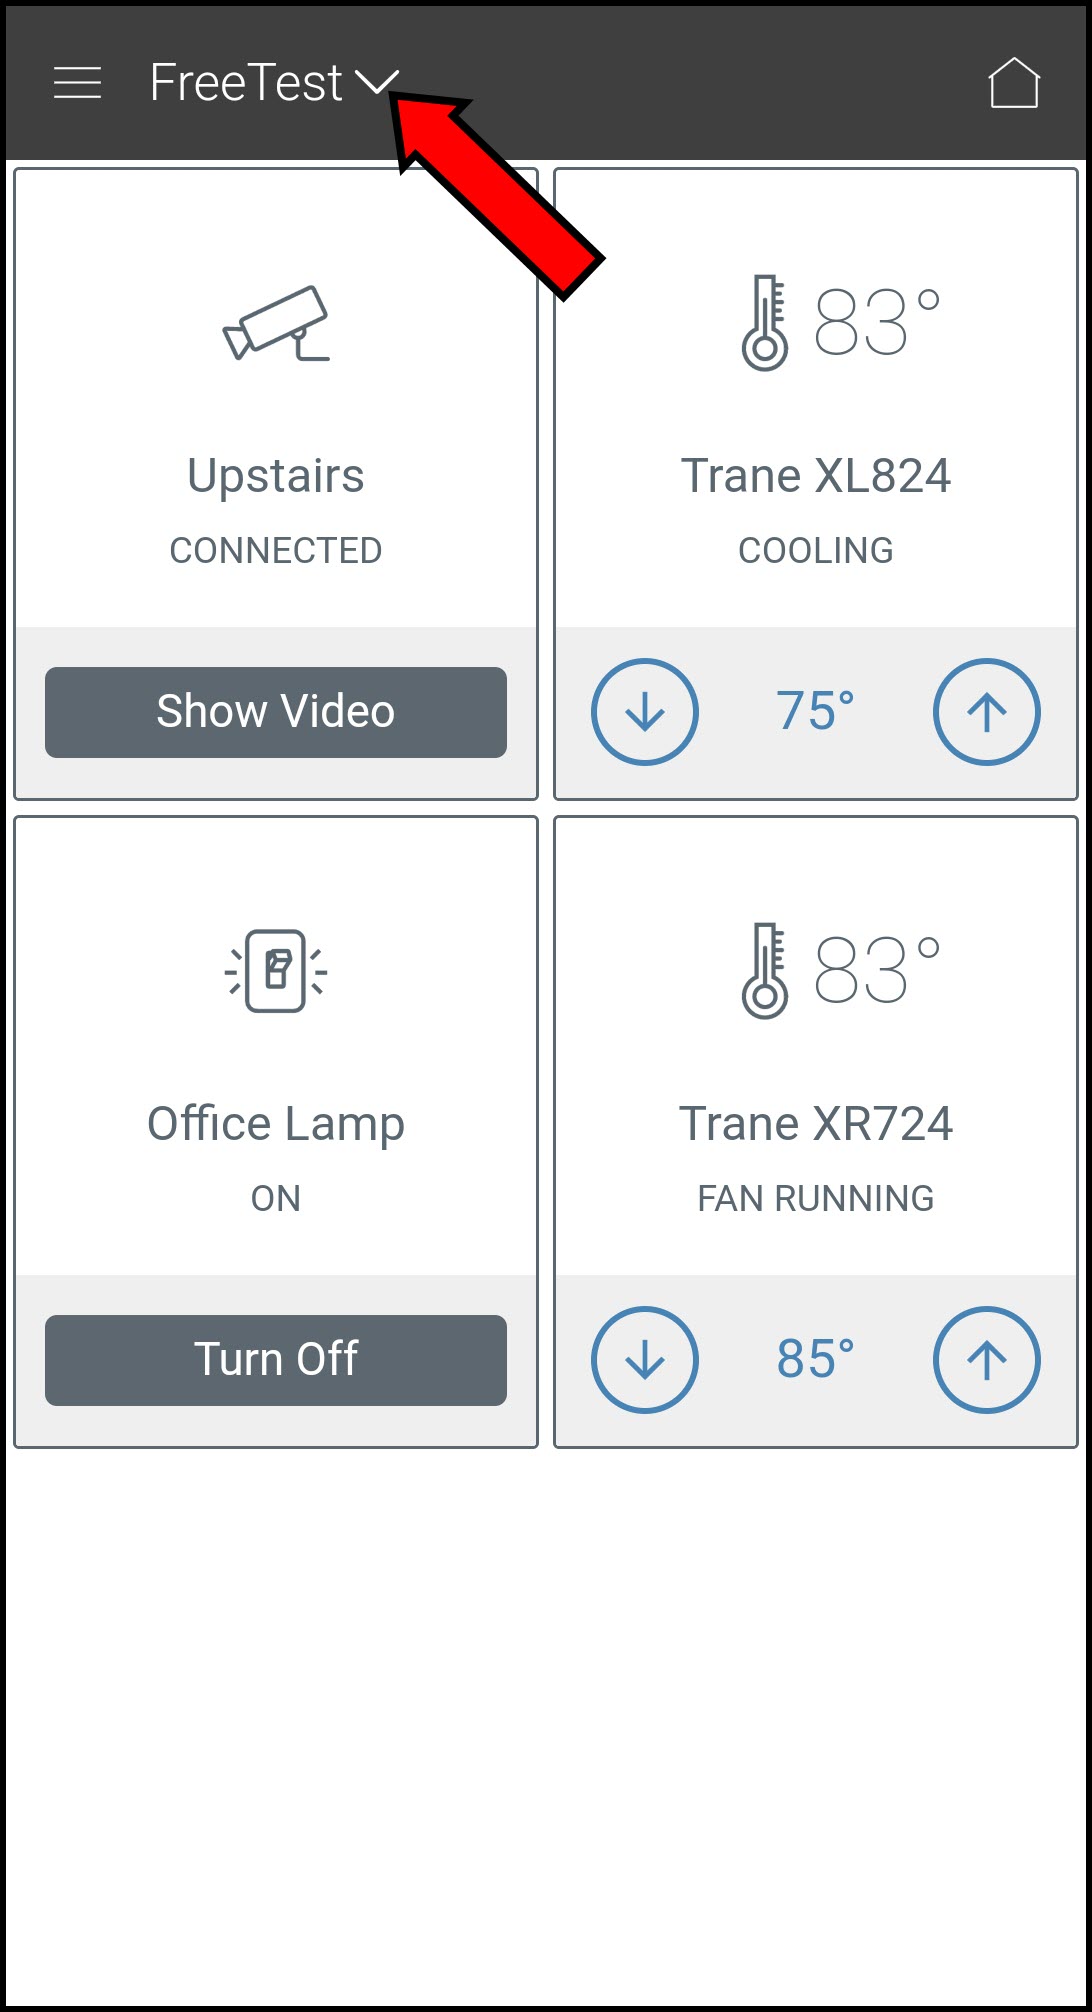
If you have multiple homes, select the home you wish to work with.
-
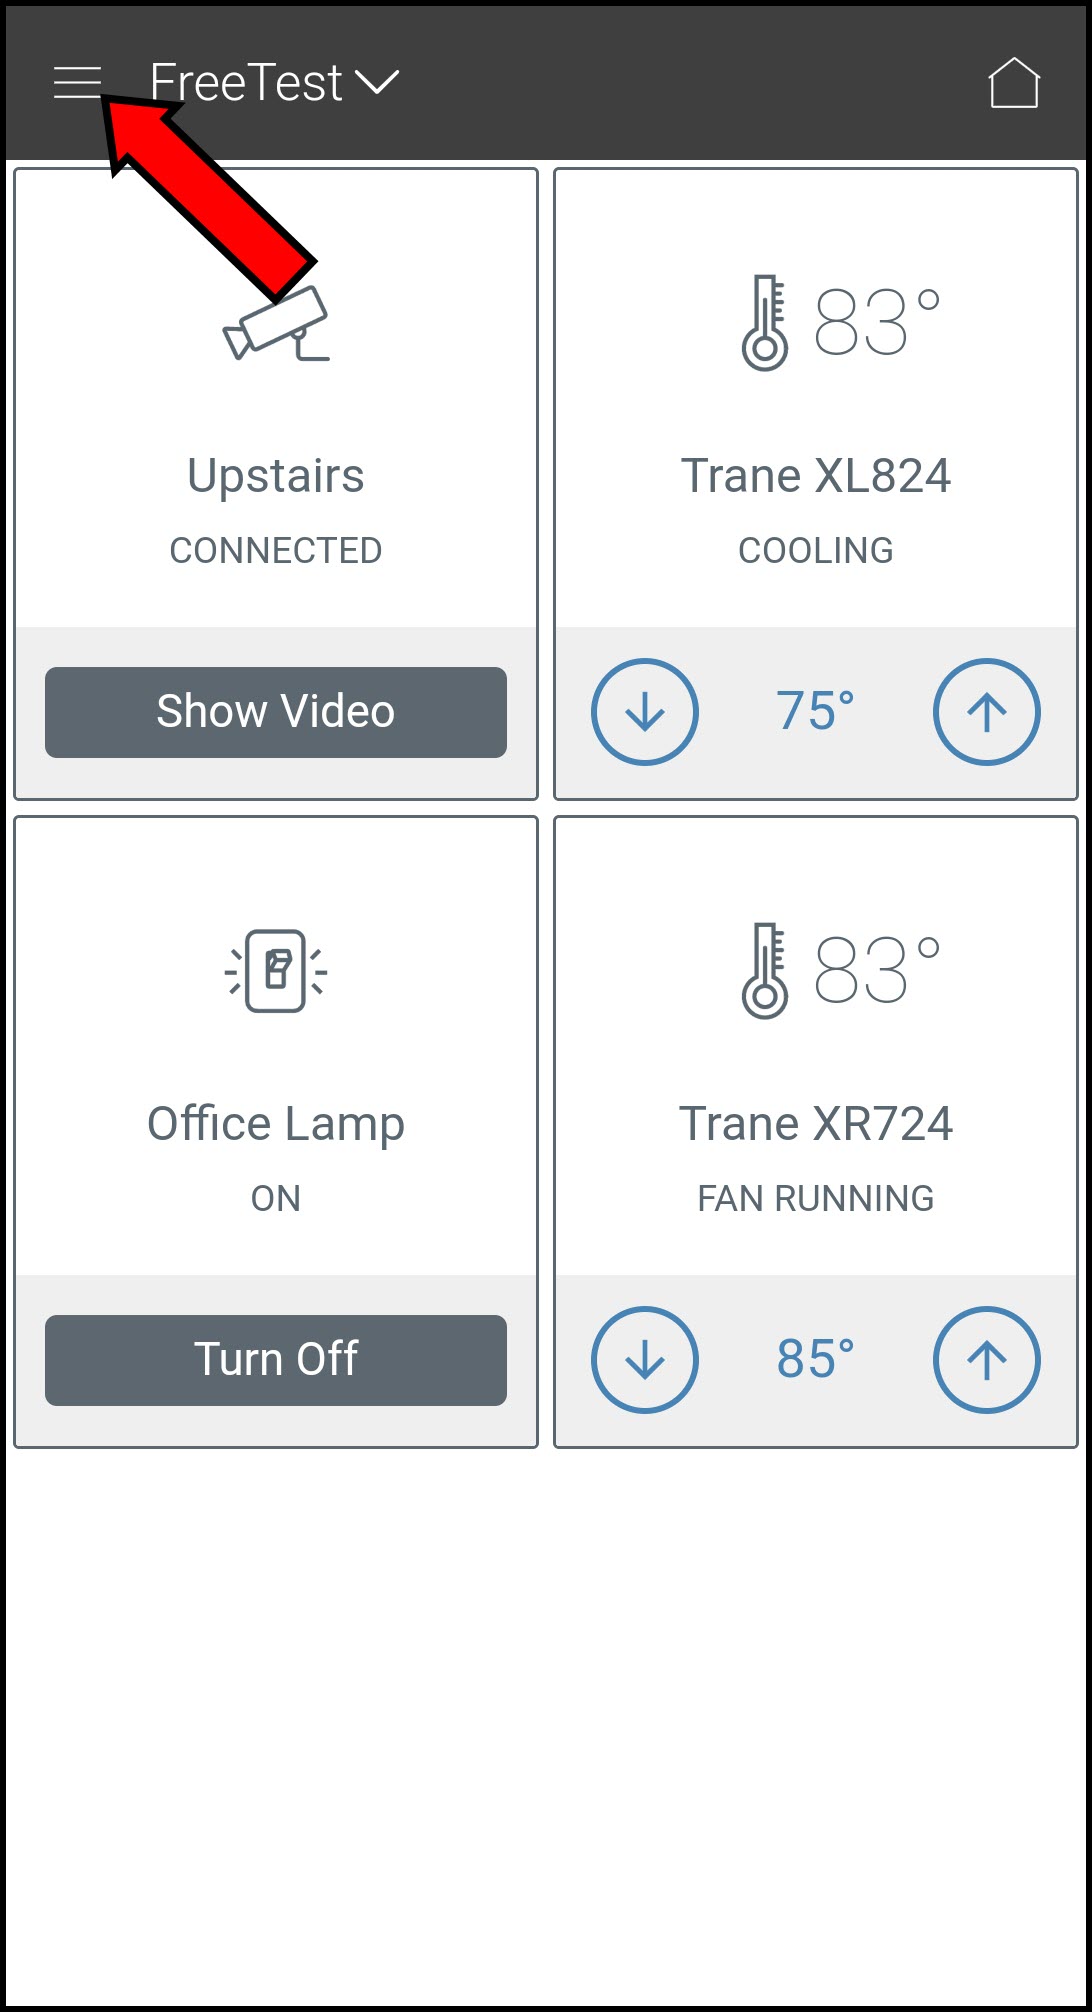
Press the menu icon in the upper left corner.
-
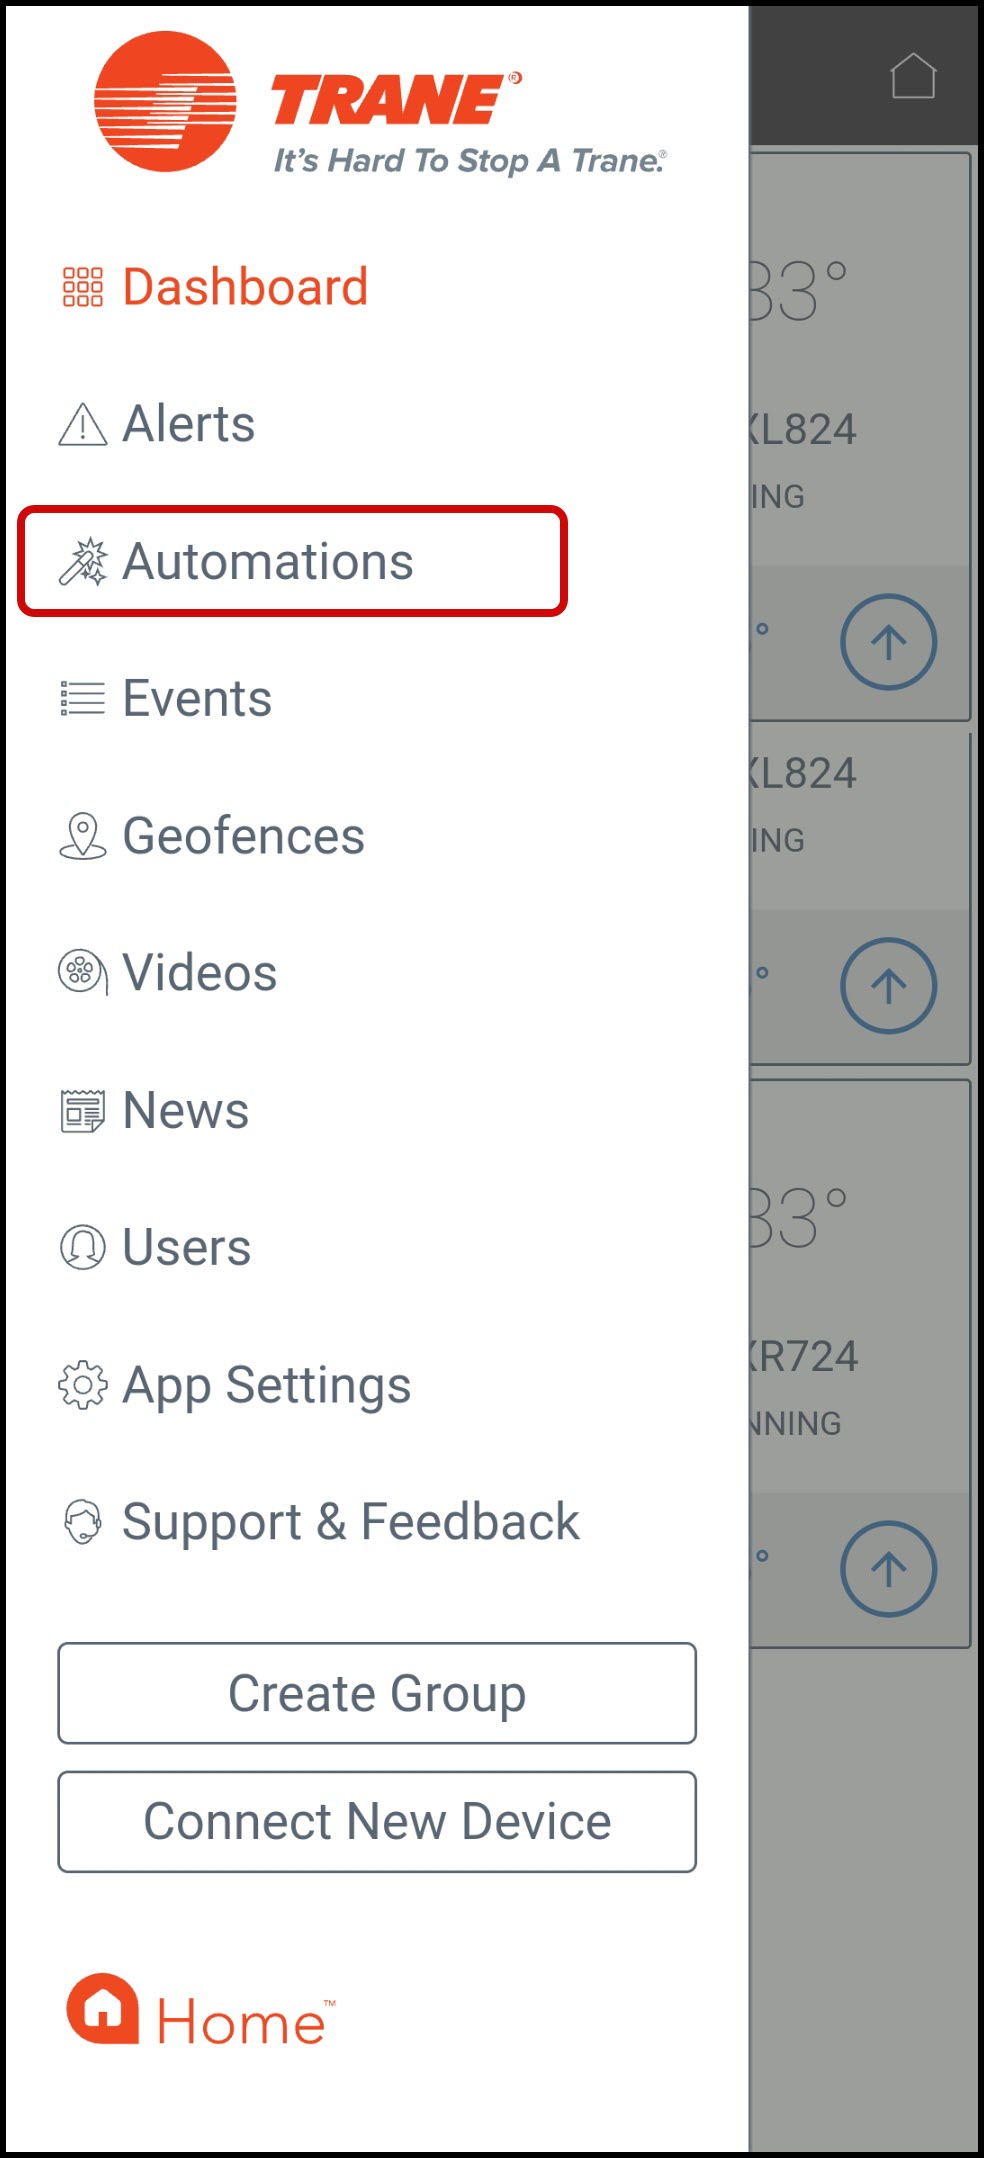
Select Automations.
-
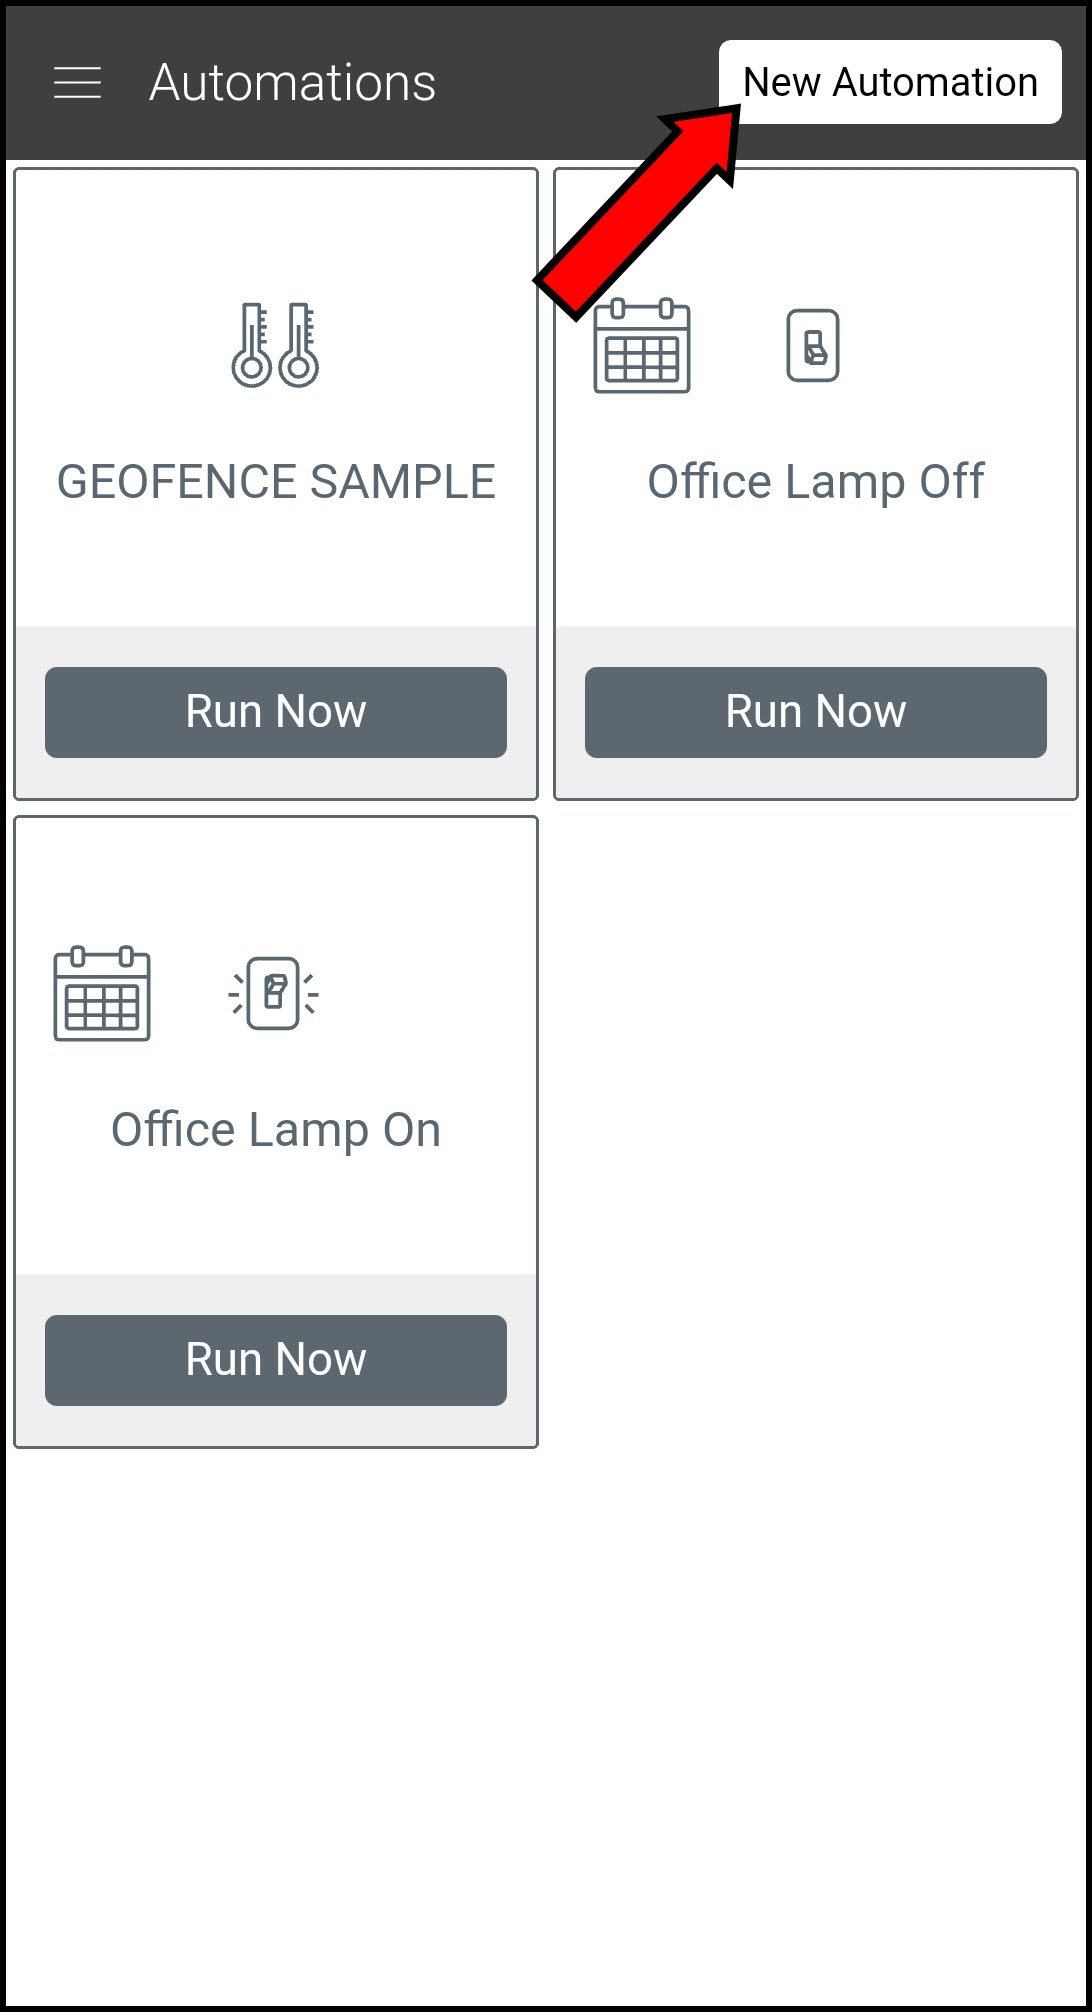
Tap New Automation.
-
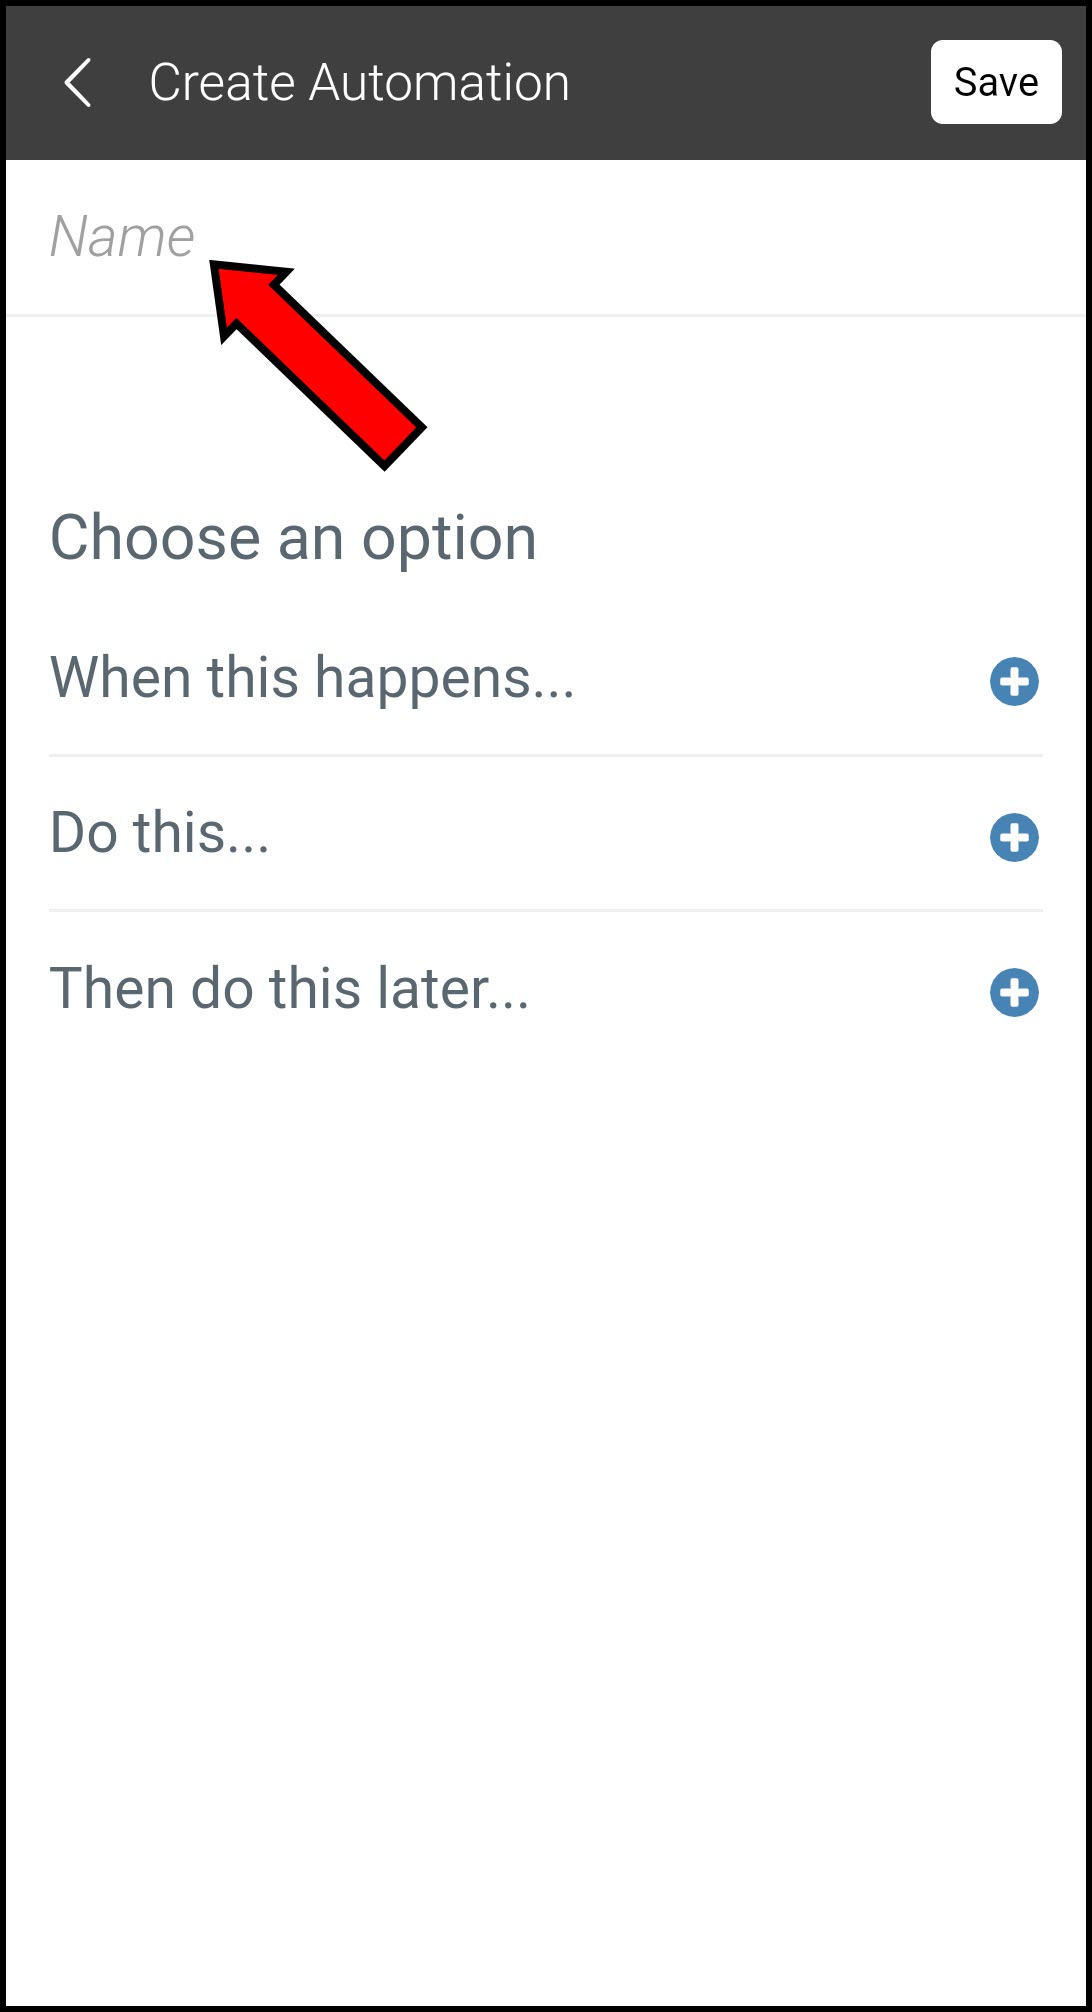
Tap where it says Name and create a name for your Automation.
-
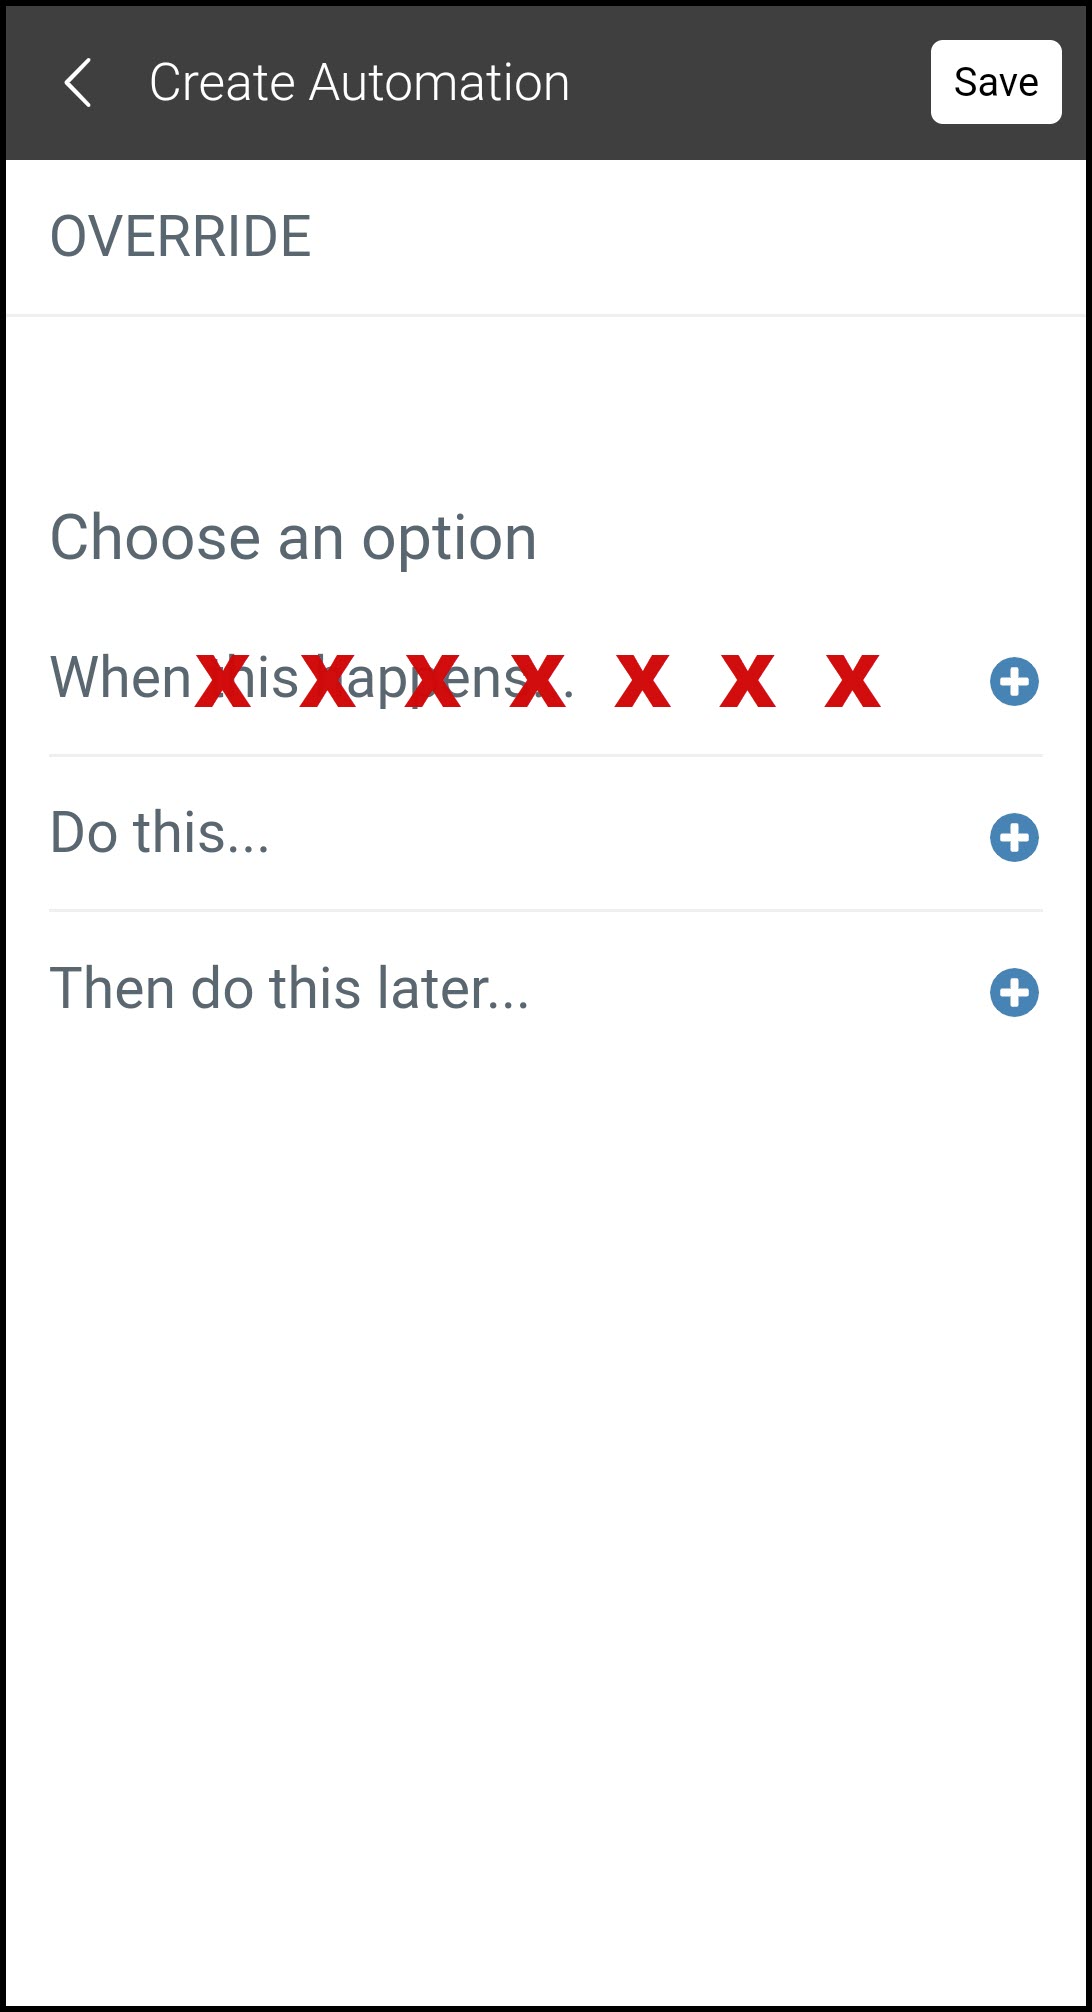
SKIP "When this happens..." You do not need this step for this type of Automation.
-
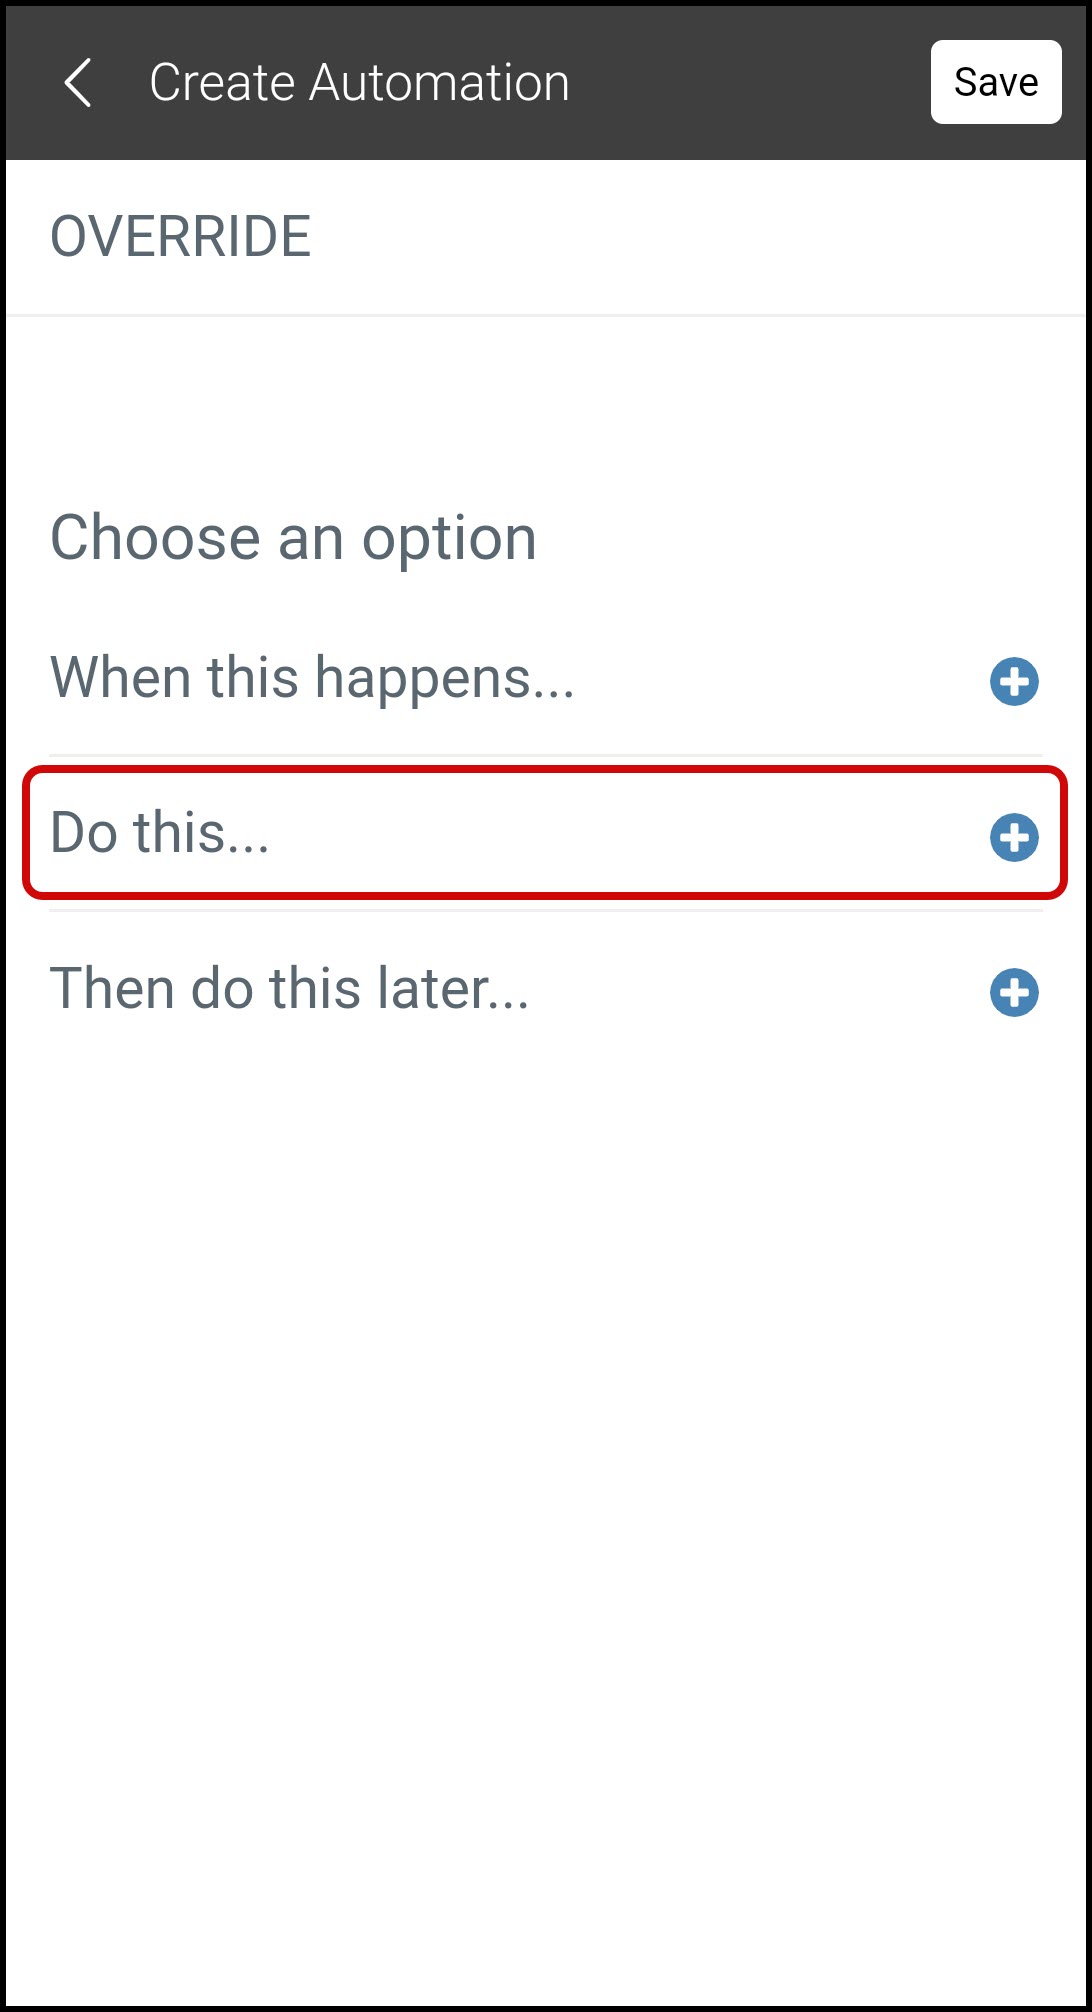
Select "Do this...".
-
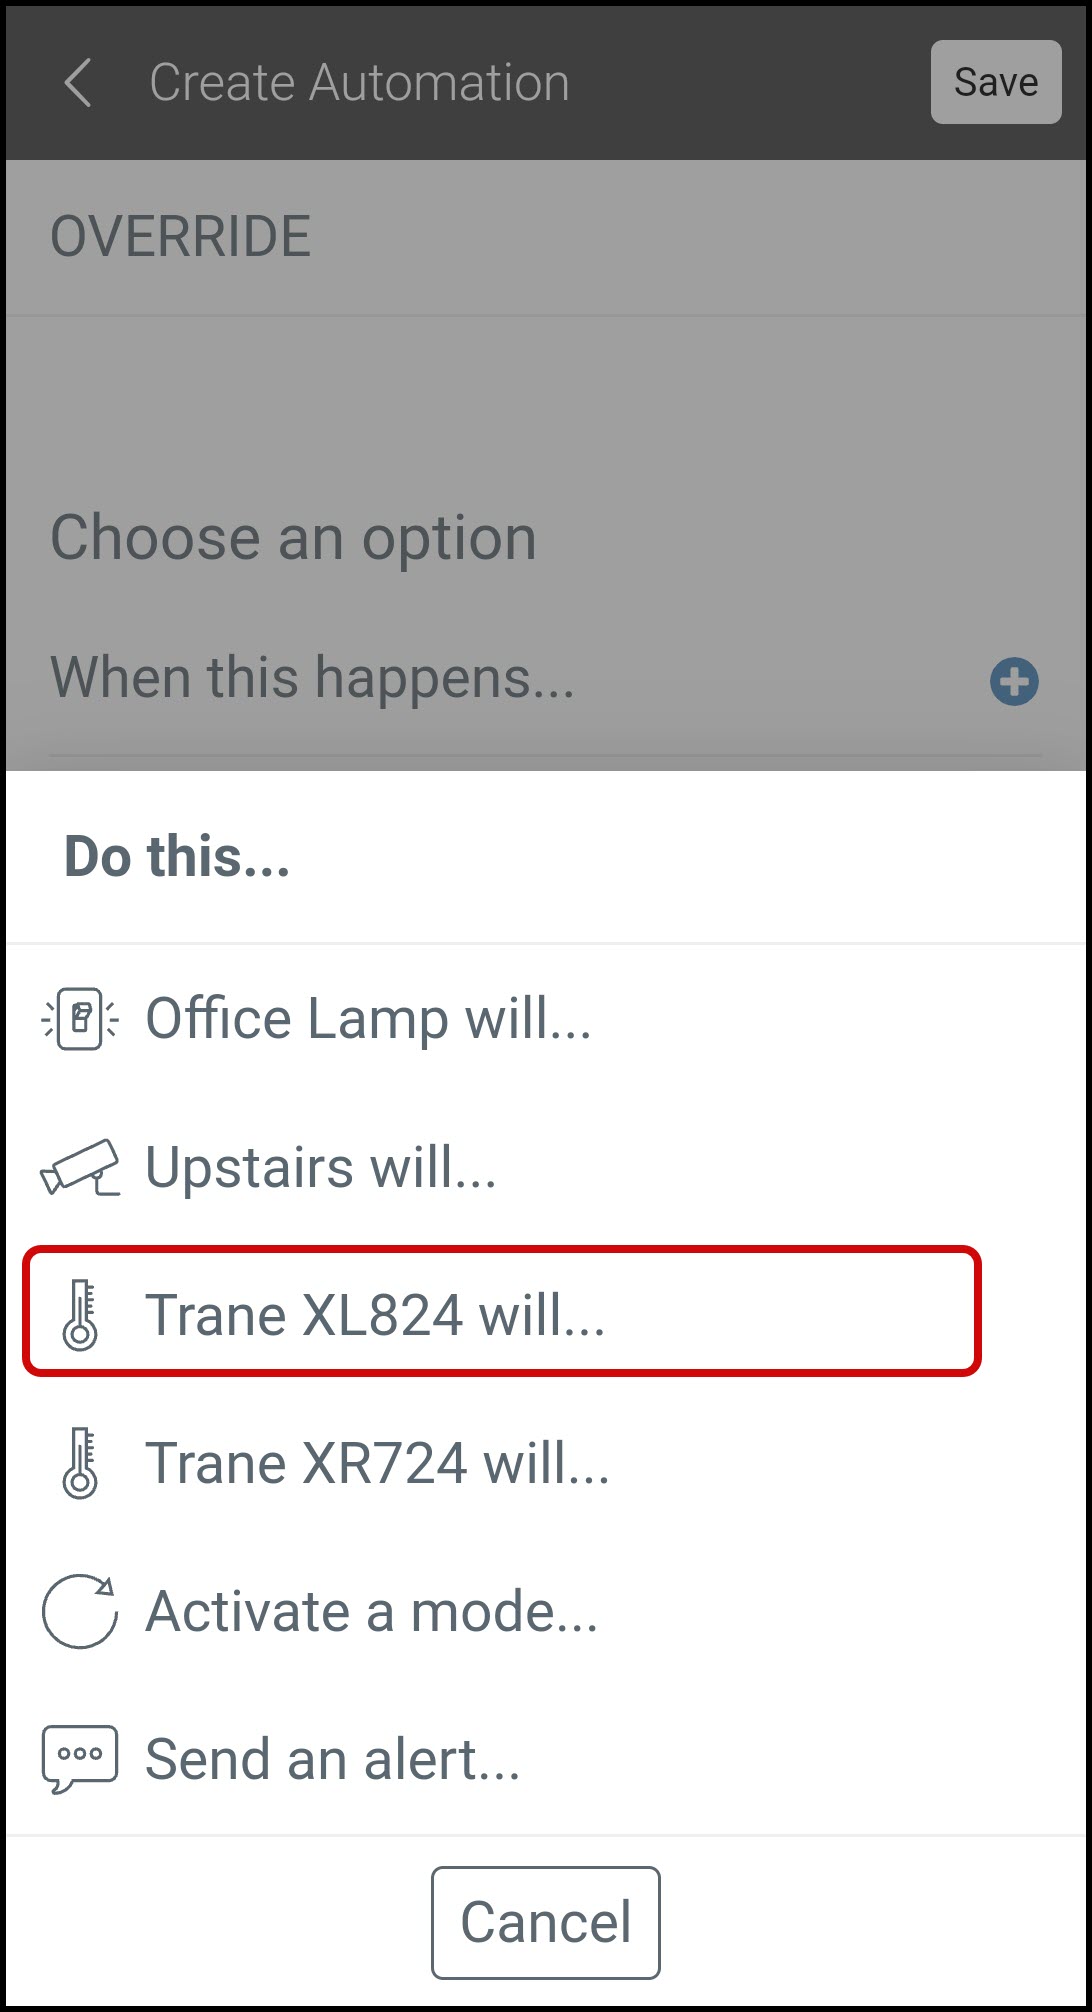
Select the thermostat you want to modify.
-
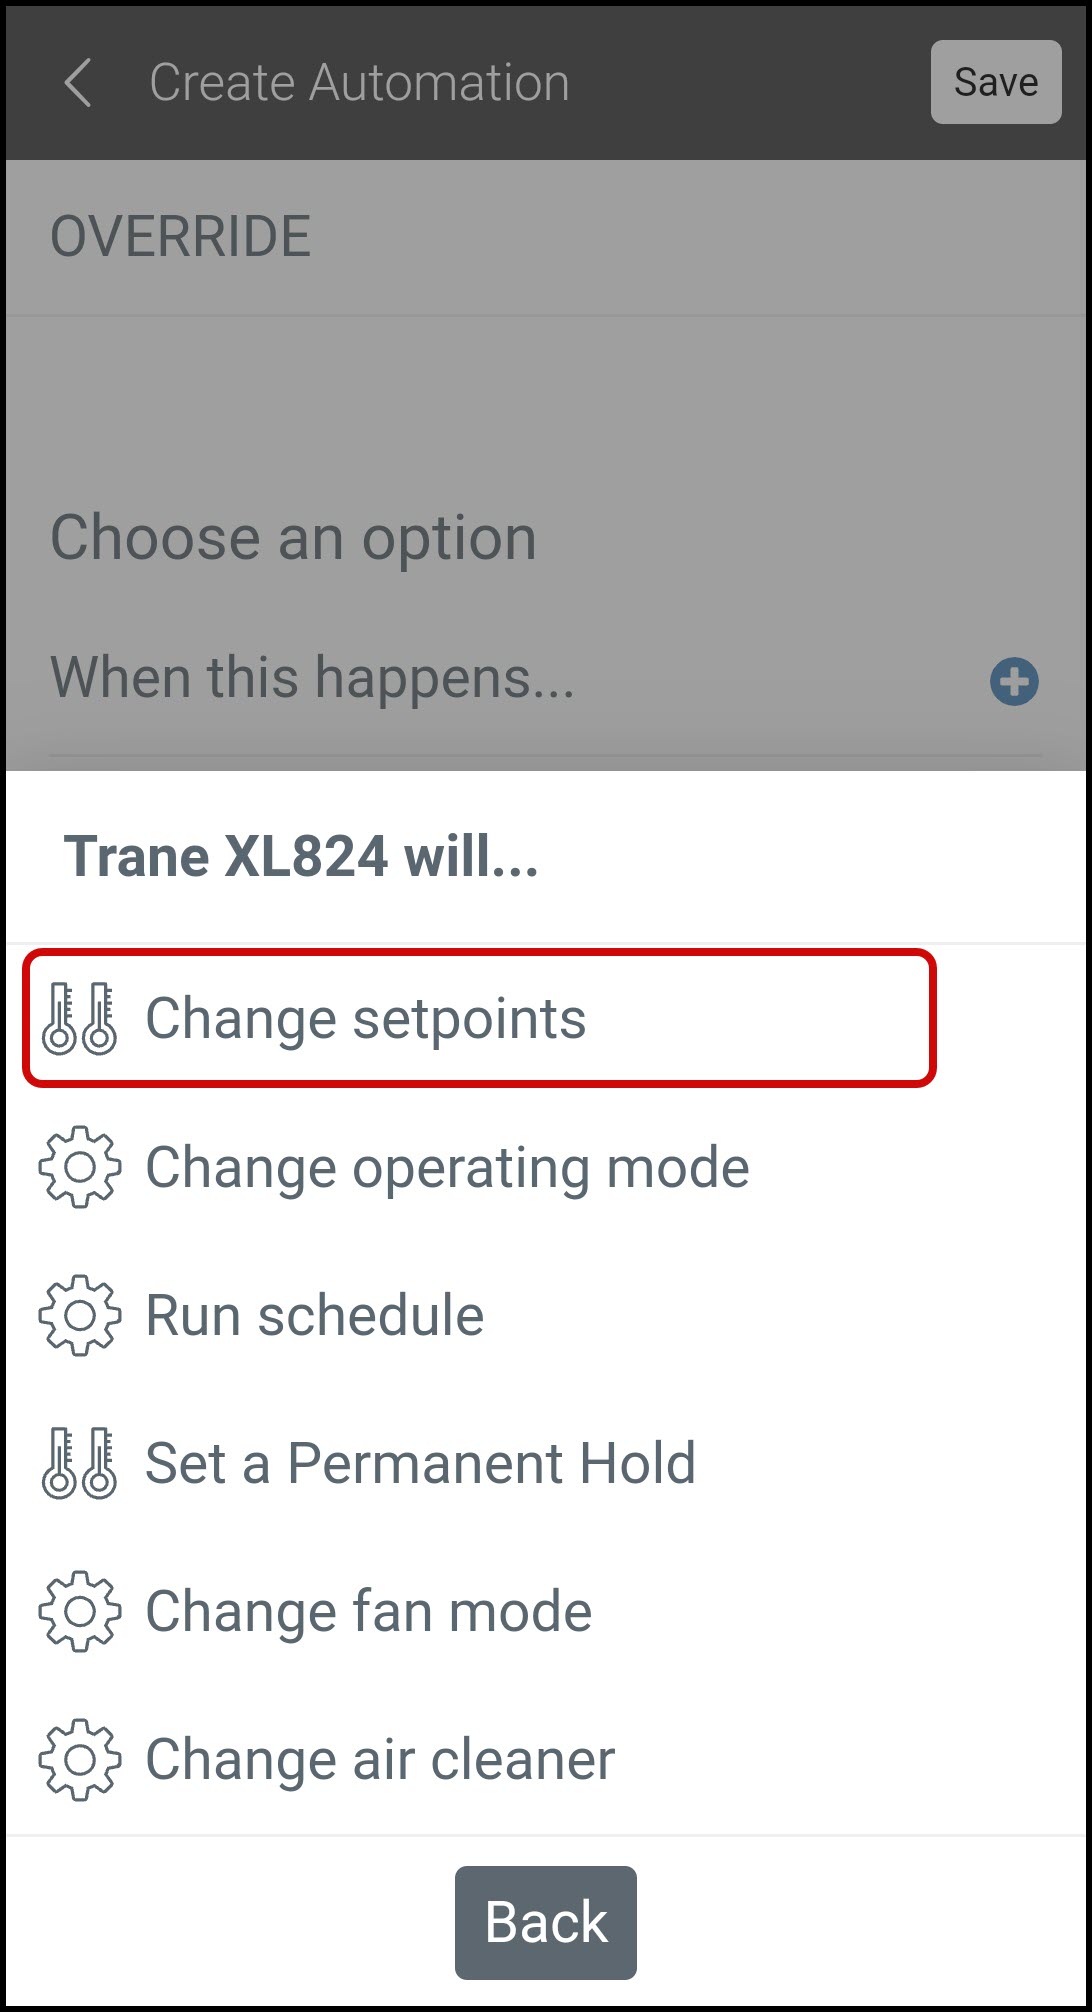
Tap Change setpoints.
-
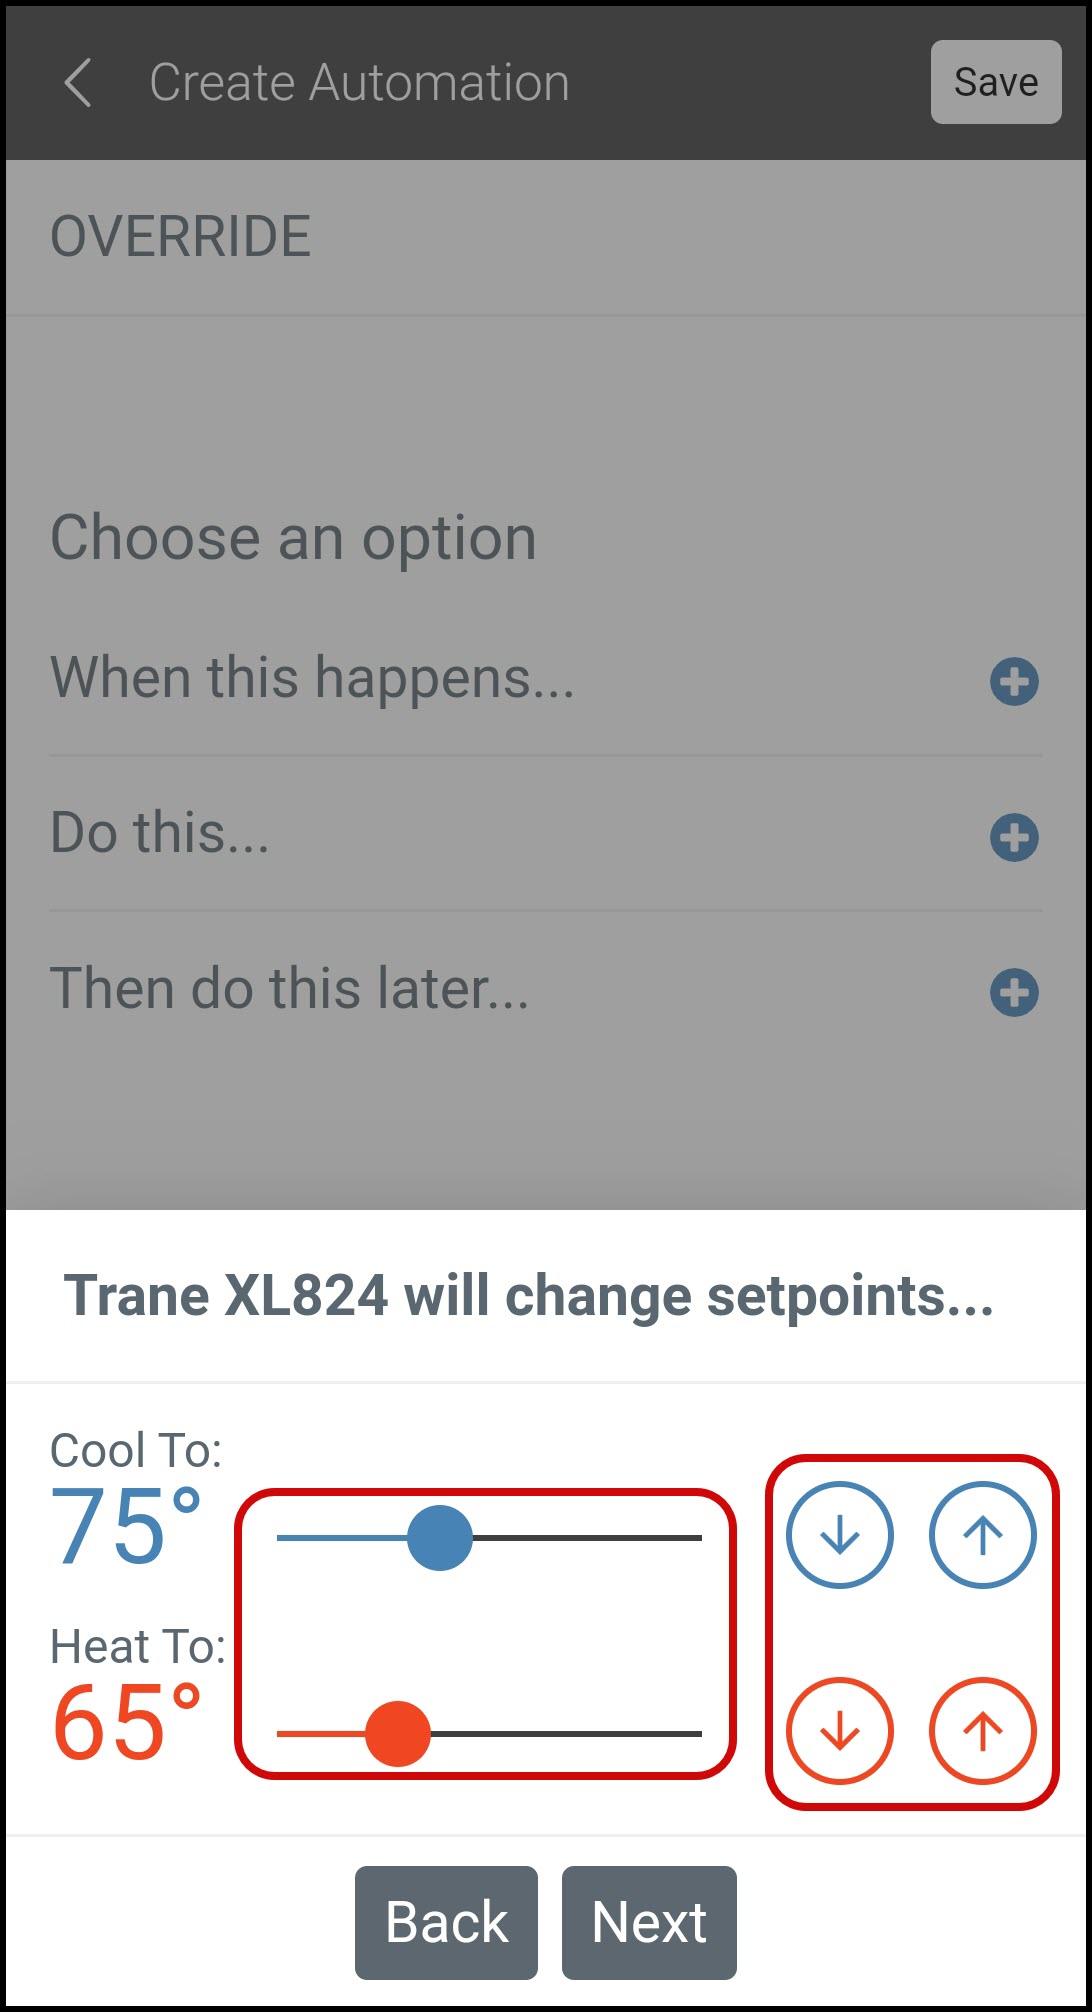
Change your cooling and/or heating setpoint(s) as desired using either the up and down arrows or the slide bars.
-
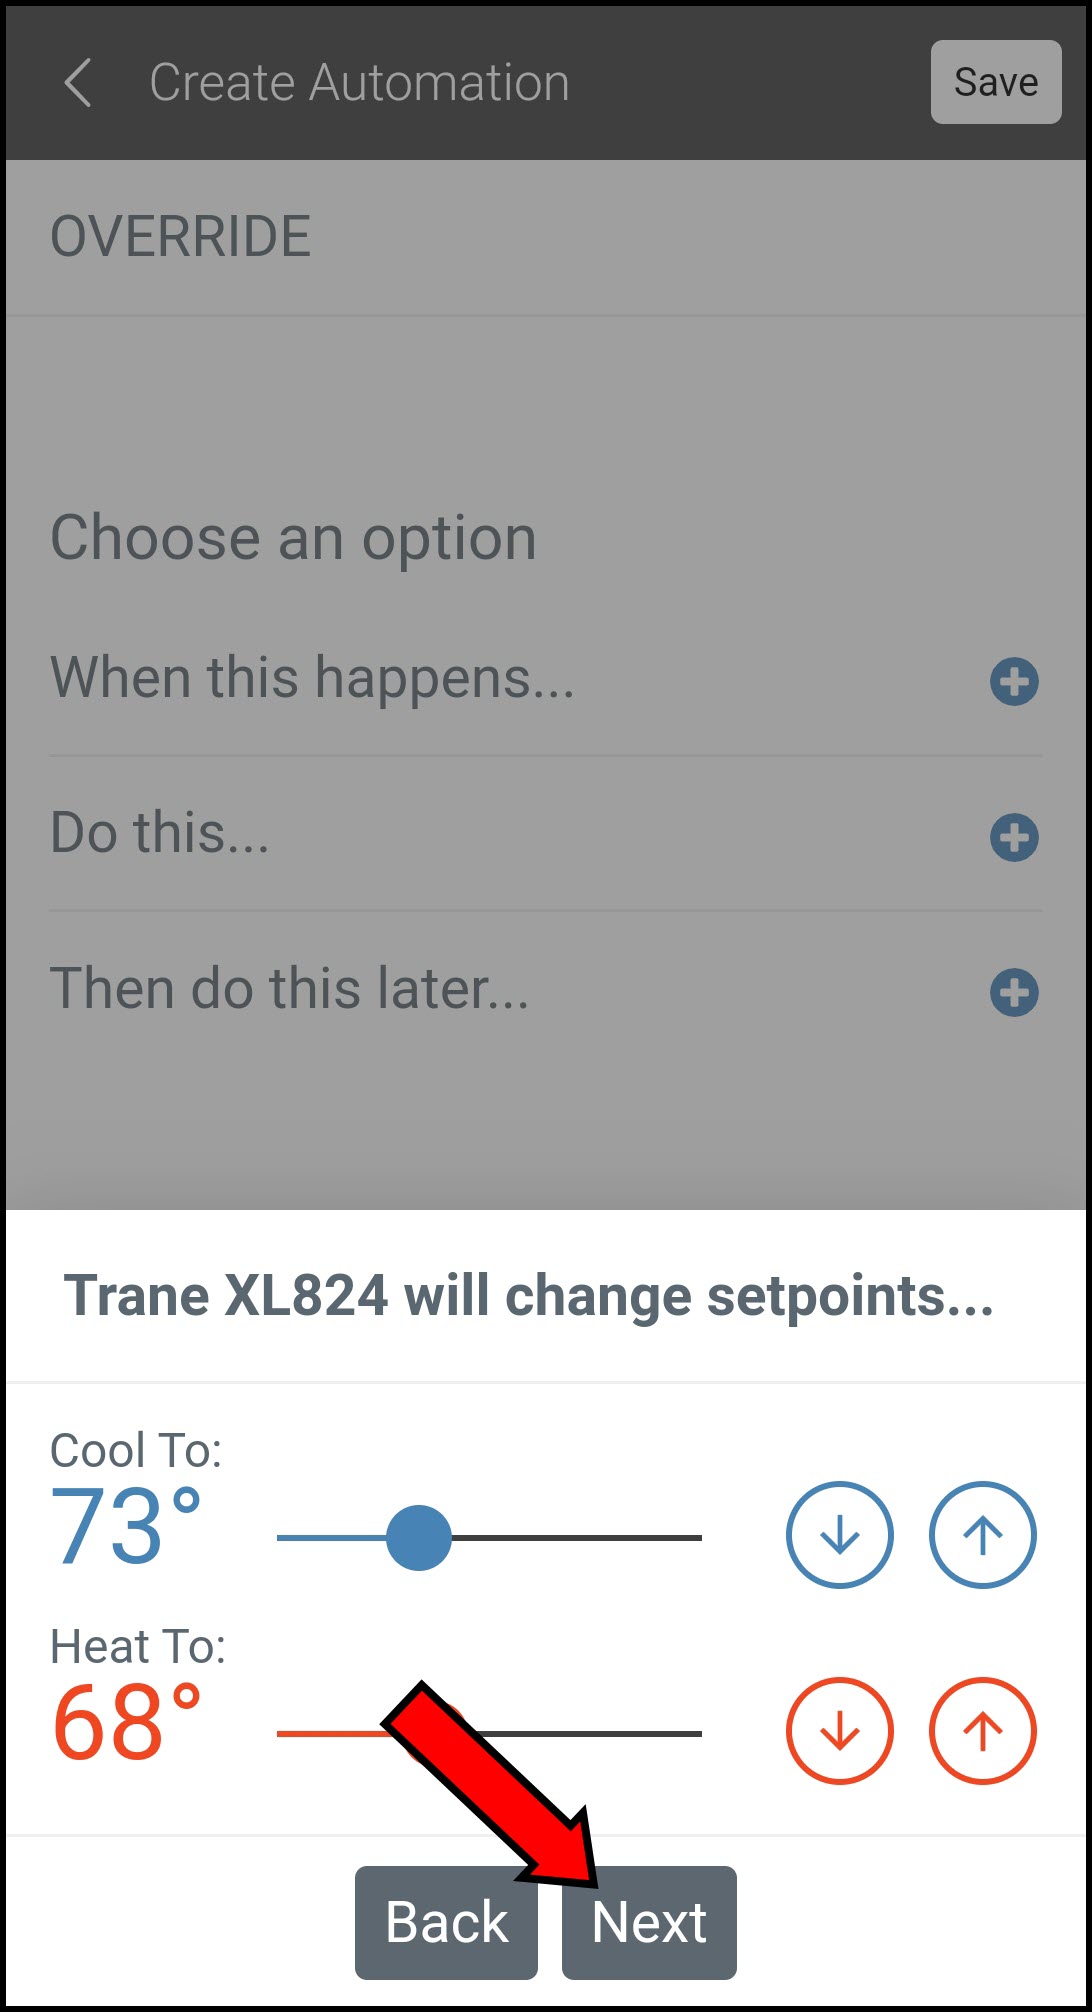
Once you have chosen your setpoints, click Next.
-
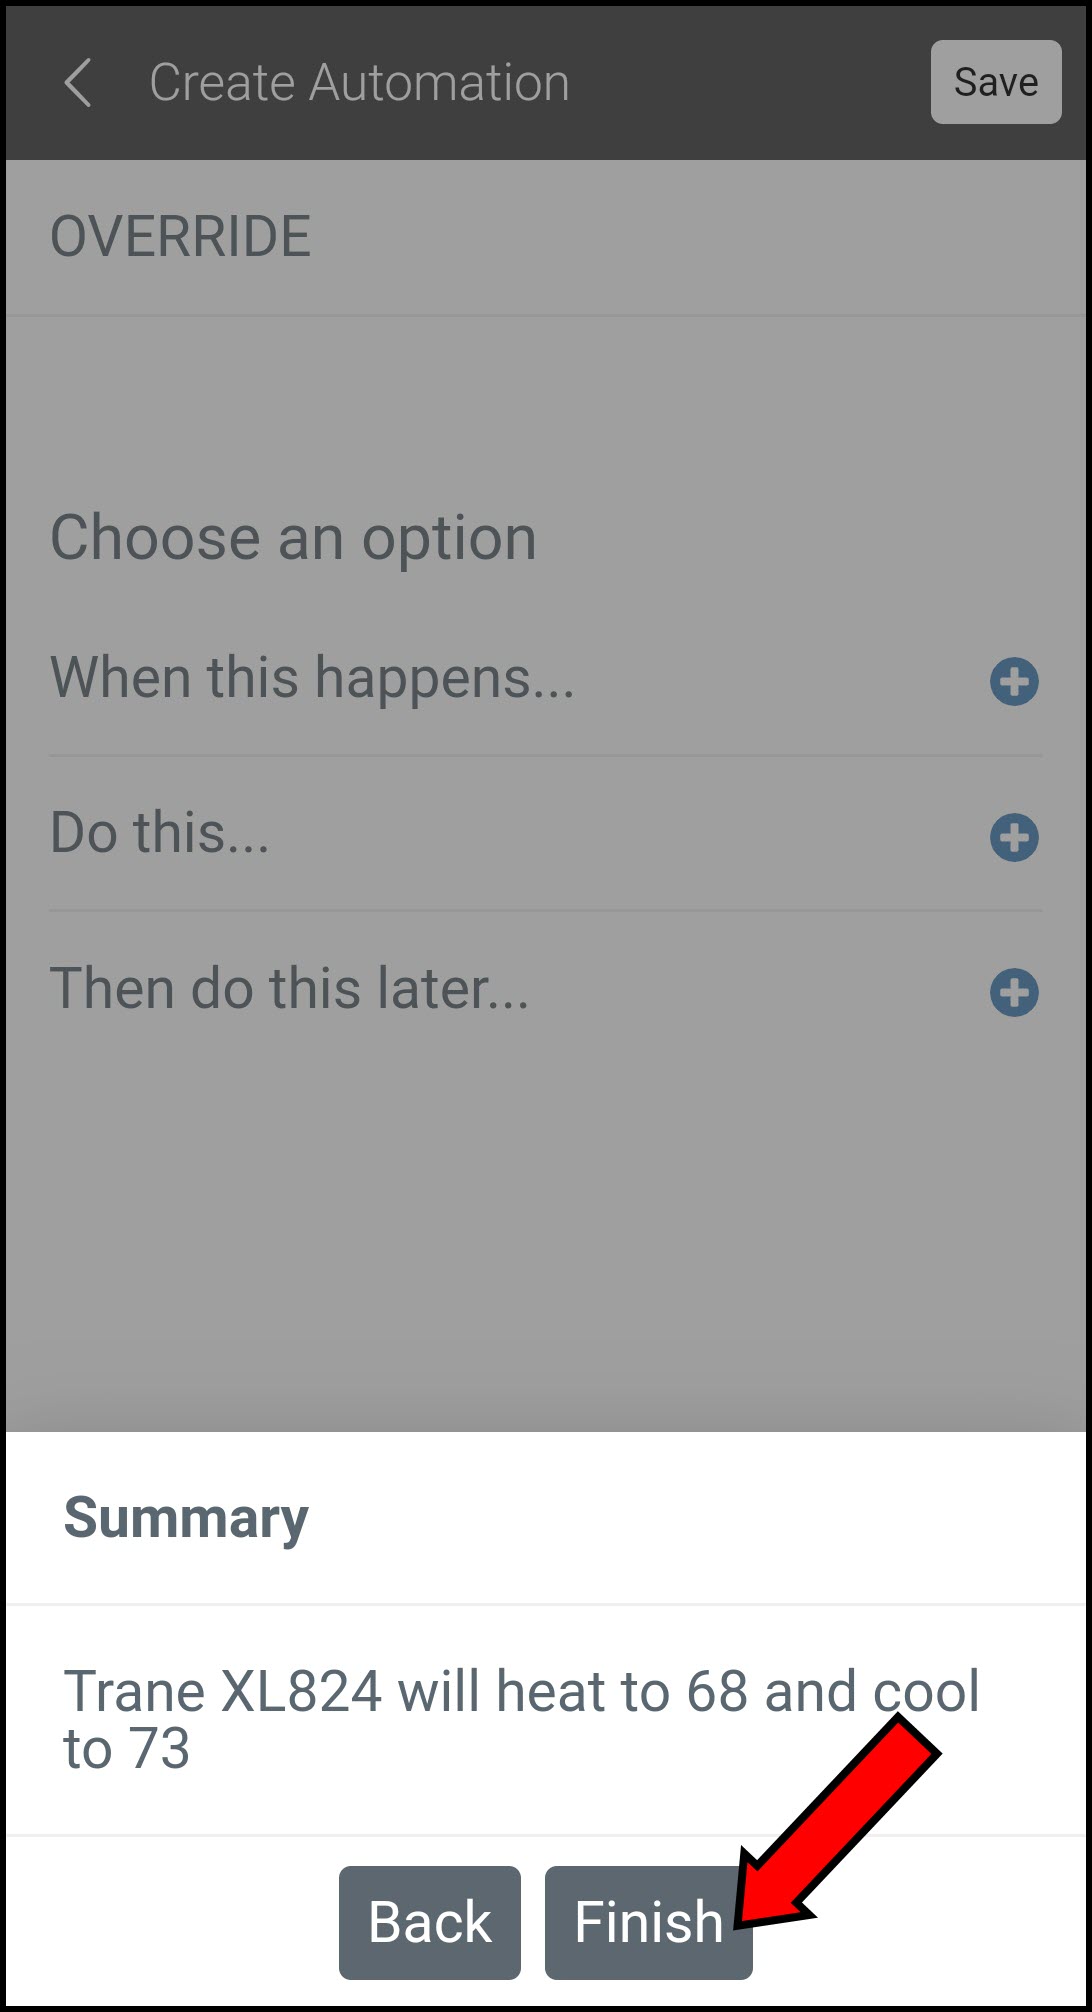
Review the summary and press Finish.
-
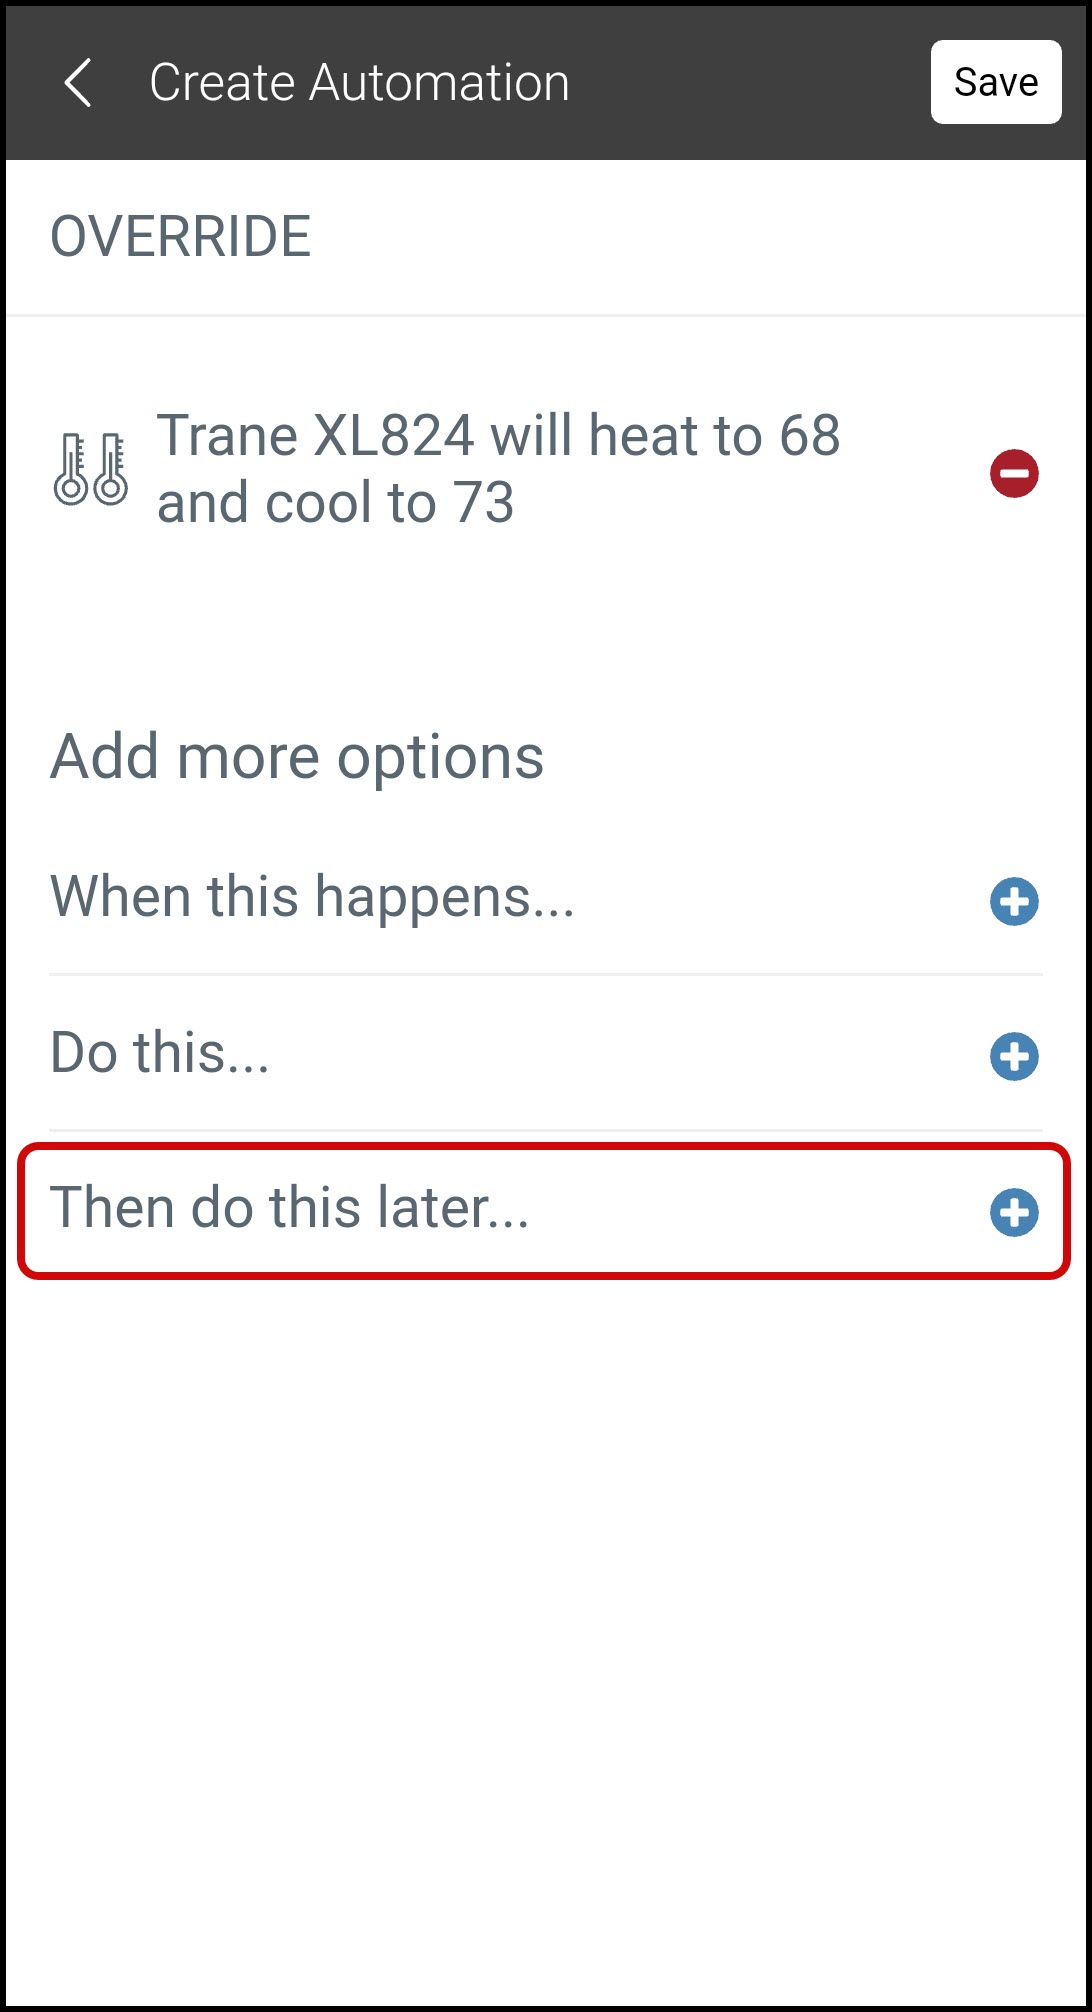
You now have the option to add a specific duration for the automation. To do so, tap "Then do this later...".
-
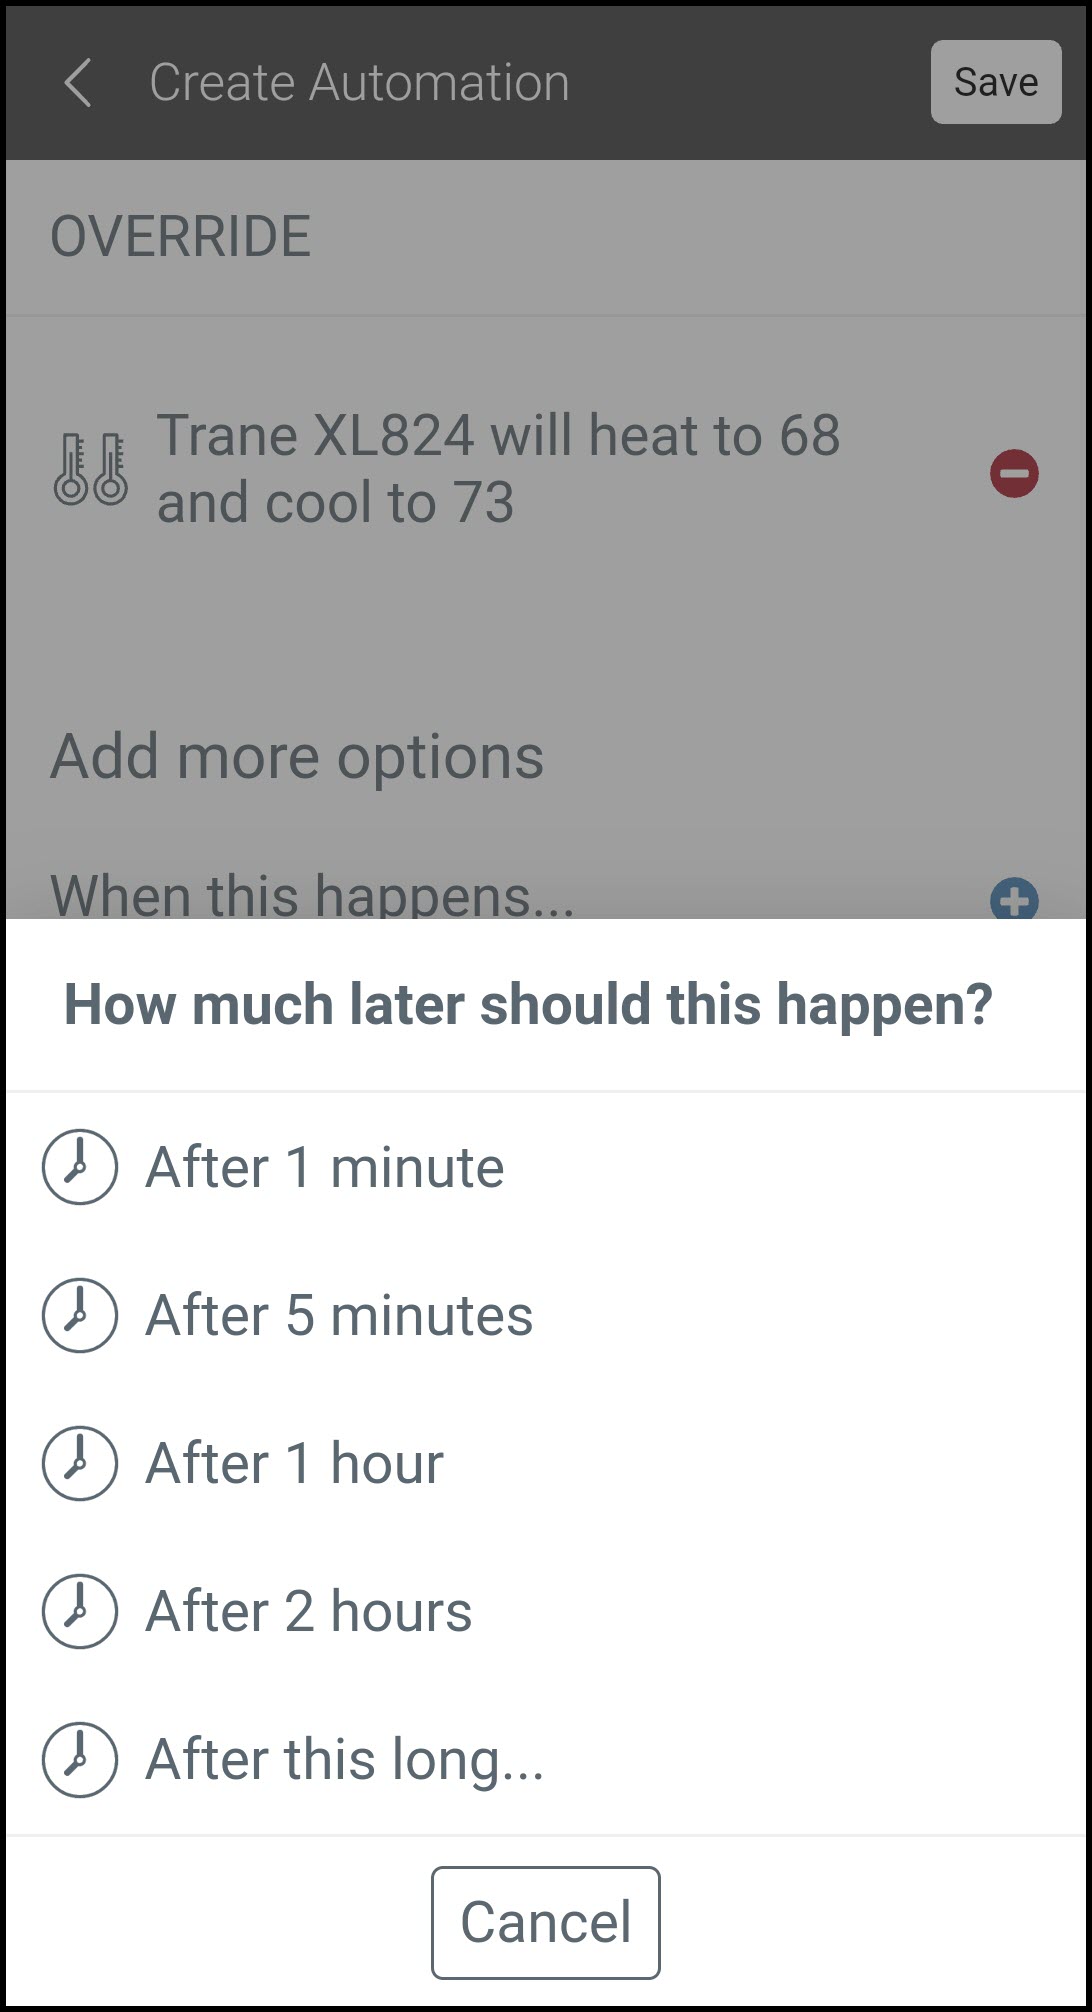
Choose how much later you want the next action to take place.
-
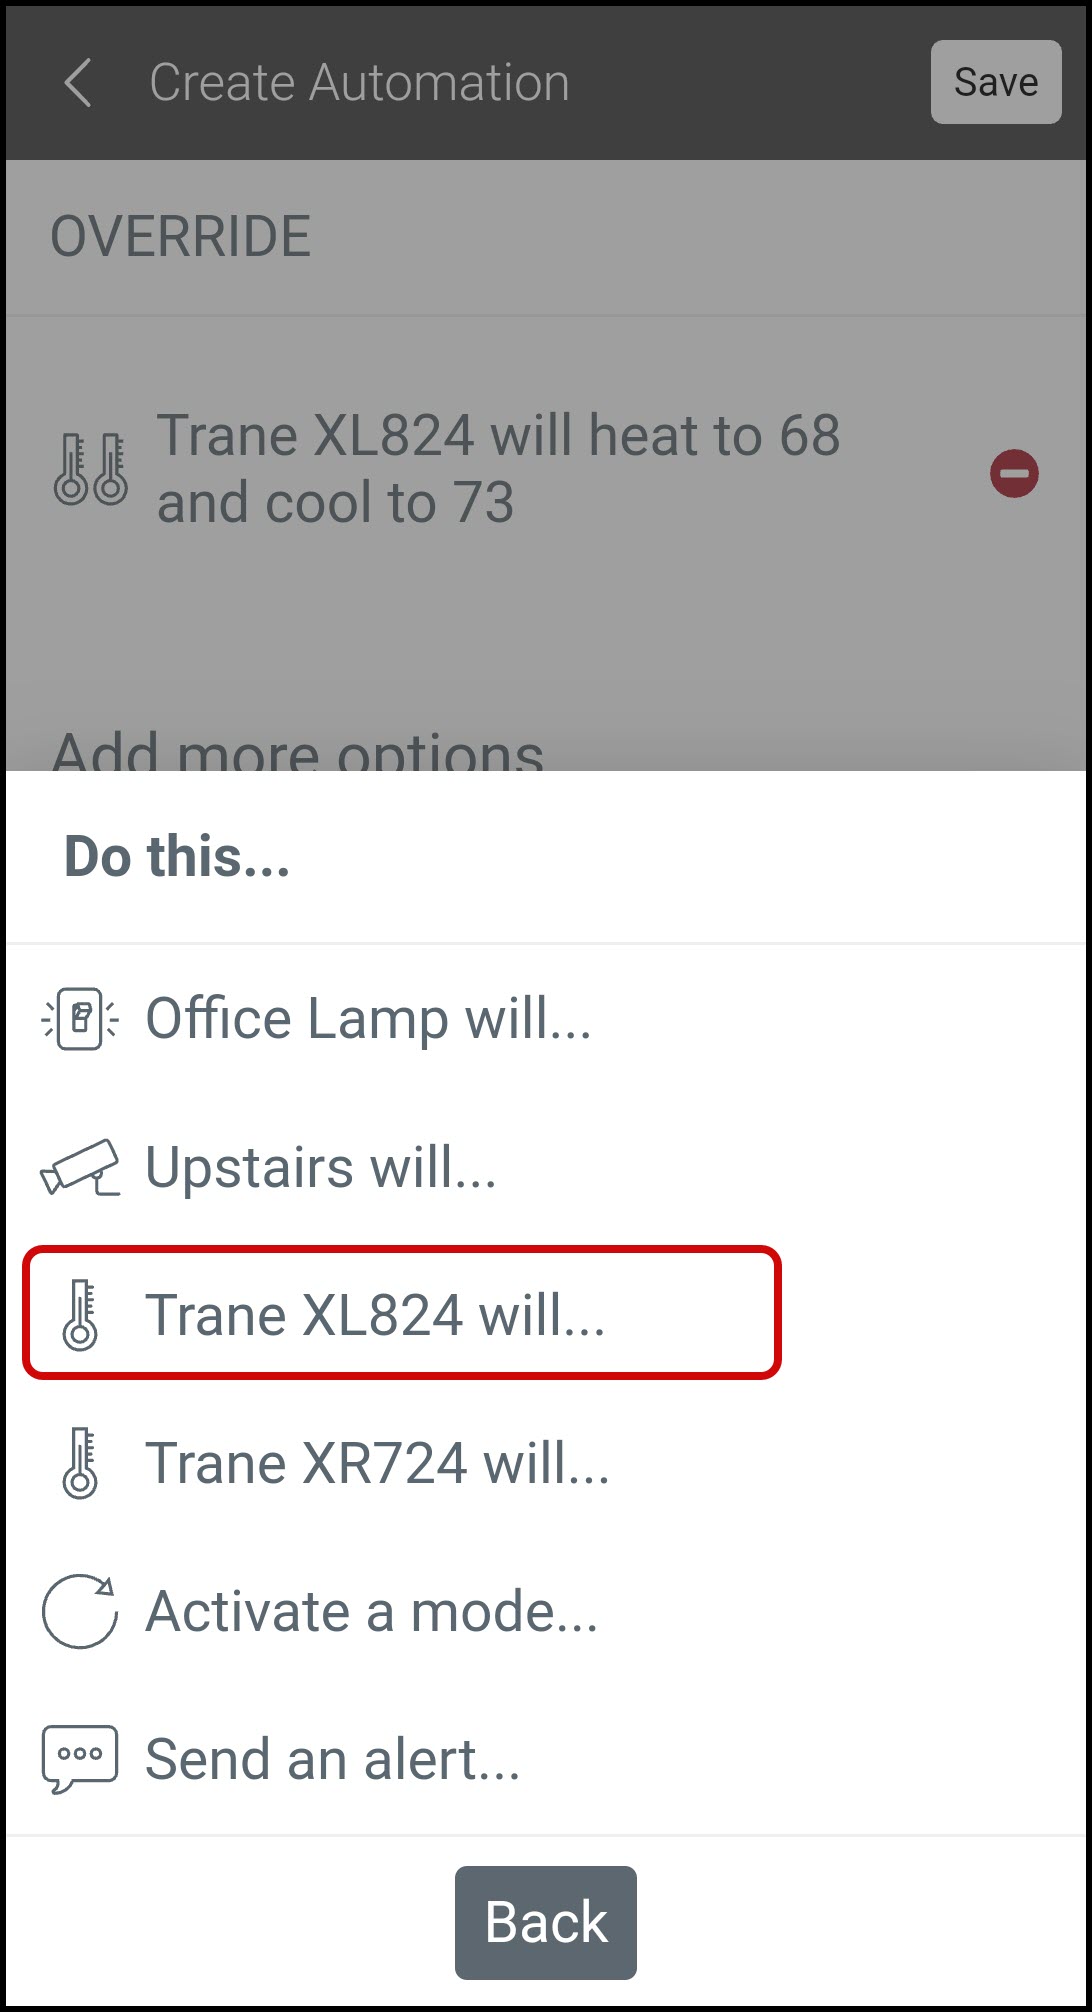
Select the same thermostat again.
-
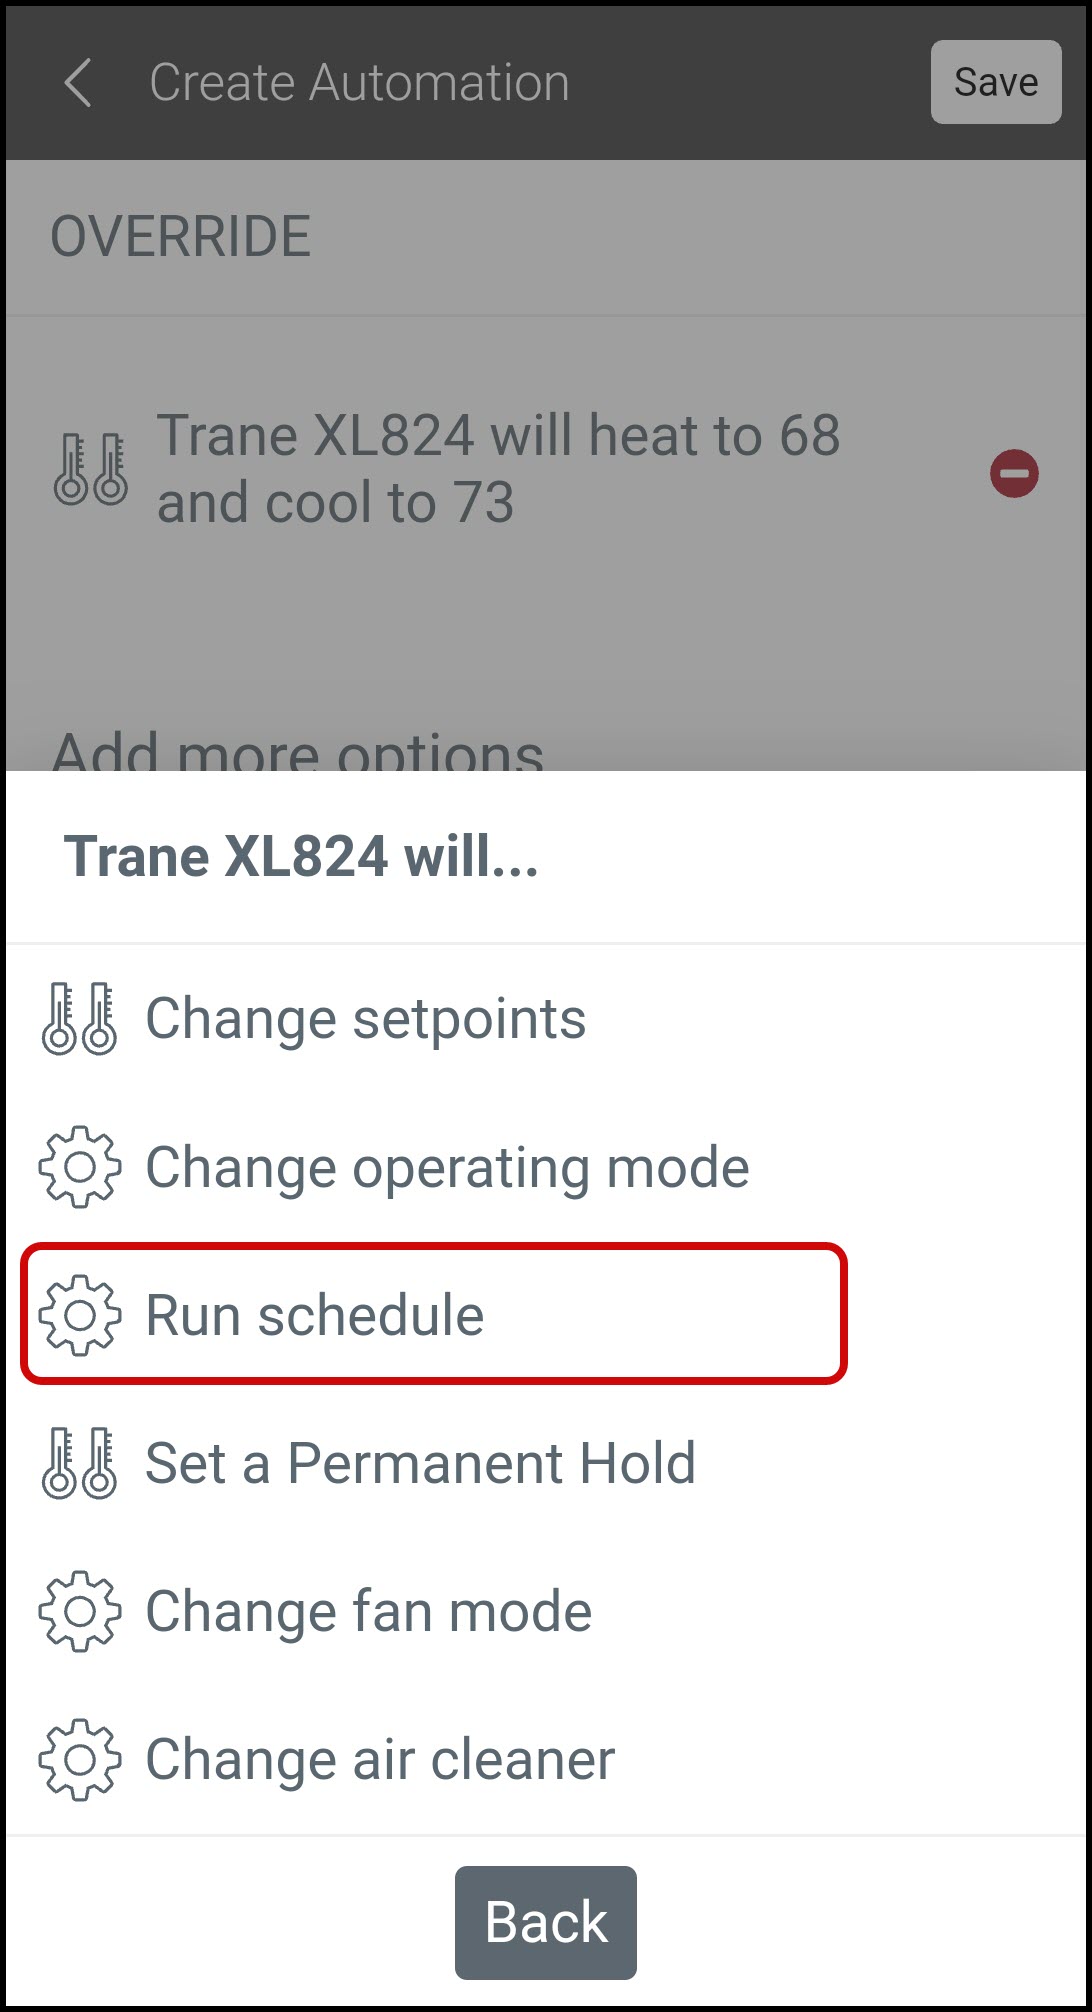
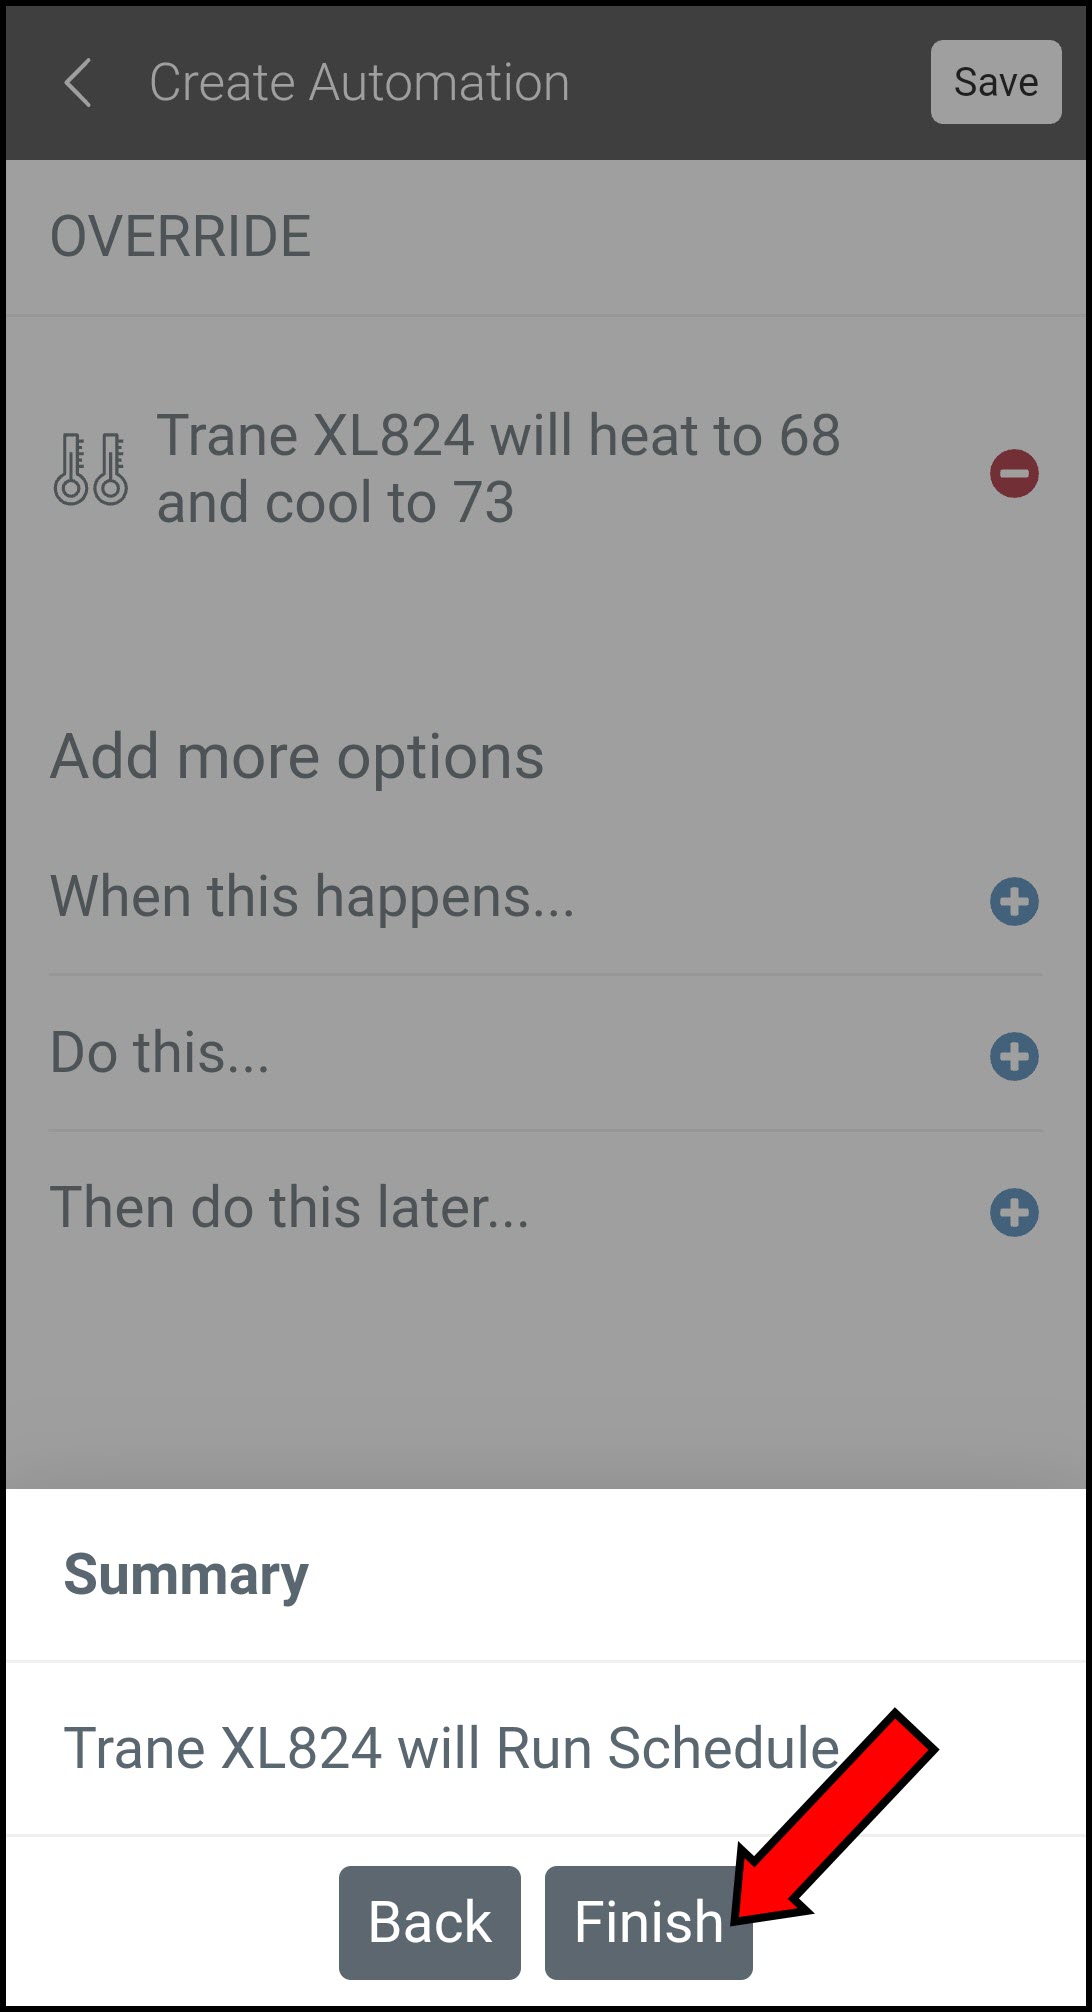
Tap Run schedule to revert to your normal schedule at that time.
-
Review the summary and select Finish.
-
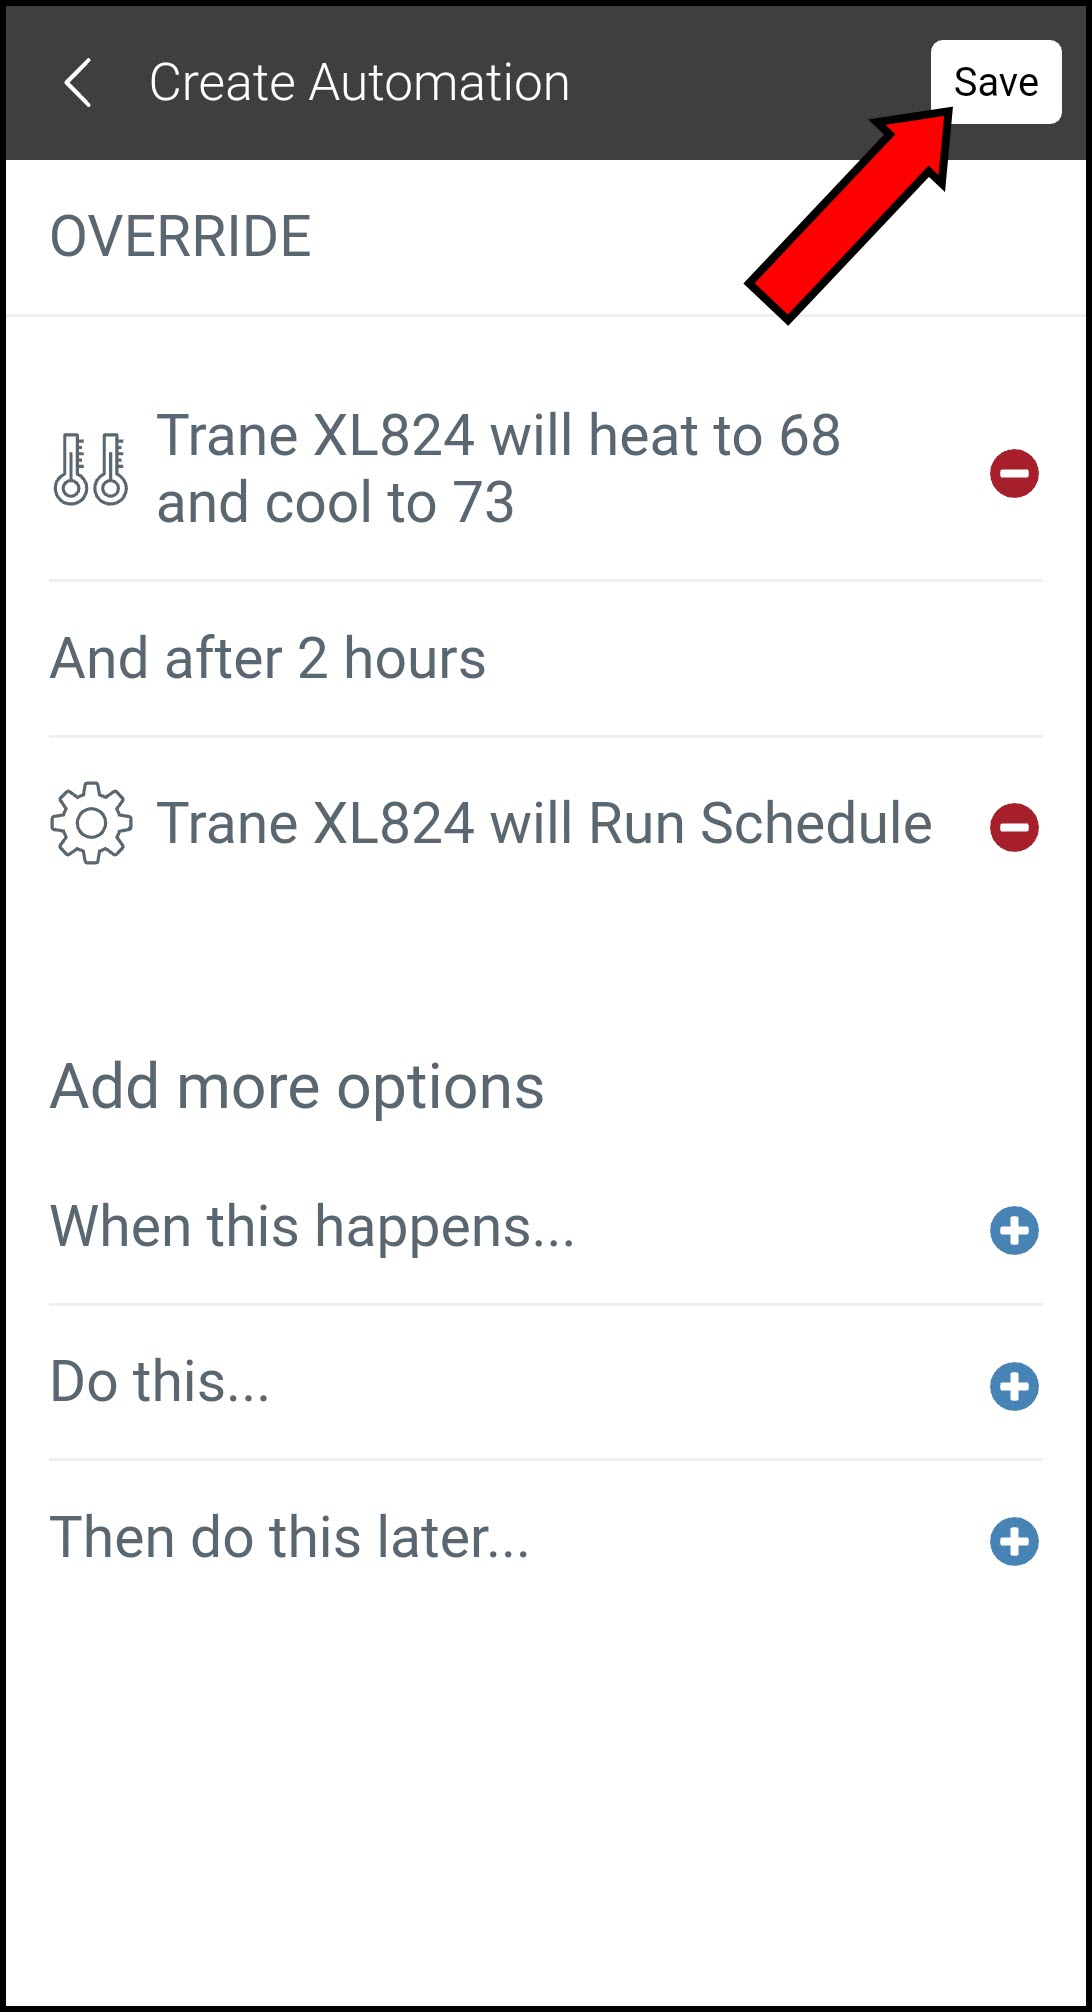
Tap Save to complete the automation.
-
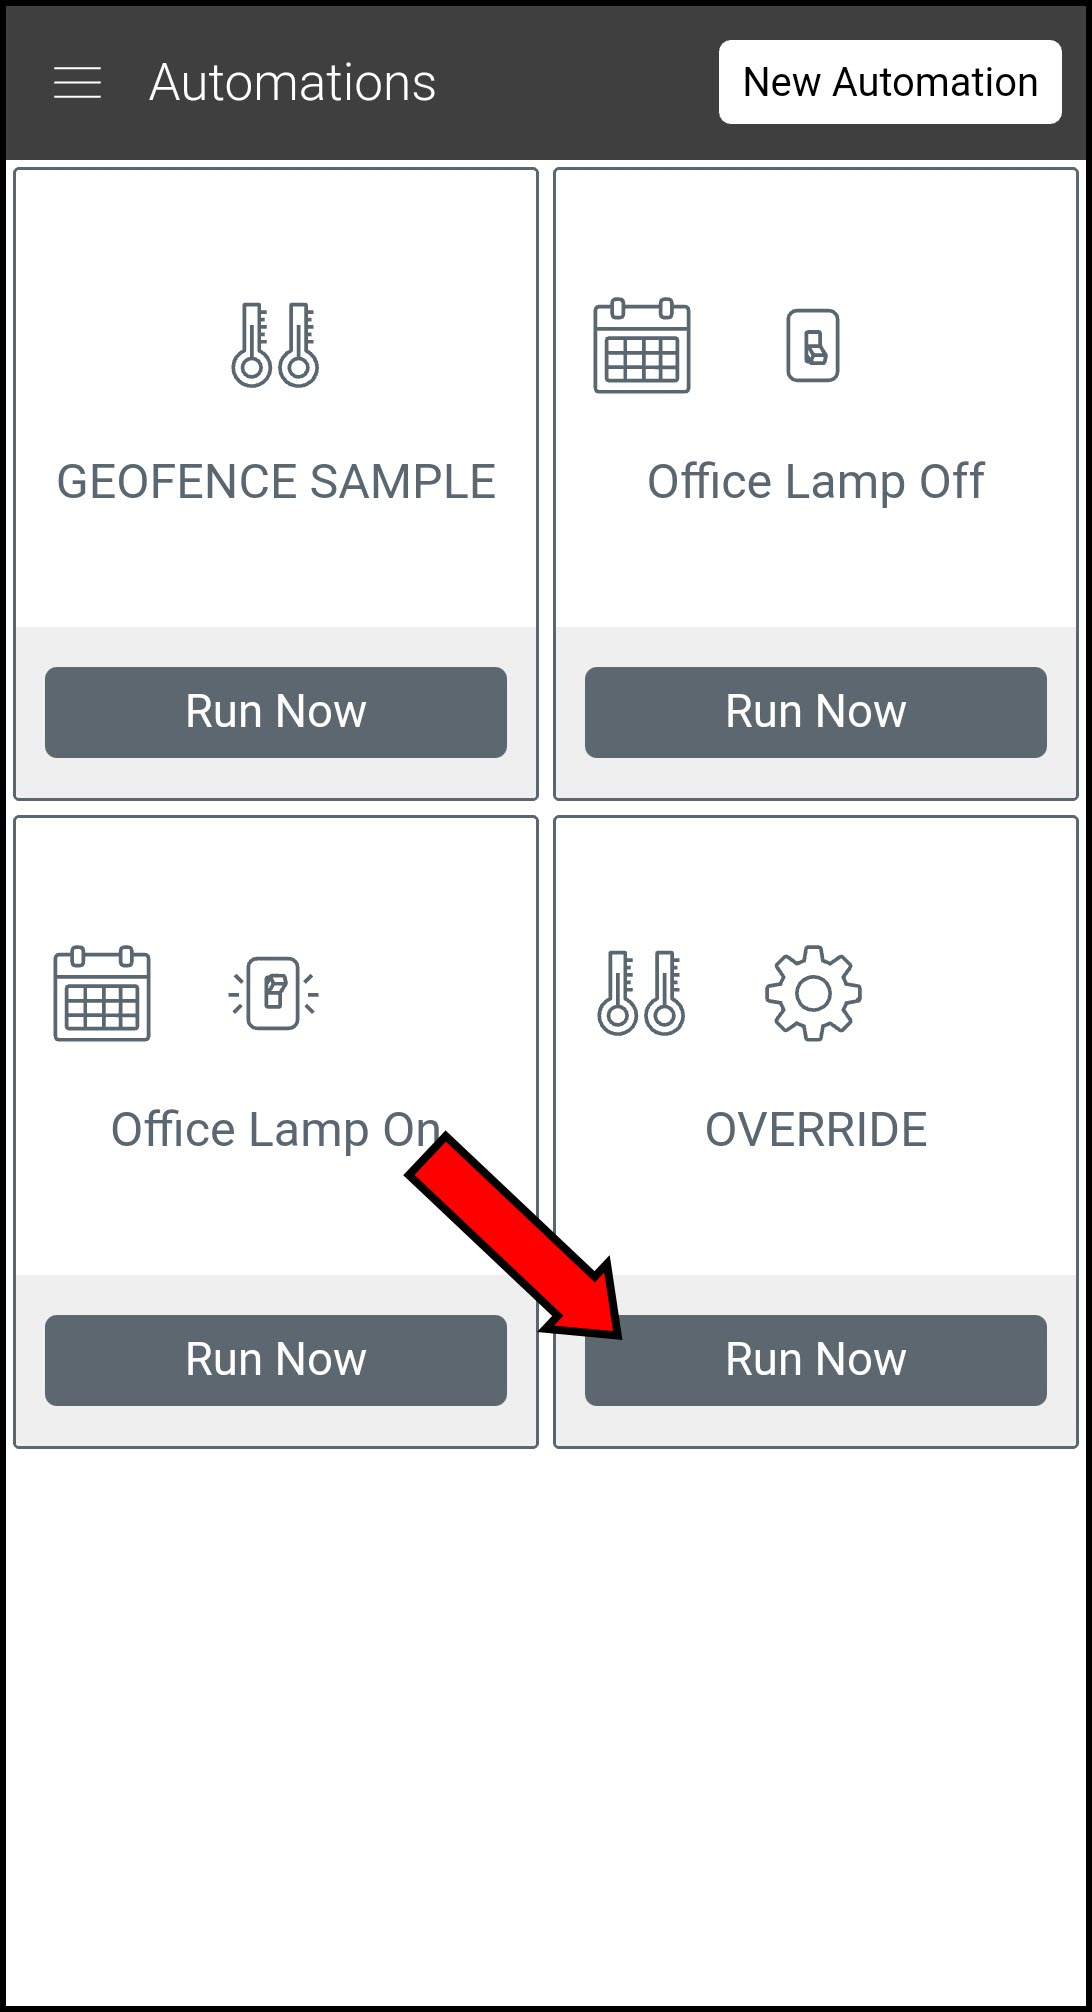
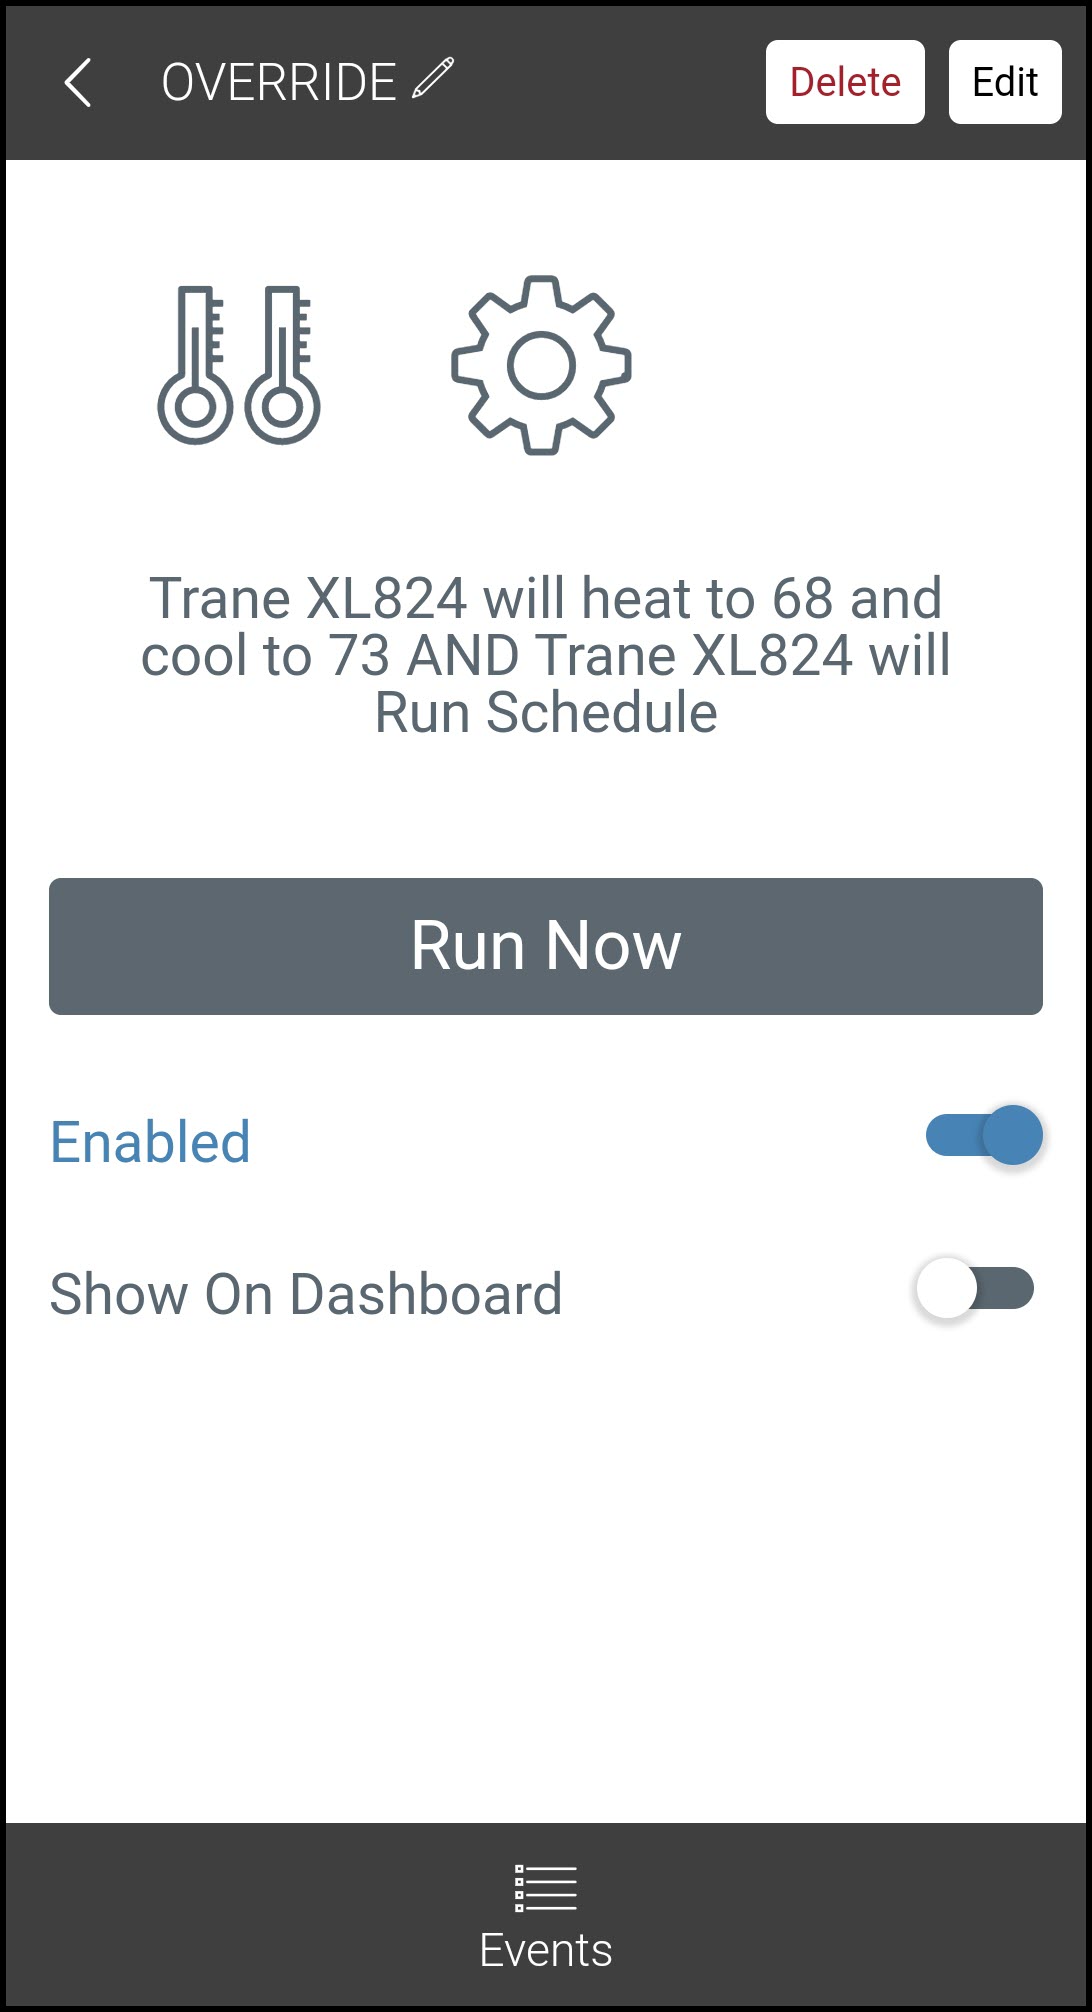
You can now go back into the Automation screen at any time and tap Run Now to override your schedule for that specific amount of time.
-
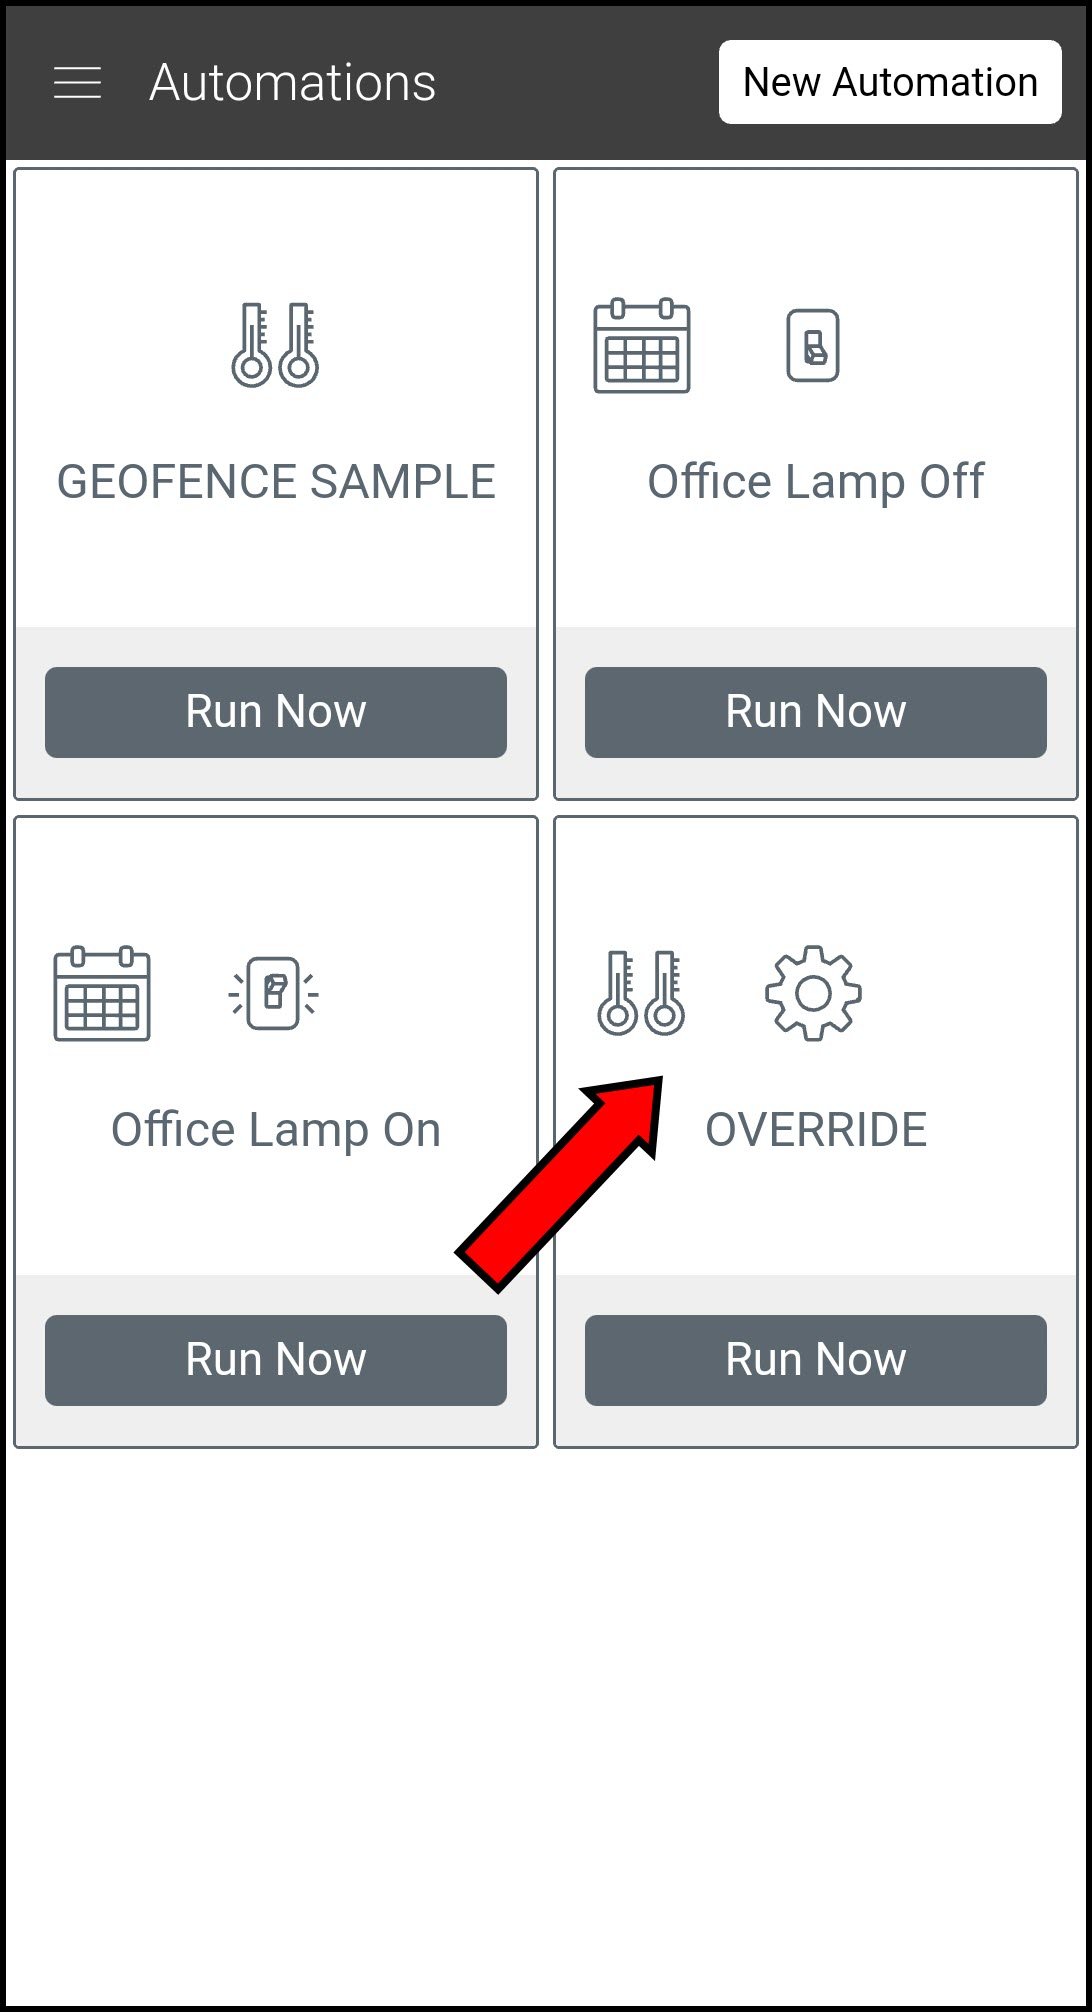
You can also tap the name of the Automation to view or edit its settings.
-
From here you can enable or disable it, set it to appear on your dashboard for ease of access, or edit the settings (setpoints, schedule, etc.).
-
From the Web Portal
-
Log into the Trane Home web portal.
-
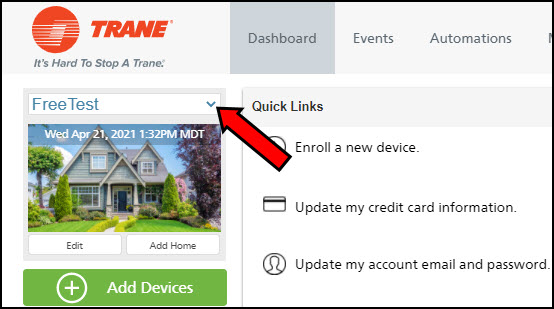
If you have multiple homes, select the home you wish to work with.
-
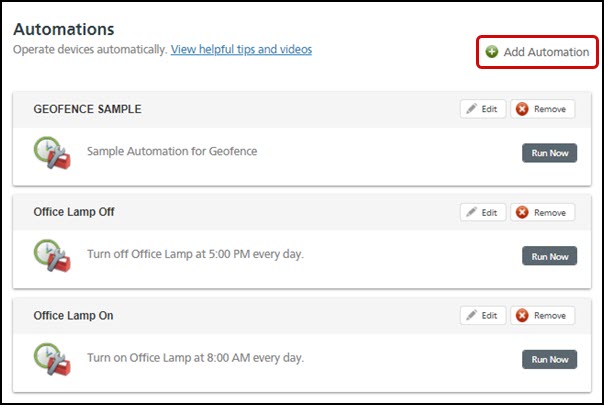
Select Automations at the top of the page.

-
Click Add Automation.
-
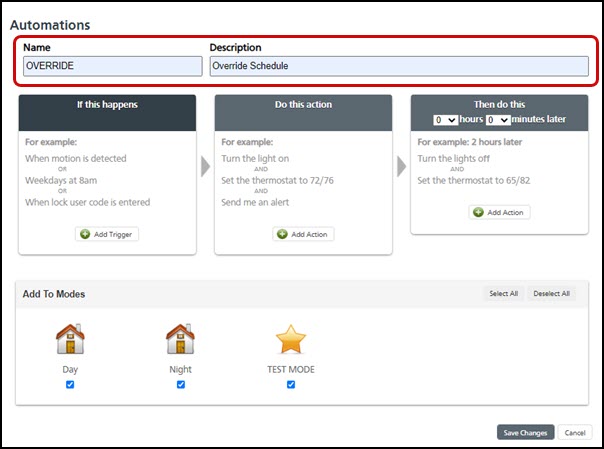
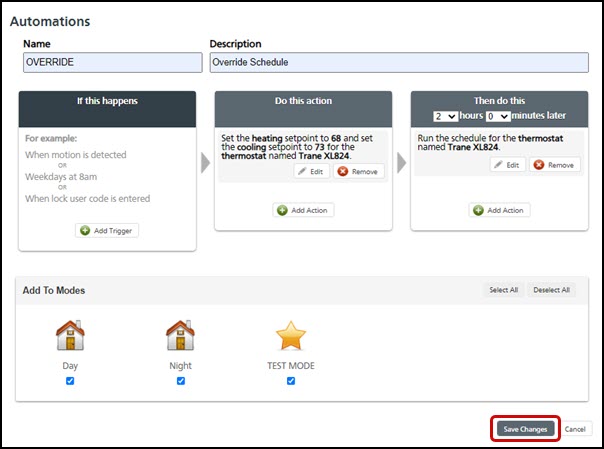
Name your automation. A description is optional.
-
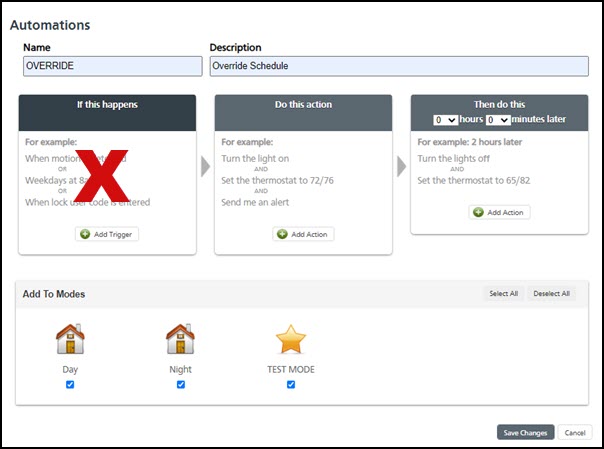
SKIP "If this happens". This step is not needed for this type of Automation.
-
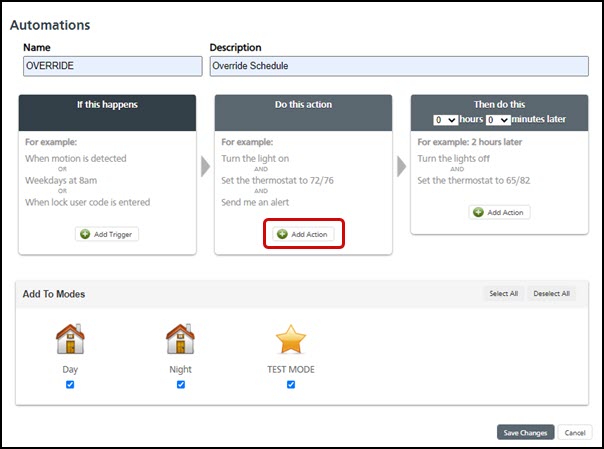
Under "Do this action", select Add Action.
-
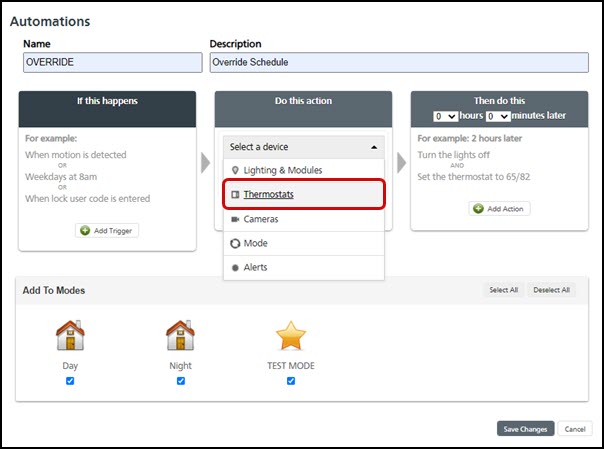
You will be prompted to select a Device. Select Thermostats.
-
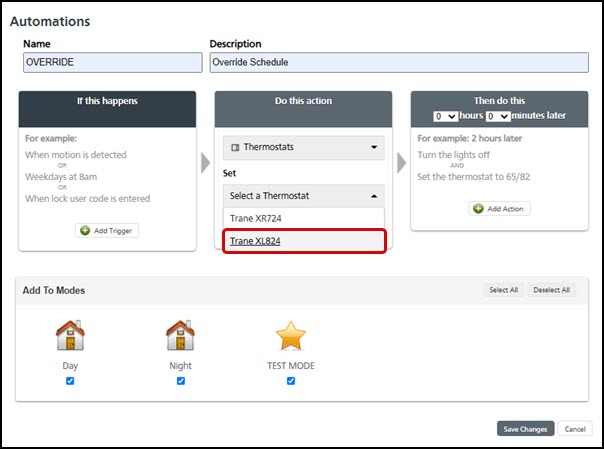
You should now see a drop-down box that says "Select a Thermostat". Click this and select the thermostat you wish to automate.
-
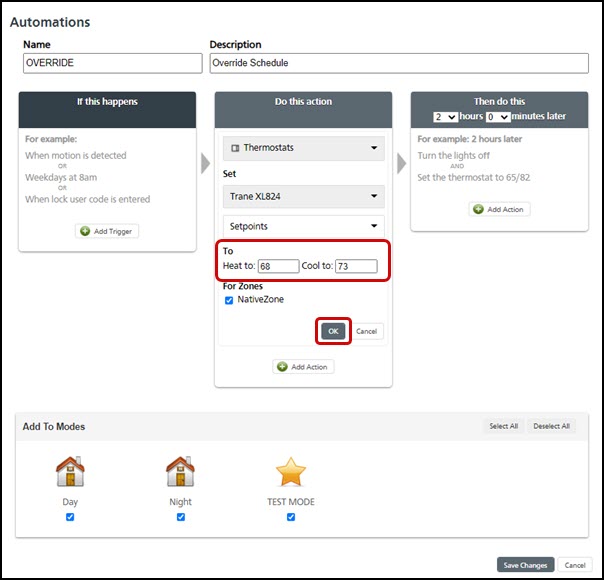
By default, you should now see a drop-down box that says "Setpoints". Do not change this. Enter your desired heating and cooling setpoints in the appropriate boxes and click OK.
-
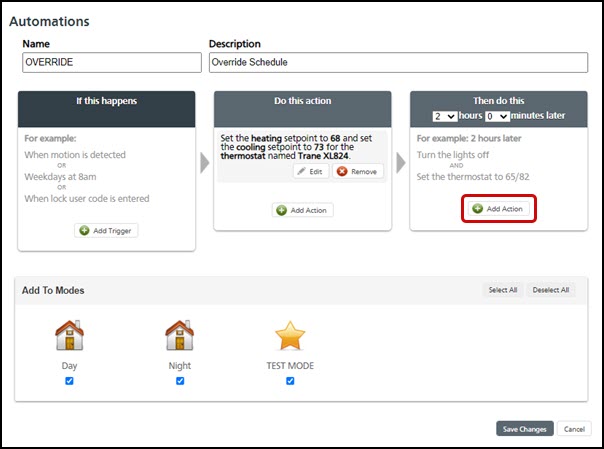
You can now add a specific duration for the automation by configuring "Then do This". Choose how much later you want the next action to take place by setting the hours and minutes in the dropdown boxes.

-
Select Add Action.
-
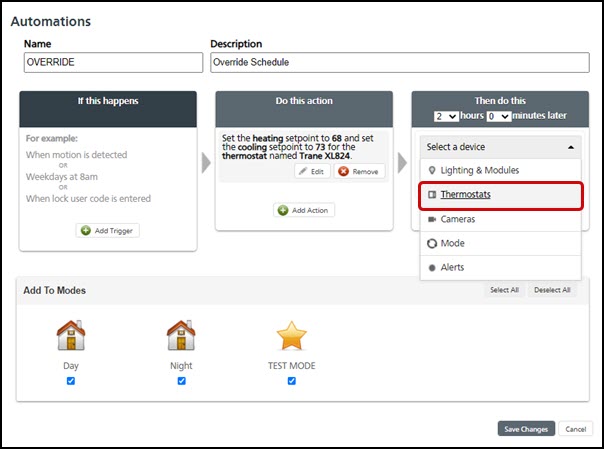
Once again, you will be prompted to select a Device. Select Thermostats.
-
Click "Select a Thermostat" and choose the same thermostat as before.

-
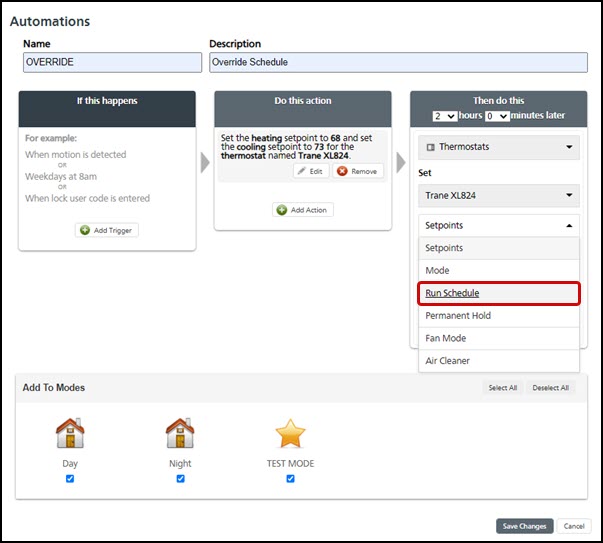
You should now see the Setpoints dropdown box again. Click it to change it and choose Run Schedule from the menu.
-
Click OK.

-
Press Save Changes to save and exit.
-
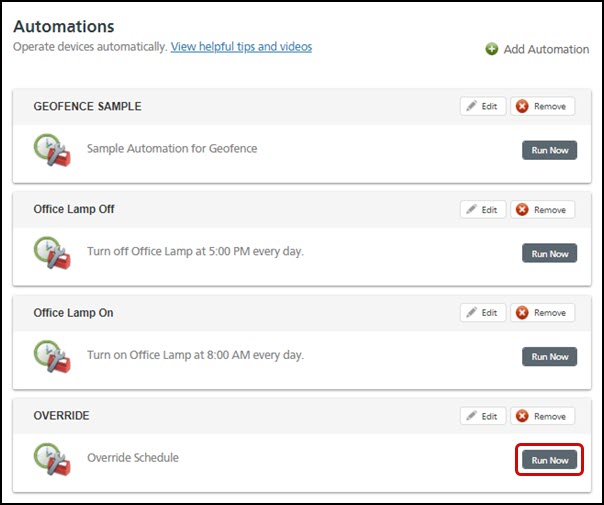
You can now return to the Automations screen at any time and tap Run Now on the new automation to temporarily override your schedule.
-
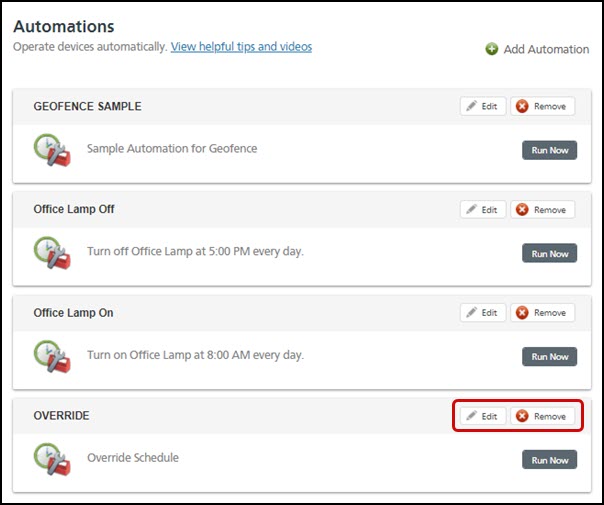
NOTE: You can also Edit or Remove automations from this page. To edit automation, click Edit and make any changes you would like. To remove an automation, click Remove and confirm that you want to remove it.
-
If you have any questions or need assistance, please contact Trane Home Customer Support via email at help@tranehome.com or call 1-877-288-7707, Monday-Friday 9 AM – 8 PM ET, and Saturday 10 AM – 5 PM ET.
Comments
0 comments
Article is closed for comments.