How to View or Change Your Trane® Home Account Settings
Using the Account section of the portal, you can manage your account settings and your subscription plan. This article deals only with Account Settings. For information on viewing and editing your subscription, please visit How to View or Change Your Trane® Home Subscription.
-
Adding a Home to Your Trane Home Account
-
Removing a Home From Your Account
-
Editing Your Account Settings
-
Canceling Your Account
Adding a Home to Your Trane Home Account
All homes on your Trane Home account can be controlled from the Trane Home web portal or mobile app.
You might want to add a home to your account if:
-
You own multiple residences, such as a primary home and a vacation home, which you want to monitor from a single account.
-
You own multiple rental properties which you'd like to manage from a single account.
-
You have installed Trane Home in a home to assist an independent senior and would like to monitor their residence.
-
NOTE: Each home must have its own subscription. Fees vary depending on the subscription plan. Any additional costs will be displayed prior to completing the setup for the new home.
To Add a Home:
-
Log into the Trane Home web portal.
-
Select Account from the grey menu at the top of the page.

-
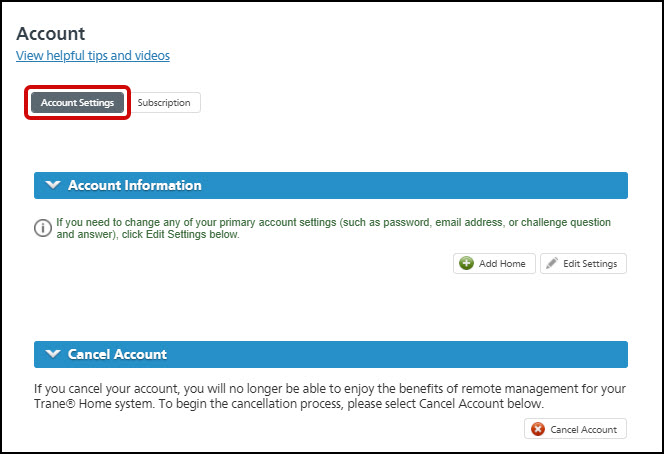
You will be directed automatically to the Account Settings section. You can also press the Account Settings button to access this section.
-
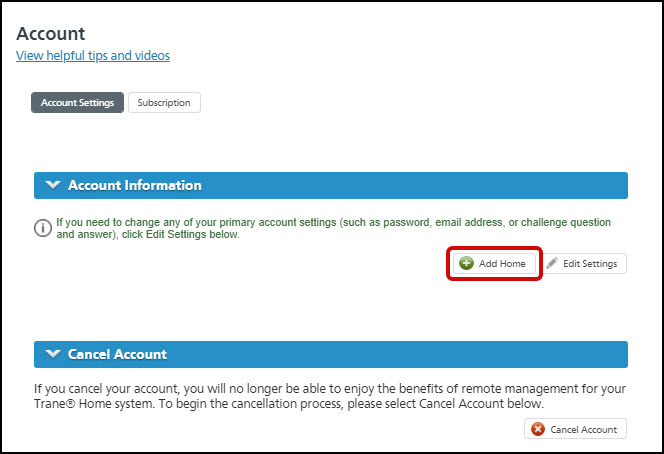
Select Add Home.
-
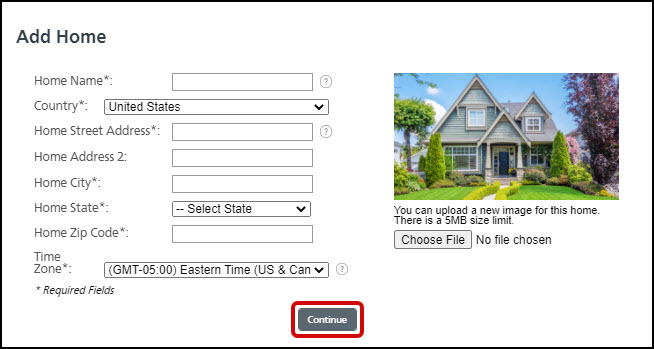
Enter the following information and press Continue to save.
-
House Name - Select a meaningful name; this name is displayed in Alerts sent from this home.
-
Address - Enter the home's physical address. Do not use a P.O. Box.
-
Zip Code - Enter the home's local zip code. This will be used for local weather information as well as for setting sunrise/sunset times properly for Modes & Automations.
-
Timezone - Select the local timezone of the house. This will be used to ensure scheduled events run properly for the local time.
-
UploadImage - (Optional) Choose an image to display on the Dashboard for this home.
-
-
The new home will be automatically selected once it is saved, and you can begin to add devices.
Removing a Home From Your Account
If you own multiple properties and need to remove a home from your account for any reason, you can do so from the web portal.
NOTE: Once removed, a home cannot be recovered. Please be sure you have selected the correct house before confirming the removal.
- Log into the Trane Home web portal.
- Select the home you wish to remove from the drop-down menu above the house picture on the left side of the page.
- Press Edit beneath the house picture.
- In the home settings screen, locate and click Remove Home.
- Confirm that you want to remove this home. The message displayed will advise you of any decrease in your monthly payment based on your subscription type; if the home is on a free subscription, this amount will be $0.
NOTE: If you have removed the wrong home, please contact Customer Support for assistance. An agent will assist you with the processes of creating a new home in the portal, disassociating your devices from the deleted home, and re-enrolling them in the newly added home. You must be on-site with the devices in order to complete these processes.
Editing Your Account Settings
You can edit numerous settings for your account including name, contact information, email address, and password.
NOTE: You cannot change your Trane Home username! If you need to change your username, please contact Customer Support for assistance.
-
Log into the Trane Home web portal.
-
Select Account from the grey menu at the top of the page.

-
You will be directed automatically to the Account Settings section. You can also press the Account Settings button to access this section.

-
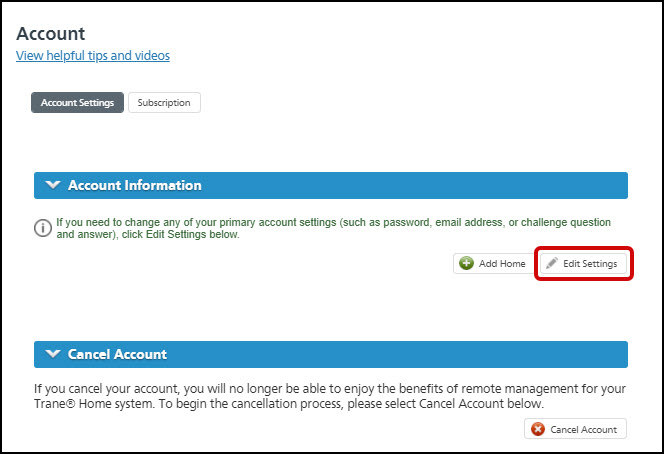
Click Edit Settings.
-
You must enter your current password to make any changes in this section!

-
You can then make changes in any or all of the sections.
-
Change Session Expiration Time - How long it takes for Trane Home to log you out of the portal when you are inactive. Select 5, 10, 30, or 60 minutes, or set it to Disabled so that your session does not timeout.

-
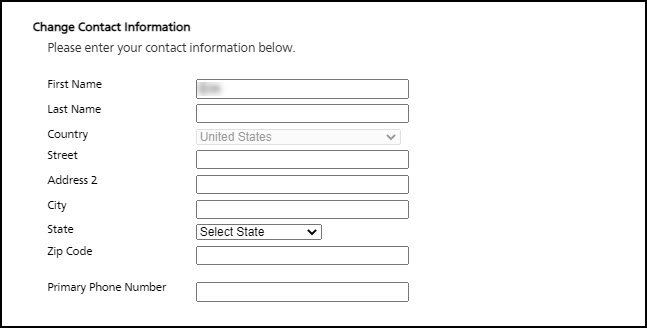
Change Contact Information - Your personal contact information as the account owner. The address could be your primary home, your mailing address, or your billing address, whichever you prefer.
-
Change Email Address - The primary email address associated with your account. This is the email address that you will need when speaking with Customer Support or submitting feedback. If you choose to change your email address, you will need to enter the new address in the first box and then confirm it in the second box.

-
Change Password - Change the password that you use to log into the Trane Home portal and mobile app. If you choose to change your password, you will need to enter the new password in the first box and confirm it in the second.

-
Change Challenge Question & Answer - This is the secret question that you will need to confirm when requesting account changes through Customer Support. Select any question from the list of options and enter your response, making sure to choose one that is easy to remember.

-
-
Once you have made all of the desired changes, press Update to save.

-
If the changes were successfully applied, you will see a confirmation message. Press OK to return to the Account page.

Canceling Your Account
In the Account section, you can also cancel your account. For instructions and information, please visit How To Cancel Your Trane® Home Account.
If you have any questions or need assistance, please contact Trane Home Customer Support via email at help@tranehome.com or call 1-877-288-7707, Monday-Friday 9 AM – 8 PM ET, and Saturday 10 AM – 5 PM ET.
Comments
0 comments
Article is closed for comments.