Automations Overview
Automations allow your devices to operate automatically based on specific conditions or times of the day. Use Automations along with Modes to unleash the full capabilities of your Trane® Home system and devices.
Common Automations
-
At sunset, each evening, turn on my night light.
-
When my child enters their User Code into a lock, turn on the entry light and send an alert.
-
When motion is detected in the family room, adjust the thermostat to a comfortable temperature.
-
When motion is detected in my office, send an alert and record video.
-
When a window is opened, turn off my HVAC system. (Zwave thermostats only)
-
When my vacation home detects motion, change the HVAC schedule from Energy Save to Run Occupied Schedule (Zwave Thermostats only)
Automations in the Web Portal
Every automation begins with an event that starts the action, also known as a trigger. Some examples of triggers include a specific user code being entered on a lock, a camera detecting motion, or the time of day, among many others. Once you have chosen your trigger, you can choose what actions will happen afterward.
-
Log into the Trane Home web portal.
-
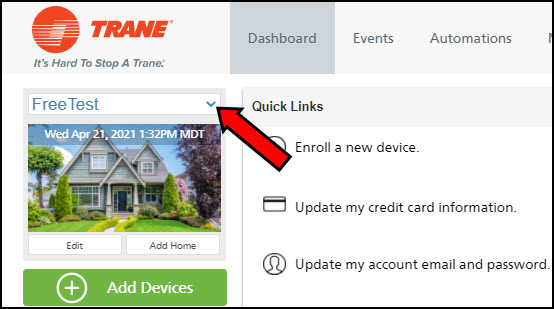
If you have multiple homes, select the home you wish to automate.
-
Select Automations from the grey banner at the top of the screen.

-
Click the green plus sign next to Add Automation.

-
Enter a name for your automation and, if desired, a description.

-
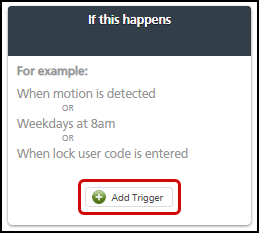
In the green section titled If This Happens, click the green plus sign next to Add Trigger.
-
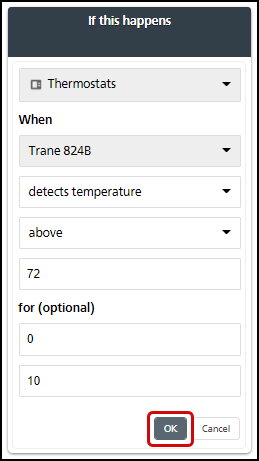
Using the dropdown menus that appear, select the device type (thermostat, camera, sensor, etc.) you wish to use, the specific device, and the conditions it must meet. Click OK to confirm. In the example below, the user has opted to use their thermostat's indoor temperature reading as a trigger, so the automation will begin if the indoor temperature rises above 72° for 10 minutes.
-
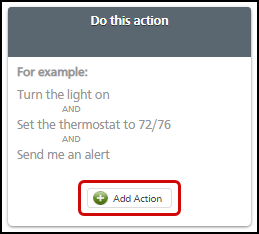
In the center column titled Do This Action, click the green plus sign next to Add Action.
-
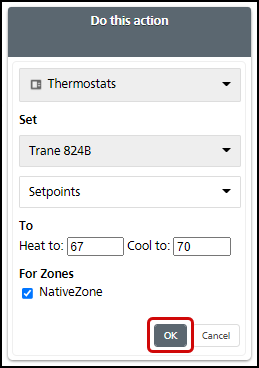
Using the dropdown menus that appear, select the device type (thermostat, camera, sensor, etc.) you wish to use, the specific device, and the action it should take. Click OK to confirm. In the example below, the user has opted to change the thermostat's setpoints to 67° for heating and 70° for cooling when the automation is triggered.
-
- If you want to automate the system to perform another action afterward, based on the same trigger, proceed to Step 11.
- If not, proceed to Step 14.
-
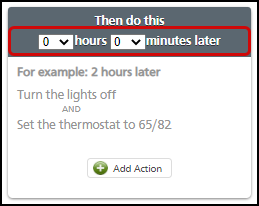
In the third column titled Then Do This, select how much later you want the next action to occur. You can set this anywhere from 0 minutes to 23 hours and 55 minutes. If you set both to 0, the next action will occur immediately after the automation is triggered.
-
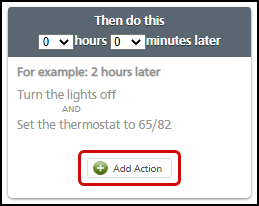
Click the green plus sign next to Add Action.
-
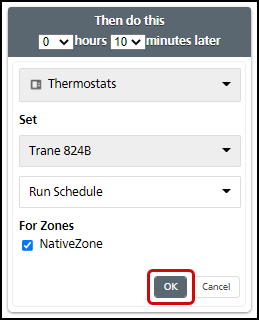
Use the dropdown menus to choose the device type, device (if required), and action it should take. In the example below, the user has chosen to have the thermostat return to its normal schedule after 10 minutes.
- Assign the automation to one or more modes using the checkboxes beneath the mode icons and click Save Changes.
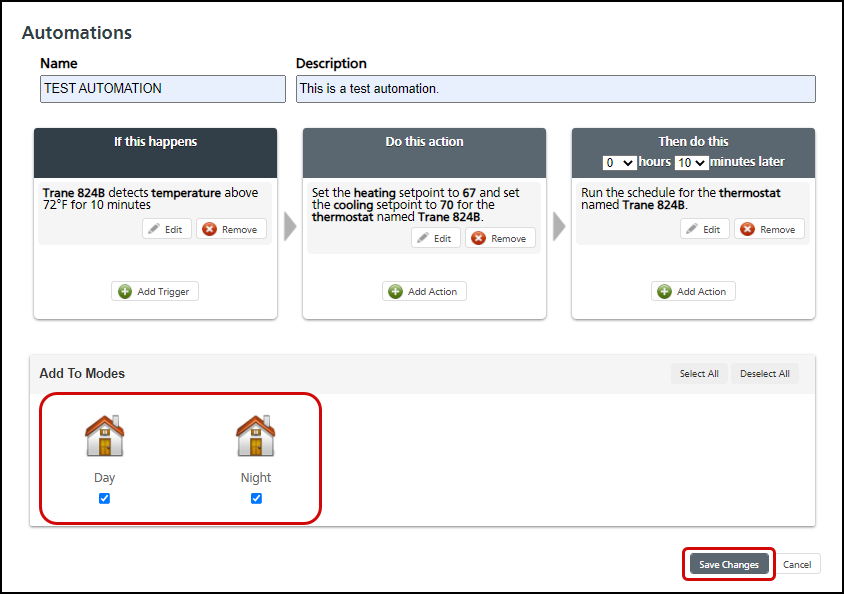
NOTE: Your Automation will now be active whenever its assigned Mode is active. If you have elected to have the Automation active on all modes, it will be active at all times.
If you have any questions or need assistance, please contact Trane Home Customer Support via email at help@tranehome.com or call 1-877-288-7707, Monday-Friday 9 AM – 8 PM ET, and Saturday 10 AM – 5 PM ET.
Comments
0 comments
Article is closed for comments.